garden at home

Week Five - Successful Summer Harvests and Winter Crop Planning

We are at week five of our Garden Q&A series with the Vancouver Master Gardeners, with only one more week to go! We have really enjoyed receiving your questions, and learning together about growing food. The world of growing food has no finish line, and there is always something new to learn. This week we have a question answered by Master Gardener student Sally, and then Bev and Jennifer are talking about guidelines for choosing what to plant for winter gardens, and how to maintain them.

118349385_10220732681159351_5753473499598005740_o.jpg

Question from Diane in Lake Country:
Why are my cucumbers doing the curl this year?

Answer from Sally:
Cucumber fruit curl, properly known as crooking, is a common condition of cucumbers. 

There are many causes, requiring you to do a little detective work to correct the situation.  

 Pollination Problems: Even when there are plenty of pollinators in your garden, conditions might not be right to ensure complete pollination. Pollen requires semi-humid, warm conditions to be at its best, and when it’s too dry or prolonged rains occur during flowering, cucumber ovaries may not be fully pollinated. Cucumber flowers are pollinated by insects (mostly bees) that must visit each flower multiple times for complete pollination to produce a normal fruit. Inadequate pollination happens when there are too few bees, or when weather conditions are too wet, dry, hot, cool or cloudy. If only part of a flower's ovaries are fully pollinated, the enlarging ovary, which is the little cucumber fruit, becomes lop-sided. One side lengthens, while the other side stays shorter, causing curved fruit. You can hand pollinate cucumbers to achieve better pollination results, but if the weather is against you, fruits may still curl. We can't control adverse weather, but we can encourage bees to visit our yards by planting alyssum, calendula, dill, monarda, parsley, echinacea and many more types of herbs and flowers. Our cool, damp weather this year is likely the culprit, as bees don't fly in the rain.  

Diane, since you’ve indicated that you’re familiar with growing cucumbers successfully, the following issues are unlikely to be the source of this year’s problem. But here are some further thoughts. 

Incorrect Growing Conditions: Cucumbers need very specific cultural conditions when their fruits are developing or those fruits may become deformed. Evenly moist soil at temperatures above 60 F. (16 C.) are ideal for straight fruits. Try adding up to 4 inches (10 cm.) of organic mulch if your earliest fruits are crooked and water your plants any time the top inch (2.5 cm.) of soil below the mulch feels dry. Because fluctuating moisture can also adversely affect fruit formation, try mulching cucumbers to keep soil uniformly moist. Wait to apply straw, dried grass or compost until soil has warmed in late June. Mulching too early keeps soil cool, which is the opposite of warm-season crop requirements. 

Poor Nutrition: Cucumbers are heavy feeders and require a significant amount of nutrition to fruit properly. Prior to planting, each cucumber plant should be provided with a balanced, (preferably organic) fertilizer, then side dressed with the same product every two to three weeks once the vines start to run. 

Physical Interference: If you discover newly-forming cucumbers not straight when they’re sprawling on the ground, try training them up a trellis or fence. As the ovaries of cucumber flowers are elongating, young fruits can easily deform when they catch on flower petals, vines, or leaves. Growing them on a trellis gives fruits more space to spread, away from physical barriers.  

 Resources 

Digging in with the Kids - Growing Chefs Integration Idea:

Planning to increase your pollinator plants is a great first step to having more fruitful gardens. There is great value in being able to chat about the importance of pollinators with kids - and this often really fires them up to ensure that they are doing their part to make a difference, and support our pollinators. Next time you are out for a walk, have kids note what plants seem to be the crowd favourite for the pollinators, and consider bringing these into your garden. Perhaps they want to keep a journal and track their pollinator sightings out and about. There are many more pollinators than just bees, so get to know your local pollinators - and keep an eye out for them when you are outdoors. The bright colours of flowers attract pollinators, so plan for adding some colour in your garden - you can’t go wrong!

BONUS! Master Gardener Students Bev and Jennifer talk to us about what can be planted now for winter gardens, and how to maintain these plants throughout the season.

From Bev 

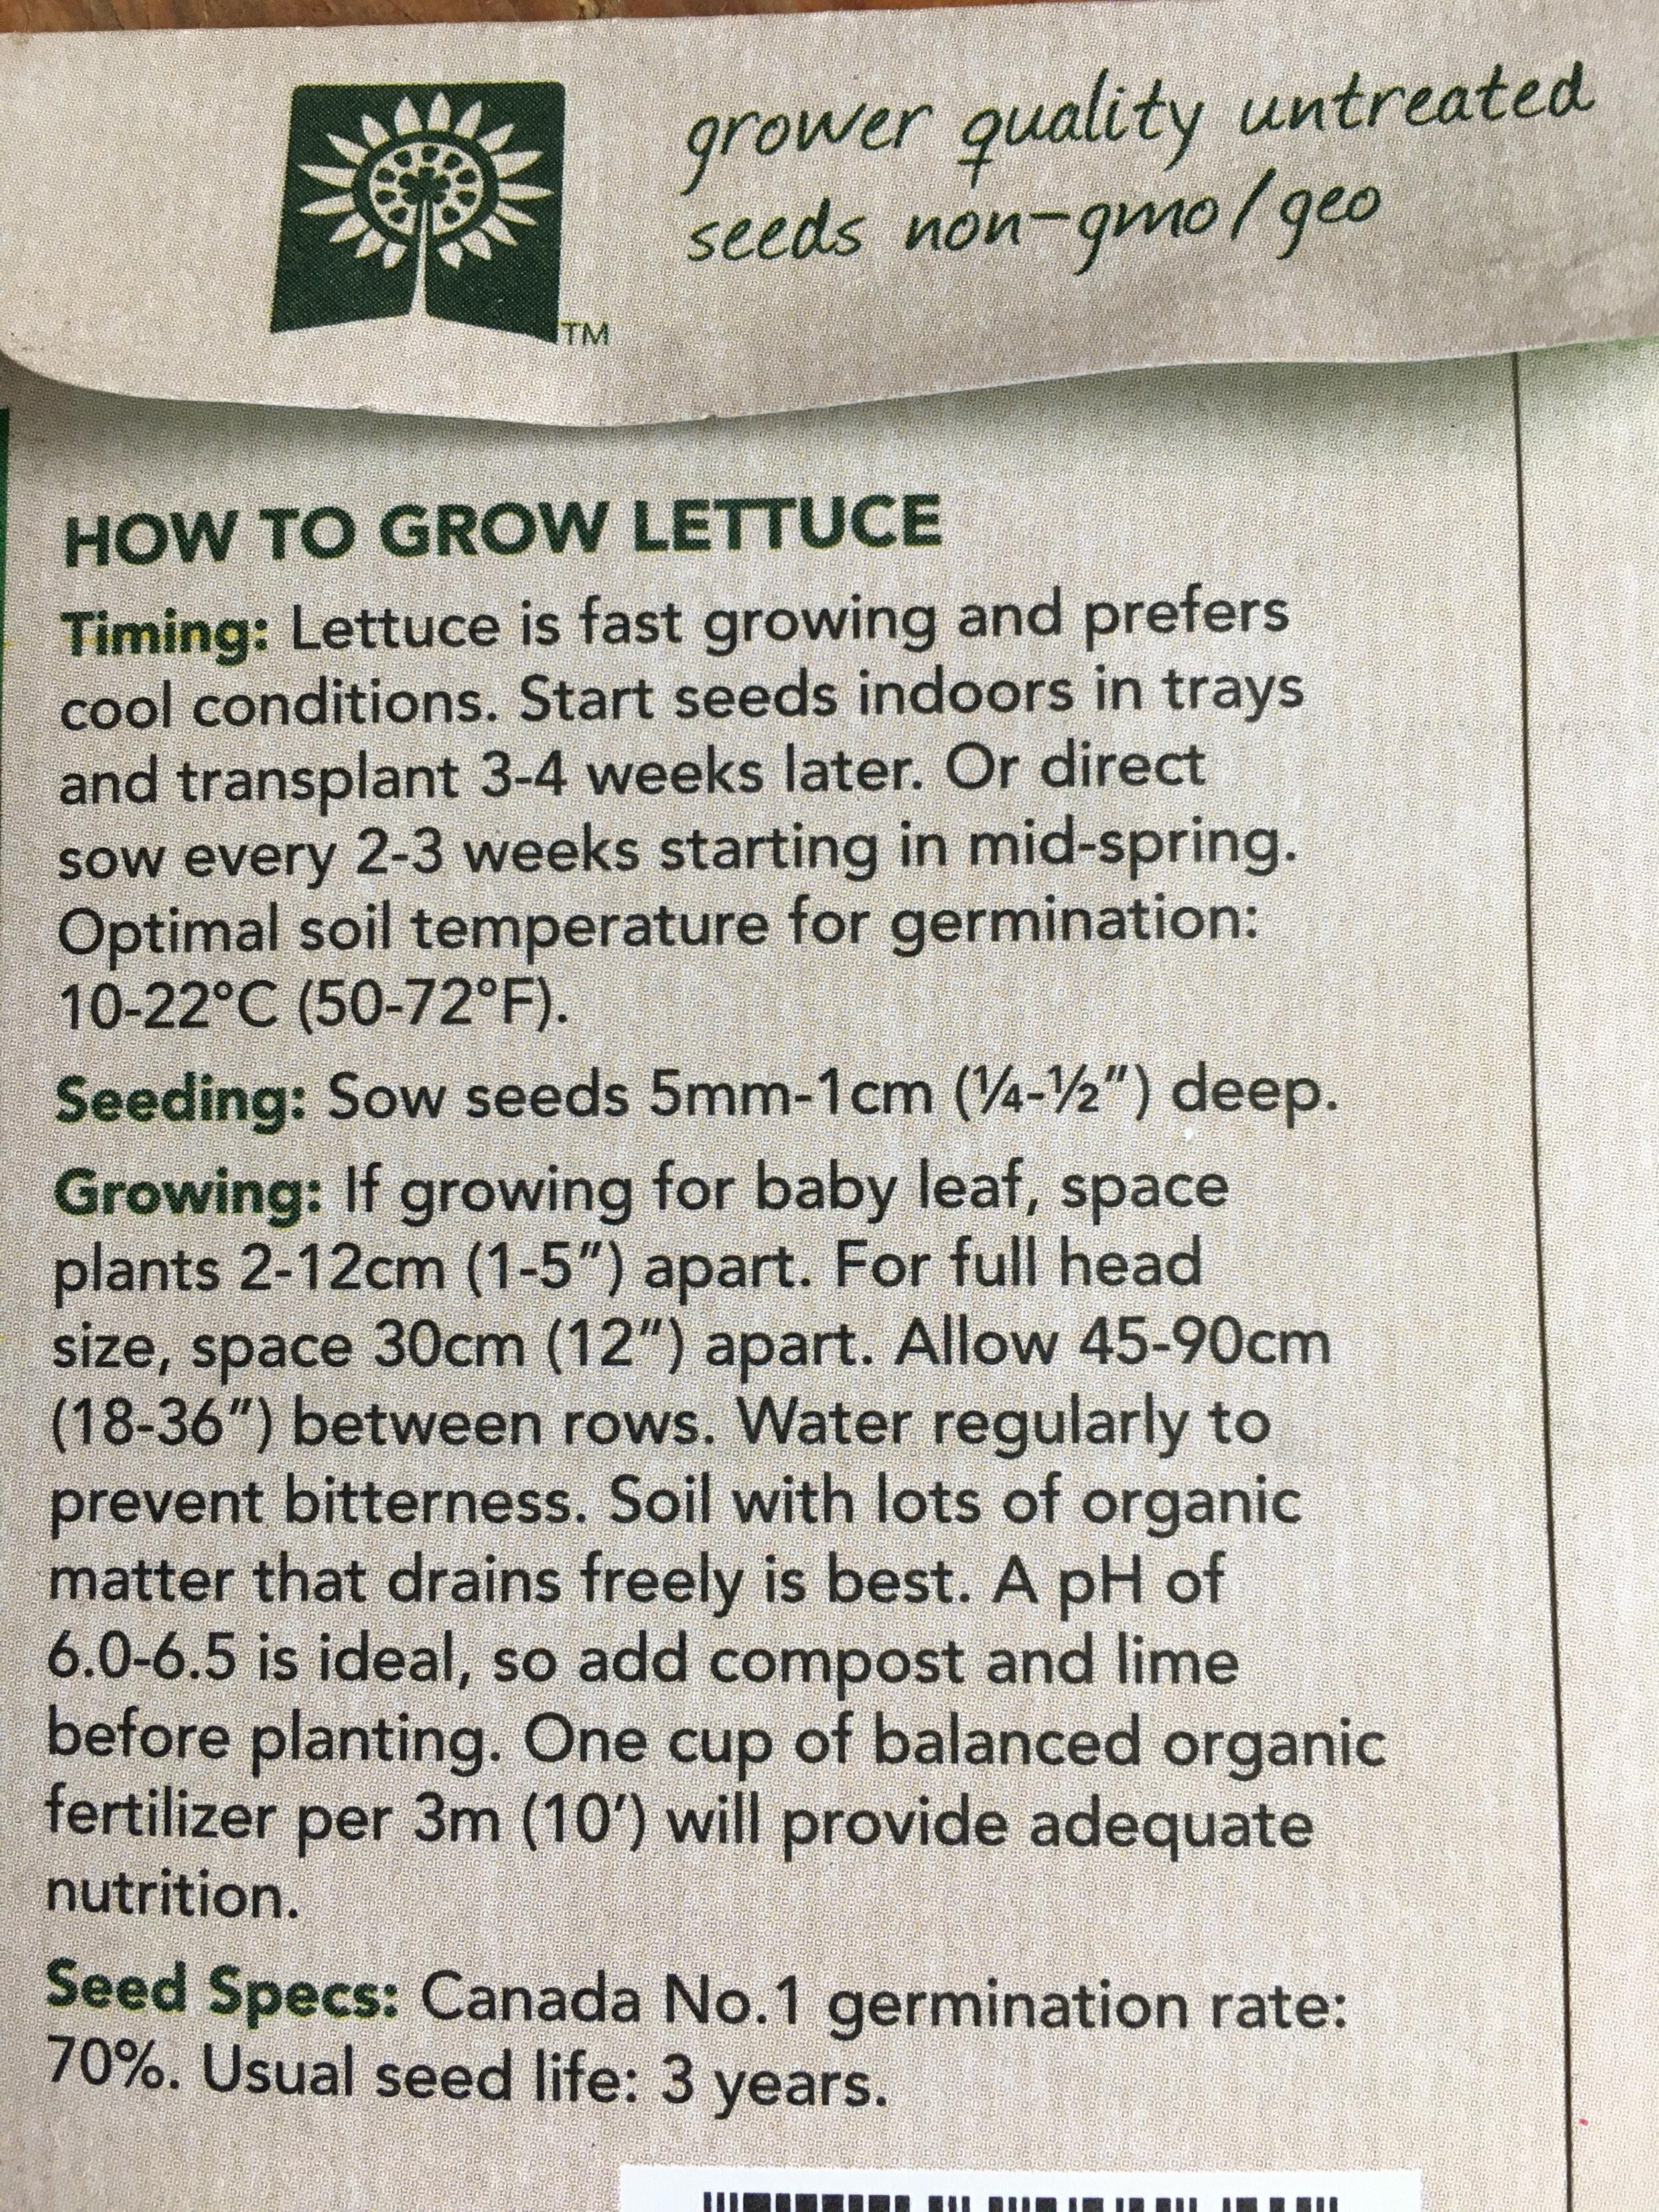
Warm days and cool nights… September is definitely one of my favourite times of year. While a final harvest of summer vegetables is on the minds of gardeners, there is still time to do a little planting to continue to enjoy your garden into the winter. Lettuce and corn salad (sometimes called Mache´) are two options that can be sown in September. 

 Lettuces such as Winter Density, Cimmaron, and Rouge d’Hiver are recommended by Linda Gilkson. She says that if you have some type of temporary covering, like row covering, for particularly bad winter weather, you can extend your harvest. Corn salad is something that I have not tried, but according to many seasoned gardeners, it is one of the easiest greens to grow and will tolerate extreme weather. It prefers cool, moist soil for sprouting, and seeds start to germinate in 7-21 days. When it comes time to harvest it, slice the rosette of leaves off just above the soil line, with a sharp knife as the plant will continue to grow back. This is a veggie I’m going to try this year! 

71PU6Ar6ZPL._AC_SX466_.jpg
MS478-42_480x480.jpg

A few tips on growing winter vegetables: 

  • Winter vegetables require mulch, mulch, mulch to keep them insulated from the cold and from freezing. You want to do everything you can to keep the soil as warm and protected from heavy rain erosion as possible. Collecting leaves in the Fall is a great and inexpensive way to create your own mulch. If you’re growing lettuces in the Fall though, work thin layers of mulch around where you’ve planted as you don’t want to prevent the seeds from benefiting from the last days of summer sunshine. Mulching also attracts beneficial insects such as ground beetles to your garden. 

  • Don’t harvest lettuces when they are frozen unless you are throwing them into a soup, because they will be mushy. Wait until the crop thaws. For example, you might go out first thing in the morning and everything is frozen, but if you wait until later in the afternoon that may be a better time. 

  • Raised beds are generally beneficial for winter crops because the soil stays warmer and drains more efficiently.  

  • If you garden in containers, make sure they are frost proof and move them closer to ta wall and/or under a shelter. Linda Gilkson suggests: 

…you can grow containers together and insulate between the pots with leaves, plastic, straw or other materials. Wrapping a band of burlap or plastic around the outside of the whole group off containers gives the roots even more protection from freezing. (p. 182 Backyard Bounty) 

From Jennifer

We are fortunate to live in Vancouver where climates are mild enough to grow some vegetables all year round. Cold crops such as Kale & Collards and Arugula are good choices for fall planting as they both do better in cooler temperatures and Kale can even benefit from a light frost. 

However, you do need to take a little more care when growing vegetables over the winter. Here are some things you should consider:

  1. Choose a winter variety. For kale consider Winter red, Winterbor, or Siberian. Arugula - try Wild arugula, Dragon's Tongue, or Astro. 

  2. Timing - For kale, you need to get your transplants planted 8 weeks before the first frost (approx November 1) so I would use seedlings. If you start from seed, you will need an additional 4 weeks to get them to germinate to the seedling stage, so you should sow seeds or start indoors in early August. Arugula can be sowed now or 8 weeks before the first frost. In a cold frame, you can sow 4 weeks before the first frost. Remember to shade (eg umbrella) young seedlings from the really hot sun until they mature. 
    Pre-sprouting seeds help to accelerate the germination stage. Simply soak the seeds in water for 4 hours before planting or place seeds between layers of damp paper towel placed in a plastic bag in a warm place until they sprout. 

  3. Select a sunny location (eg southern facing). 

  4. Make sure the soil is well-draining. Amend the soil if needed with compost & always mulch with dried leaves or straw to insulate. 

  5. Do not fertilize in Fall as extra nitrogen will encourage a flush of tender new growth which will not likely survive winter temperatures. 

  6. Be prepared for below-freezing temperatures by creating a cold frame or having a cover (eg plastic, burlap, cloche)  available to protect crops during heavy rain or freezing temperatures. Remember to remove these covers when it is sunny. 

Enjoy your greens this winter. They will grow more slowly and will be smaller in size but they should be more tender and tasty.  Arugula may have a milder flavour and be less peppery. 

Please pick up a free copy of "Planting for great fall and winter harvests" by West Coast Seeds at your local nursery for complete details on growing and harvesting all winter vegetables. You can also download it here

Good luck with your year-round vegetable gardening!

Week Four - Successful Summer Harvests and Winter Crop Planning

We are halfway through our Gardening Q&A series with the Vancouver Master Gardeners and we have been learning so much! We are ever so grateful to their team for digging into our questions and helping us successfully navigate the world of growing food! Send in your questions today to be featured in our next blog post! Now, let’s dig in, and learn together!  Without further ado, let’s see what they have for us this week!

IMG_6899.jpg

Question from Rachel in Vancouver:
Why is part of the stem on my tomato plant turning black?

Answer from Sally:
Some questions first: How is your tomato plant being watered? Is it being grown undercover? Does water remain on the leaves after rain or watering? Have you noticed any dark lesions on any leaves? What crop(s) have you grown in the tomato bed in past years? Potatoes? 

IMG_6900.jpg

I regret to say that your photos show a classic case of Late Blight. This is a fungal disease identified by dark blotches on stems and leaves. These early symptoms lead rapidly to the plant collapsing and rotting, likely before the fruit ripens. The fancy Latin name for this deadly organism is Phytophthora infestans which is a water mold. In cool, damp summers – which we have been having - it spreads widely and fast. The spores are carried on the wind and splashes of water. The spores can survive mild winters on plant debris in the soil. It infects tomatoes and potatoes.  

What to do now: Remove the infected plant immediately; Do not compost the diseased material, bury it deeply or seal it in a plastic bag & dispose of in garbage; If the unripe fruits haven’t turned leathery (they don’t look like they have), pick them and use them in a green tomato recipe, such as a chutney. 

How to avoid it in the future: There are no truly blight-resistant tomato cultivars – yet. Though breeders are trying to produce one. There is no prevention, but there are strategies to help avoid it.  The most reliable way to avoid Late Blight is to keep tomato leaves dry – don’t water them from above or splash water on the leaves. Grow plants in well-ventilated greenhouses or tunnels, or plant in beds or pots under the overhang of a roof – while still giving them full sun and lots of warmth (though not high heat). Space plants, and remove a few leaves, to provide good air circulation and reduce humidity.  Plant early-maturing varieties such as cherry tomatoes. Sometimes these can produce a crop before infection strikes. Mountain Magic is an early-season variety considered to have some resistance to the virus.  Don’t plant tomatoes in a bed in which infected potatoes or tomatoes were grown previously as the fungus can overwinter.  While they’re probably the most popular food crop to be grown by home gardeners, tomatoes are surprisingly high-maintenance plants. But, give them warmth, full sun, fertile well-drained soil high in organic matter, dry leaves, regular watering, and lots of air circulation and they will reward your care.

Resources from Linda Gilkeson: 

Digging in with the Kids - Growing Chefs Integration Idea:

These can be disappointing moments in the garden for kids and adults alike. Seeing a plant that you have loved and cared for take a turn for the worst, and not end up how you expected is a tough go. However, this is a great opportunity to talk about food waste and preservation with kids. Although these tomatoes likely aren’t going to end up being the juicy fruit of your dreams, there is still so much we can do with it. A quick google search of: “What to make with unripe or green tomatoes” will give you a wealth of culinary ideas of how to utilize this food in different ways. Like Sally mentioned: green tomato chutney or even fried green tomatoes or green tomato relish anyone? Sounds like we have found some silver linings to an unfortunate situation - and that is what life is all about!

Question from Christine in Refuge Cove (West Redonda Island) :
I am growing sunflowers and amaranth. How do I know when to harvest the seeds?

Christine 2.jpg
Christine 1.jpg

Answer from Bev:
So wonderful that you are growing both sunflowers (Helianthus annuus) and Amaranth (Amaranthus) as they both lure beneficial insects to the garden and sunflowers are fabulous for attracting pollinators. Sunflowers should be harvested when the flower head has lost most of its petals and when the back of the flower head has turned brown and the foliage yellow. You can let the heads dry on the stock, or clip the flower about 15 cm below the flower head. Once it’s sufficiently dry, wipe off any little flower buds that are left, and remove the seeds with your hand. The seeds should look plump and loose. A few of yours in the photo look like they are almost ready to go. 

Amaranth can be harvested once the flower spikes fade to light-brown to brown. Usually late summer but it may depend when you first planted. A few resources recommend that when you see birds flying about the plants it’s ready to harvest. Otherwise, you can give the plant a little shake into your hand. If the seeds fall out, you know it’s time. You can also rub the flower heads over a bucket and if they fall out easily, they’re ready. If not, give them a couple more weeks. Enjoy! 

Resources:

Digging in with the Kids - Growing Chefs Integration Idea:

Flower drawing, bird watching, seed saving - great opportunities to engage the kids in some mindfulness and hands-on activities in the garden.

Matt.jpg

Question from Matt in Refuge Cove (West Redonda Island) :
What is happening to my cherry tree? Do I have to worry about it dying?

Answer from Bev:
Hello Matt. These are very deliberate and organized holes in your tree (about 6-10 mm in diameter). Have you spotted any birds tap, tap, tapping into the tree? These holes are the work of a Sapsucker. Sapsuckers are a specific species of woodpeckers but not all woodpeckers are sapsuckers. Based on my review of my trusty bird field guide, the most common sapsucker in your area is the Red-Breasted Sapsucker (Sphyrapicus rubber). There is the yellow-bellied sapsucker (Sphyrapicus varius) in Northeastern BC, the red-naped sapsucker (Sphyrapicus nuchalis) in Southeaster BC and the Williamson’s sapsucker (Sphyrapicus thyroideus) in the Southern Interior and Southern Kootenays. Unlike woodpeckers who eat bugs on trees thereby playing a role in alerting you of possible insect infestations, sapsuckers can do some real damage and will come back to the same tree year after year. Your photo suggests this has happened because you can see where previous holes were made and the tree has healed itself. If this goes on, your tree will continue to undergo damage it likely won’t recover from. As its name states, sapsuckers actually drill sap wells into the tree, drilling deep into the bark and also sometimes stripping the bark so the sap will flow. It looks like some bark has been stripped on the left side of the tree in the photo. Besides damaging the tree, the holes may lure bugs into them, causing more damage or disease.

Digging in with the Kids - Growing Chefs Integration Idea:

It can be fun to think about the relationships between plants and animals. Take a walk in your neighbourhood and try to find connections. Some ideas:

  • Birds build nests in trees

  • Bees collect pollen from flowers

  • Squirrels run and play in trees

Question from Anja:
I’ve got a patch of “fall gold” raspberries. What do I do with them in the fall? I read some you cut down and other types you leave but I am not sure which one I am supposed to so. Also, I would like to transplant/ gift some to my friend. What is the best time/ method to do this? Thanks for any tips!

Anja 1 (1).jpg
Anja 4 (1).png
Anja 3 (1).png

Answer from Jennifer:
Hi Anja, Fall Gold Raspberries are everbearing raspberries so they are pruned differently than regular raspberries. This variety produces 2 crops on each cane, a moderate crop in late Spring/early summer and heavy crop in late summer/early Fall. You prune in summer immediately after fruiting. Cut back the tips by 1/3 that fruited last Fall but leave the remaining cane for summer fruiting. Remove the canes completely after they have fruited over their entire length. Promptly remove new plants and suckers to control spread. 

In late Winter remove damaged canes and thin as needed. You can propagate raspberries from their healthy, non-flowering suckers in late summer. Wet the end and dip the 3-6" stem in rooting hormone powder, then plant the stem about 1 inch deep in a wet, soil less potting mix. In about 4 weeks or when the stems have rooted or doubled in height, you can transfer them into a pot of garden soil which your friends can then transplant into the ground in early Spring. What a lovely gift, but please let your friends know that raspberries are aggressive spreaders so they will need sufficient garden space for them. You can contain them in a large (24" diameter) pot for a few years, but eventually they will need to be planted in the ground. Enjoy your unusual berries!

Digging in with the Kids - Growing Chefs Integration Idea:

Work with your kids to learn more about your favourite foods. The word “raspberry” seems to come from the Old French raspise, a term meaning “sweet rose-colored wine”. There are over 200 different species of raspberry and they are very nutritious. You may think citrus fruits like oranges have the highest amount of vitamin C, but surprisingly, raspberries contain even more! They are also super high in fibre, low in calories, and give you a solid dose of folic acid. The benefits of raspberries go even further: They are high in potassium, vitamin A, vitamin E, magnesium, folate, omega-3 fatty acids, manganese, and calcium.

There’s no better way to end a research project than a field trip!

Resources:

Week Three - Meet the Master Gardeners

MGA Q&A Series (1).png

We are into eek three of our Garden Q&A Series with the Vancouver Master Gardeners. In case you didn’t catch the first two weeks, be sure to read our blog posts on ‘Summer Harvests, and Winter Crop Planning’ here:

You can submit your questions via our social media accounts, or by email to christine@growingchefs.ca.

This week, we would like to introduce you to a couple of the Master Gardener students who have been working hard to share with you, their passion for growing food, and the great knowledge that they have.

Meet Master Gardener Student Bev!

A2AEE28A-A33A-4888-9462-1C7AF2449E56.JPG

What got you into growing food and wanting to complete your Master Gardener training?

Hello Fellow Gardeners!

Growing up I didn’t have a lot of exposure to fresh vegetables. My grandmother always had rhubarb growing at her front door and would make pies with it, combining it with apples or strawberries, but other than that, most of what I knew about vegetables came from a can. I’m not talking about the canning you do when you grow and can your own food so you have amazing treats throughout the winter. It was can opener stuff!  I’m likely dating myself by saying that, but we also had a milkman and breadman who delivered these essentials to our home every few days. We didn’t have a car and there were no corner or grocery stores around my neighbourhood. As a family of 8 kids, my amazing single-mom would go grocery shopping once a week and someone had to be home for the grocery delivery because she went right to work after shopping. It was like Christmas every week! My sister and I would open the boxes praying for a box of sugary cereal, or some other treat. We did have more fresh food on holidays like Christmas, Easter, and Thanksgiving. My Mom did love fresh corn which would show up on our dinner table in the late summer, early fall. These memories shaped my early understanding of where food came from. I took a course on the sociology of food in my undergrad which made me realize that our relationship with food is complex and changes the more we learn about it and appreciate it.

My interest in growing my own food didn’t really start until about 14 years ago, when I had some space to grow it. I started with tomatoes and lettuce, which seemed like a good match up. We had so much lettuce I made lettuce soup. It was actually pretty good if you add potatoes which thickens it up. From there we eased up on the lettuce and started garlic, which is amazing fresh and one of the easiest things to grow if you make sure you rotate your crop every year. The onion family (of which garlic is a member) is susceptible to root disease.

What is your favourite food to grow?
Green beans are my favourite and I typically pick them right off the vine and eat them raw. This year I’m growing cucumbers for the first time. It’s going very well, but I have to admit I didn’t think about how quickly they would grow and how having a structure for them to grow up (to stay off the ground) is essential. I managed to cobble some tomato cages and string together to help with that.

Can you share with us some of your best garden hacks or advice?
My best advice about food gardening is plant what you love to eat but try new things every season. Being able to make a simple salad with fresh veggies from your garden, is one of the simple pleasures of life! Oh, and always share with your neighbours…they may have something you’ve never tried. Happy gardening!

Meet Master Gardener Student, Jennifer!

Jm_patiogardeningphoto_Aug14.jpg

Tell us a little bit about yourself!
Hi Growing Chefs!

I'm Jennifer Martin, a retired Food Scientist, who maintains a cooperative, urban garden in the city and a large, challenging coastal garden on the Sunshine Coast which I'm trying to restore, back to its native glory.  I grow herbs, fruits, vegetables & perennials, especially ones that attract pollinators and beneficial insects. On the coast, I have mostly native woody plants, shrubs and trees, including some conifers that are over a 100-ft tall.

What are some of your favourite culinary uses of the plants that you grow?
I love herbs, especially the perennial ones, like Rosemary, Lavender, Thyme & Sage. Have you tried adding crispy sage to your pasta? Just cook the sage leaves in melted, browned butter until crispy then add it to your favourite ravioli. And for a really special treat, make honey lavender ice cream.  Simply add the culinary lavender flowers (any English variety) to a spice bag and steep them (like tea) in the heated cream mixture until you get the desired flavour. The longer you steep, the stronger the lavender flavour will be. It's delicious!

Can you share with us a fun tidbit of your knowledge around growing food?
Did you know you can grow vegetables from food scraps?  While you may have done this with a potato, you can also regrow basil, mint, cilantro, celery, romaine lettuce and even onions!  Make sure there is at least 2-3 inches of stem, then just place their ends in water until they grow roots.  After they have rooted you can replant them in soil and let them grow to full size again before eating. Start with green onions, they're the easiest and make sure to place them in a sunny location in your house to encourage root growth . This is recycling at its best!

Meet Master Gardener Student, Sally!

IMG_3122.jpeg

What led you to your passion of growing and gardening?
My first career was focused on the built environment. I studied 3-dimensional design in England in the late ‘70s before moving to the West Coast in 1981. My passion for design carried me through four decades in the corporate world in Vancouver as a consulting interior architect. I loved the job, always finding new things to learn, opportunities for creativity and developing new skills, and working with wonderful clients and colleagues. As a professional designer I became conscious of the giant footprint that design and construction have on our environment and I committed to practicing sustainable design. In the early years these concepts were considered optional and extravagant. Now, thankfully, these ideas and processes are being adopted as non-negotiable and essential.

 Even as a young child living in Barbados I remember my parents giving me a wee corner in their yard, and having my own little garden. My passion then was coleus. So many gorgeous colours and leaf shapes, and in that climate they were perennials. 

 What are you most excited about in your Master Gardener training?
Over the years I’ve had a number of other gardens, and have made just about every gardening mistake in the book. I certainly wasn’t born with a green thumb. Yet, the natural environment has continued to lure me. I find every aspect of the plant and animal world fascinating. Taking the Master Gardener training has been a gift. What propelled me to take the course was realizing I wanted to know a lot more about the art and science of growing things. The classes covered topics I didn’t initially think would be of much interest, such as entomology. Turns out, bugs are riveting! And the drastic decline of beneficial insect populations means we need to restore and develop habitats to bring them back. 

For me, what connects design and gardening is the notion of ’nurturing’. If ecology is the relationship between organisms and their environments then my previous focus was on humans and their relationships with the built environment. Now the focus has shifted to all living things and the natural environment. My image of what a beautiful garden should look like has changed in this process. Once, a manicured, European show garden was my idea of heaven. Now, gardens with wonderful soil, less formality, habitats for beneficial insects, places that celebrate the life cycles of plants - these feel right. A landscape designer I admire tremendously is Piet Oudolf from the Netherlands. And of course our own most famous landscape architect is Cornelia Hahn Oberlander, a local treasure who has been a passionate and early proponent of rewilding, environmental protection and liveable urban landscapes.

My garden for the past few years has been a tiny city one near Vancouver City Hall. It’s south facing, yet very shaded from the magnificent trees that line the street. Growing vegetables is challenging (ok, impossible) and so it’s filled with shade-loving perennials. In the autumn the trees shed their leaves and provide a fantastic leaf mulch throughout the winter. Under what appears to be dead or dormant, the soil is teaming with life, and the circle continues next spring. 

Week Two (Part Two) - Successful Summer Harvests and Winter Crop Planning

We hope you’re enjoying our Gardening Q&A’s with the Vancouver Master Gardeners. This is part two of the second round in a series of six that gives us the opportunity to tap into the wealth of knowledge of Master Gardeners in our community.

These Gardening Q&A’s are focusing on Successful Summer Harvests & Winter Crop Planning - send in your questions today to be featured in our next blog post! Now, let’s dig in, and learn together!

Question from Lesley in New Westminster:
I am growing leeks and cabbage for winter harvest. Any other crops I should grow?

Answer:
Yes many! We’re fortunate to live in a region with a climate that makes year-round vegetable gardening possible. To quote from Linda Gilkeson’s August 8th blog:

“This month we are coming to the end of the seeding season for winter harvest vegetables. With the cooler temperatures this week, conditions are ideal for sowing lettuce, spinach and other leafy greens (leaf mustard, leaf radish, Chinese cabbage) as well as winter radishes and daikon. For sowing this month, choose frost hardy lettuce varieties to extend your harvest all winter. There are some excellent hardy lettuce varieties, including ‘Winter Density’, ‘Rouge d’ Hiver’, ‘Arctic King’, ‘Continuity’ (AKA ‘Merveille des Quatre Saisons’).” 

These can be sown up until the end of this month, along with arugula and corn salad, which is a super-hardy lettuce substitute for winter months. The leaves are small (so grow lots), but the plant is indestructible in winter ice, snow and below-freezing weather. 

If you haven’t sown kale, collards, leaf beet, or Swiss chard before this, try to find seedlings to transplant, as it is getting too late to start these larger plants from seed. If you are sowing now, plant immediately (today!) and make sure seedlings grow as quickly as possible: thin them as soon as they come up and provide plenty of water and nutrients (enrich the soil with blood or fish meal, fish compost, alfalfa meal or other amendments higher in nitrogen). 

dab990000ac70af68428b0c7aefa9b2b.jpg

Today is Spinach Day at my house as this is perfect timing to sow spinach for fall, winter, and spring harvests: days are short enough now that most spinach seedlings won’t bolt even in hot weather. Spinach does best if it is protected from heavy winter rain by being grown under the overhang of a roof or in a cold frame (see photo above) or tunnel. 

Mulch the soil around the plants in November to protect the roots. And no matter how battered your plants are by winter weather, don’t give up on them, because most will survive to sprout a whole new crop of leaves in March and April.” If you hurry, these other winter crops can be sown up until early August: leaf turnip/mizuna, sweet onions, and scallions, broccoli raab. 

Cilantro can also be sown in late August to mid-September. If planted in October, Garlic will have time to grow a large root system before it starts to make bulbs in May and June for harvest in mid-July. Broad beans or Fava beans: sow in October, harvest in spring. 

Linda Gilkeson has created a handy chart When to Plant for Winter Harvest.

Digging in with the Kids - Growing Chefs Integration Idea:

This is a great opportunity to introduce kids to garden crop planning. Have them pick a couple of crops they would like to grow, and research together what the plants need to thrive, and when to start the seeds. This is a great opportunity to practice reading and writing while making a great garden plan together!

Question from Susan in North Vancouver:
What lettuce varieties do well in fall/winter?

Answer:
Frost-hardy varieties that overwinter include Winter Density, Rouge d’Hiver, Arctic King; there are also these that do well both summer and winter: Continuity (aka Merveille des Quatre Saisons), All The Year Round. West Coast Seeds Winter Blend is a traditional French mesclun recipe. They also have Red Sails, Capulin and Vit Corn Salad Mache among several other winter lettuce varieties.

Question from Susan in North Vancouver:
When do I plant garlic?

Answer:
If planted in October, garlic will have time to grow a large root system before it starts to make bulbs in May and June for harvest in mid-July.

Question from Lauren in White Rock:
I am wondering what would be the best plants to grow for a kitchen windowsill garden this winter?

Answer from Jennifer:
Hi Lauren, if you are trying to grow on a kitchen windowsill, I assume you will be restricted to smaller size pots so I think herbs are your best option. You will need to choose herbs that grow in shady conditions because there are fewer hours of sunlight during the winter months. You might consider sage, mint, marjoram, parsley, and chives. 

If you want to grow sun-loving herbs, like basil & rosemary, you will need a southern exposure and you will need to supplement with some artificial light in order to achieve the 6-8 hrs of sunlight that these herbs require. If your home is dry, you might consider misting or placing your planters on top of pebbles placed in a water tray. 

As your cold frame is larger and outside, hopefully in a sunny location (south or west exposure) you could consider lettuce, radish, carrots, onions, spinach, arugula, beets, leeks or any hardy vegetable or herb that the size of your cold frame will accommodate at harvest time. The highest-yielding winter vegetables (based on commercial farm conditions) are onions, carrots, spinach, and lettuce. I'm glad you are considering a winter garden as some vegetables (carrots, scallions, kale) can be much tastier grown over the winter months. Good luck!

Digging in with the Kids - Growing Chefs Integration Idea:

Here at Growing Chefs, we are big believers that you can grow in any space! We are typically in classrooms in the fall, and have had great success growing our indoor windowsill gardens with kids. Yes, sometimes our indoor windowsill gardens do not take off, but we have a lot of fun learning about how plants grow and develop in different conditions. We make sure to add in an element of science by tracking the growth of plants and making hypotheses about what we expect will happen with different variables like temperature, light, growing container, soil, etc.

For container growing, check out our blog post on using different recycled materials to grow in here! Keep an eye out for our Fall Growing Chefs at Home program where we will feature a 2-part video series on ‘Plant Growth Science Experiments!’

Week Two (Part One) - Successful Summer Harvests and Winter Crop Planning

Welcome back to another week of Gardening Q&A’s with the Vancouver Master Gardeners. This is the second round in a series of six, that gives us the opportunity to tap into the wealth of knowledge of Master Gardeners in our community.

Thank you for sending in all of your questions! We received so many that we will be splitting the responses into two separate posts this week - so stay tuned! These Gardening Q&A’s are focusing on Successful Summer Harvests & Winter Crop Planning - send in your questions today to be featured in our next blog post! Now, let’s dig in, and learn together!

Question from Karen in Vancouver:
What’s happening to my tomatoes? Any idea what is causing this disfigurement?

Answer:
Great to see you growing tomatoes as they are not the easiest to grow in our climate! Tomatoes like warmth but not excessive heat. It looks like your tomatoes have yellow/green shoulders disorder. It is not exactly clear what causes it, but in most cases, it’s due to extreme temperature change of unusually hot weather (over 32 degrees Celsius) which we did get at the end of July. If the fruit is exposed to strong sunlight and intense heat, this disorder can occur. If you’re growing these in a greenhouse, you have to be particularly mindful of excessive heat as the temperature in a greenhouse can increase quickly. 

One way to prevent yellow/green shoulder is to ensure that you’re not over-pruning your tomatoes and taking all the stems off. The leaves provide necessary shade during these hot periods and also give your tomatoes better flavour. Pruning off “suckers” between the main stem and the leaf stem is fine though. A potassium deficiency in your soil can also cause this disorder, so you may want to consider getting your soil tested. Potassium is a primary plant nutrient which helps to develop strong roots and stems. It is unlikely you have a root issue, as the ripe part of the fruit looks great! Just cut that yellow part off and they’ll be good to eat.

Digging in with the Kids - Growing Chefs Integration Idea:

Last week we talked about getting the kids involved with picking suckers off of tomato plants. Check it out here - but good to note that in this case, we must be careful to not over prune! Another fun activity which can be a perfect fit for unsightly fruit and vegetables, is to think about different preserving methods that we could use to transform our food, and keep it longer. Stay tuned for our Growing Chefs at Home program this Fall, we will be covering the topic of ‘Food Preservation’ - canned tomato sauce anyone?

Question from Susan in North Vancouver:
Can I plant peas in the fall?

Answer:
No, unfortunately not in our area. While they grow best in cool, humid weather, temperatures below 10°C will kill the plants. Of course, if you have a greenhouse with cool but not freezing temperatures, they would grow there. To quote from Linda Gilkeson’s Newsletter April 30, 2018:

“You can sow peas every month through June to ensure fresh peas into October. I start my early plantings of peas in vermiculite indoors to avoid the main egg-laying period of pea leaf weevil, which is now common in my area. The weevils have one generation a year and only lay their eggs in the spring. Peas planted later than mid-May after the egg laying period are done generally to escape damage from the weevil larvae, which eat the nitrogen fixing nodules on the roots. Pea attacked by weevil larvae can’t make their own nitrogen, but still grow well if the soil is enriched with nitrogen sources, such as fish compost, blood meal, alfalfa meal, etc. And while I am on peas, this is a reminder to sow varieties resistant to enation mosaic virus (EMV) for peas that will be present in your garden from mid-summer onward. The virus is spread by aphids and usually shows up in mid-summer. So, to summarize my pea planting plans: In March and April, I plant any varieties I want, but start them indoors and compensate for weevil damage by enriching the planting bed with nitrogen amendments. For peas sown in May and June, I choose EMV resistant varieties, sow them directly in the garden and don’t add nitrogen to the soil since these plants can make their own.”

Question from Susan in North Vancouver: 
What soil preparation do I need for winter vegetables?

Answer:
Growing crops in permanent beds is popular in this region for good reason. Compared to a garden plot that is tilled from edge to edge every year, there are several advantages to permanent beds: Once beds are laid out, pathways and growing areas don’t change over the years. Only planted areas need to be fertilized, watered and weeded which saves work and resources. Soil in beds doesn’t become compacted because you don’t walk on it. It can be easier to control weeds between beds when the pathways are permanent. Permanent pathways can provide a refuge for beneficial insects that eat plant pests. 

If you know that your soil is balanced, healthy and has supported summer crops it’s recommended that the soil is left relatively un-worked. Don’t cultivate beds deeply as this destroys soil structure and brings the ‘weed bank’ to the surface (the countless dormant weed seeds in the ground). If you’re unsure about the qualities of your soil, it’s advisable to have your soil tested by a lab (DIY tests are often inaccurate). 

If you’ve not done so this year, add agricultural lime (ground up limestone) or dolomitic lime to raise soil pH above 6.5. The exception to not cultivating deeply is that lime needs to be worked deeply into the soil. But it should only be needed if the soil is particularly acidic. Veggie beds need a minimum of 30 cm soil depth; 45 cm is better. Winter veg needs well-drained soil that won’t get waterlogged over our wet winters. Plants suffer if they are planted where water stands for more than 24 hours. While this isn’t such a problem in summer as soil has time to dry out, drainage needs to be improved to channel water away in winter. 

Easy solutions are to mound up the soil or build raised beds high enough to raise the root zone above the water line. Adding organic matter to soils provides food for the soil microbiome and this, in turn, releases nutrients to plants. 

Sources of organic matter include homemade and commercial compost (especially the fish plus wood waste composts) and leaf mold. 

When you harvest summer veg, cut the stems off at the soil line and leave their roots in the ground to decompose and return nutrients to the soil. Adding organic matter is the single most effective strategy for improving soil. Apply the compost to the top of the soil and work it in very lightly and gently, going no deeper than about 10 cm, with a garden fork. 

To summarize: to prep soil for winter veg, when your bed(s) are empty in late summer add compost, a complete organic fertilizer and lime (if needed). When plants are in the ground, start mulching. This is not optional! Mulches keep the shoulders of root crops from freezing and they insulate the soil. Use ‘fluffy’ mulches such as whole leaves, bracken fern or straw.

Digging in with the Kids - Growing Chefs Integration Idea:

Preparing soil for winter vegetable crops is a great opportunity for kids to get involved by having them create their own compost to add nutrients and food into the soil.  If you grew crops in the Spring and Summer, your soil worked so hard producing lovely food for us, and now it is our time to give back! Have the kids check out our lesson on Soil and Compost - learn how to make your own plant food by ‘Creating Your Own Soil-Arium’ and more videos on soil science, and different composting methods here.

add water - soilarium.png

Question from Selma in Vancouver:
What is a good cover crop for a small veggie gardening space? Can I use a cover crop in between/with my winter vegetables? When is a good time to start with a cover crop?

Answer from Jennifer:
Cover crops are mainly used for commercial vegetable gardens. For small veggie gardens, Linda Gilkeson, our local veggie expert, recommends "interplanting" instead. With interplanting you just plant other vegetables in these open spaces. For example, lettuce is good for this as it can be tucked in just about anywhere between Brussels sprout, winter cauliflower or winter broccoli. Right now you could plant winter harvest vegetables such as winter greens (kale, spinach, chard.) 

West Coast Seeds publishes a free magazine on ‘Harvesting Winter Vegetables’ which is available at most local nurseries if you would like specific information on what to plant and their growing schedules. Mixing plants together is actually good for your garden as it creates biodiversity, attracts more beneficial insects resulting in less disease and a more sustainable garden. Even mixing in flowers is good, particularly if they are pollinators. You can use cover crops if you want but they rob the soil of valuable nutrients that are best used for your vegetables. If you're concerned about weeds, I would recommend a light mulch such as dried leaves or straw that can be used all year round. Mulch also retains moisture, protects the soil from sunscald and it's easy to brush it aside when you need to plant something or to topdress your garden. Mulch will also decompose over time feeding the soil so you will need to keep replenishing it. I hope you will consider interplanting and mulching instead. Interplanting or dense planting, using every available space makes your garden more productive. Timing for interplanting depends on your available space. Once you have harvested one vegetable, you can fill that space with seedlings of lettuce, kale, Chinese cabbage, leaf beet and other vegetables you may have already started in your nursery bed. Linda Gilkeson provides specific information on interplanting on p43 of her book "Backyard Bounty", organic vegetable gardening in the Pacific Northwest. Good luck with your gardening and I hope you will find this approach rewarding.

Digging in with the Kids - Growing Chefs Integration Idea:

Have the kids help collect leaves in the fall around the yard to use as mulch to protect the moisture in your soil, and feed your soil as they decompose. Alternatively, planting a winter pollinator garden with kids is a great way to learn about the importance of pollinators in our food system. Check out our blog post on pollinator gardens here.

Question from Llew in Calgary:
When do you harvest sriracha peppers? What colour?

IMG_1464.JPEG

Answer:
All peppers (Capsicum annuum) love heat and generally require a long warm season to ripen. Sriracha is actually a sauce made up of various types of chilli peppers. There is no pepper called “sriracha” unless the one you have is one that has been created through hybridization of peppers to make a commercially named pepper called “sriracha.” A “hot” pepper can be harvested when the fruit is firm. If you wait until the pepper changes colour (red, yellow, brown, purple) the vitamin-C content increases dramatically. Even if you harvest before the colour of the fruit is not what it should be (but make sure it’s firm), it will continue to ripen and turn red, yellow, brown, purple or stay green! If you pick the fruit when they are green you will likely get a larger harvest. If it’s getting late in the season, and before the first frost, you can pull out the entire plant/bush, hang it upside down in a dry, warm place or put them on trays to dry out.

Digging in with the Kids - Growing Chefs Integration Idea:

Speaking of peppers, invite your kids to be the chef and let them determine the spice level! This template will help you pick ingredients and write a recipe for your very own stir fry and stir fry sauce.

Week One - Successful Summer Harvests and Winter Crop Planning

We are so grateful for the friendship and knowledge that students from the Vancouver Master Gardeners are providing our community with, to support in successfully growing food.

This is the first in our series of six Gardening Q&A’s focused on Successful Summer Harvests & Winter Crop Planning, brought to you in partnership with the Vancouver Master Gardeners and Growing Chefs Let’s dig in, and learn together!

Question from Rachel in Vancouver:
We have a fig tree we grew from a cutting we received four years ago. It is currently nine feet tall and has a handful of figs ripening. In the last couple of weeks, the leaves have started to yellow. We removed them but wondered if that was a mistake. What is happening?

Answer from Sally:
The key to having a good crop of figs in our area is to choose the right variety, as some are better-suited to growing in the Pacific Northwest (example, Desert King, Peter’s Honey, and Brown Turkey are reliable). In warm climates figs crop twice, but if grown outdoors here we can only expect to get one crop a year. Ficus carica – edible fig – is native to rocky, sunny Mediterranean and western Asian sites. They like a lot of warmth, full sun (to part shade), and to have their roots somewhat constricted. It’s good to see this one growing in a pot – that works well because it mimics the constrained, rocky conditions they like. They like a somewhat alkaline soil (pH 6 – 7.8) but the soil doesn’t have to be rich. 

Figs stress easily, so changes to lighting, humidity, or temperature need to be done gradually or they may drop leaves. They do not like the cold and will die back. It’s possible our rather cool spring and early summer have affected it, leading to yellowing leaves. Removing a few yellow leaves won’t hurt. The plant overall looks a bit droopy. In our area the tree needs to receive at least six hours sun a day and ideally be positioned against a south-facing wall to maximize the heat. Since it’s container grown, it needs regular watering- it doesn’t like erratic watering or being allowed to dry out - and feeding.

In spring and summer feed it every week, alternating between a high potassium fertilizer such as tomato food and a general-purpose fertilizer. Mulching around the base with 2.5 – 5 cm of compost will help to keep the soil in the pot more evenly moist. Conversely, figs don’t like to be overwatered. Check the soil 3 cm below the surface. If it’s dry to the touch then it’s time to water. Water deeply until plenty of water comes out the bottom of the pot. Don’t let it sit in water. In winter when they’re dormant, figs need to be protected from the cold either by moving the container to a frost-free place (garage or other sheltered spot), and covering the pot with bubble wrap for insulation. If it can’t be moved then the bare branches should be covered with a few layers of horticultural fleece. The leaf doesn’t appear to show signs of pests such as scale, aphids, mealy bugs or spider mites. The chewed corner and specking on the underside are not indicative of serious problems. The chewing is possibly caterpillar. If it’s only in small areas it shouldn’t be a problem. So, check sun exposure, heat, watering, and fertilizing.

Digging in with the Kids - Growing Chefs Integration Idea:

Invite the kids in your life to help test how dry the soil in your garden is! As Sally mentioned, if you stick your figure in the soil 3cm deep, and it is dry - that means that it is time for more water. This is a great way to engage kids in the garden and help them identify when more water is needed. This can change all the time based on our weather, and when they have a fun trick to use, they often feel more ownership over caring for the garden. Have them stick their finger in up to their first, or second knuckle - noting that the surface of the dirt may dry up before the layers beneath. Let them know that when growing plants, what we see above the surface is only part of what is going on! Often our soil may be dry on top, but have plenty of moisture below the surface - and this trick can help us from overwatering. Have the kids test how dry the soil is with all of your plants, and note how there are changes amongst different containers, and areas of your garden based on their environment and exposure to sun and heat.

Question from Sevan in Pemberton:
The bark on our peach tree is peeling, and it has fallen over. The owners before us attempted to keep it standing with some support. Despite its struggles, the tree is producing gorgeous fruit! Should we do anything more to take care of it, or is it ok the way it is?

Answer from Jennifer:
Hi Sevan, the pictures look like this is a mature tree with peeling bark and a fairly large canker on its trunk. There are a number of factors that could be contributing to the peeling bark. Sunscald and extreme temperature changes are the likely ones, as the tree appears to be in a very sunny location, so if the canker is on the South or West side of the trunk this could be due to sunscald.

Fruit trees have very thin bark so they are more susceptible to this.  It certainly wouldn't hurt to try and shade the trunk portion of the tree during really hot periods and remove any damaged, dried or loose bark around the surface of the wound. If the bark is removed around the entire circumference of the tree (called "girdling"), it will die, but trees can survive smaller wounds.  There are also trunk wraps but these may cause more harm than good because they can create breeding areas for insects and hold moisture in so you need to be careful with this type of remedy. Painting or cementing cankers in trees are also not recommended. Thankfully, this canker does look healed and your tree is producing nice fruit. The bark also looks discoloured and black which could indicate a fungal disease, although the canker looks fairly dry and benign, so perhaps a previous fungal disease. 

Fruit trees are susceptible to fungus diseases so you want to make sure your soil is well drained and there is not a lot of water sitting near the base of the trunk. Usually you see curling leaves and sunken spots on the peaches if there is an active fungus problem. It is hard to tell why your tree has fallen over. It could be poor pruning, unbalanced branch structure, heavy winds, disease or all of the above. 

The concern here is the branches, leaves and fruit touching the ground which creates an entry point for insects and disease. It is always best to keep branches off the ground, if you can, for good air flow and to discourage entry points and contact with the ground. As the tree is producing some really nice fruit (well done!), I would just keep an eye on it and see how it progresses. This darling tree definitely has a lot of character and appears to be a survivor!! Good luck with it.

Digging in with the Kids - Growing Chefs Integration Idea:

This Gardening Q&A sounds like it has great potential for some detective work! Take note of the things to look out for that would indicate disease in your plants. Have the kids in your life join you on an ‘eye spy’ hunt for indications of disease in your plant like Jennifer mentioned!

Question from Johanna in Vancouver:
My tomato plants seem to be growing like crazy but some of them have zero flowers/fruit. Help!

Answer:
Our cool weather so far this year has not been conducive to good tomato growing. The plants will grow lots of large, soft leaves in cooler weather and produce fewer flowers leading to fruit. If you’ve had success with tomatoes in the past then the issue is very likely to be attributed to the cool weather. 

If this is your first time, here are some points to consider. Tomatoes are moderately difficult to grow and need more doting care than many other crops. To grow well, they need the following:

  • Full sun

  • Fertile, well-drained soil that’s high in organic matter, with a pH level 6.0 – 6.8.

  • Warmth, but not high heat. Temps between 26° to 30° are best. Higher temperatures can kill flowers, so if your plants are in a greenhouse that’s getting super hot that could be an issue.

  • Regular watering to keep the soil evenly moist. Don’t let the soil dry out, but don’t let the plants sit in water either. Expect to water about 2.5 cm per week during peak growth. Overwatering produces leaf growth at the expense of flowers. Container grown plants need extra water.

  • Feeding every 10 – 14 days with a balanced organic fertilizer.

Conversely, large-fruited and long-season varieties such as Brandywine don’t ripen many fruits in cool summers (such as ours recently). Vine tomatoes need to have their suckers pinched out (these are the little side shoots growing between the main stem and a leaf stem). If they aren’t pinched out, all the plant’s energy will go into producing shoots, and not flowers and fruit. If you’ve got bush tomatoes you won’t need to remove side shoots. 

Above-ground parts of the plant need to be kept dry, and have good ventilation around plants - they don’t want to be crowded. A purple tinge to the undersides of leaves indicates the plants are not taking up enough phosphorus due to the cool weather (it’s not necessarily that there’s a phosphorus deficiency in the soil). Phosphorus deficiency is linked to less fruit production. Feeding with higher potassium encourages good fruit development. Feeding with excess nitrogen can promote a lot of lush leaf growth and very few flowers/fruit. Bonemeal has an appropriate proportion of N-P-K nutrients: 2 - [11-14] – [0-2] and could be used sparingly. Wood ashes (0-1-5) also have good proportions of flower/fruit producing nutrients. But really, it sounds like the most likely problem has been our very cool early summer. Tomatoes just don’t do well in the cool.

Digging in with the Kids - Growing Chefs! Integration Idea:

Mmmmmmm! One of our favourite things to do in the garden is pinch the shoots on tomato plants! It is totally a kid-friendly activity, and pinching the shoots, and pruning excess leaves to promote air flow gives off the most wonderful aromatics. When you are looking down the main stem of your tomato plant, you will see little ‘shoots’ come out at a 45-degree angle from the ‘elbow’ of the main stem and main branches which produce fruit. See the picture below! You can invite kids to pinch them with their fingers when the shoots are still small, no snips needed. For thicker stems, best to use some snips with adult discretion, and supervision required. Make sure to stop and….smell your hands - it smells so fresh! Ask the kids if the smell reminds them of anything familiar. 

Question from Kim in Vancouver:
I have been harvesting my kale all summer. I know kale can also be grown in the winter but do I need to plant new seeds? Or, will it keep growing?

Answer from Jennifer:
Hi Kim, yes, Kale is a biennial plant (lives for 2 years) so it will keep growing over the winter in zone 8-10 as it is very hardy and can survive temperatures down to -10C\14F. As with all vegetables, it's always good to add a light mulch (eg. dried leaves, straw) to the soil surface to protect from freezing temperatures in winter and hot sun in summer. Kale survives over winter as long as you harvested it correctly by removing the older outside leaves first and leaving the centre stem intact that has the smaller leaves. However, by next Spring this kale plant will bolt and die. It's also a good idea to reseed or transplant small kale plants so you have more plants to harvest from over the winter as kale leaves do not regenerate as quickly in colder months. You will need to get these new plants to maturity before the first frost so timing is critical. Also it's helpful to add more plants now to replace the plants you will lose next spring so you have plants at different stages of their growth cycle (called succession planting). If you are going to reseed,  I would consider some winter varieties such as Winter Red, Rainbow Lacinato, or a winter kale blend. You can pick up a free copy of West Coast Seeds, Planting for Fall/Winter harvests at your local nursery (or view it online here). On p. 8 they list a dozen different varieties of winter kale with planting instructions. You will find similar information on p. 38 of West Coast Seeds Gardening Guide 2020 which is also available at most nurseries (or view it online here). Good luck with your Winter harvest!

Digging in with the Kids - Growing Chefs! Integration Idea:

Similar to pinching the shoots on the tomato plants, have kids help with removing the older, outside leaves to harvest, and leaving the centre intact with the smaller leaves. Also, if you haven’t checked it out already, have your kids watch our lesson video on starting seeds - and have them help with re-seeding more kale plants!

Identifying Soil Types: Becoming a Soil-ologist Activity

This week, Christine from our team has been talking all about soil and composting! If you missed her lesson on the components of soil and the importance of composting you can find it here in our Growing Chefs! at Home Lesson 7 post.

For a fun science experiment today we are going to explore the soil in our own gardens to see if we can learn more about the different components of this soil and see if we can identify different soil types just like a soil scientist!

In this activity, kids will learn about the different components that make up soil, and how to identify various soil types. It is important to be able to identify your soil type so that you are able to grow the plants that prefer that environment. If you don’t have the correct soil type to grow the plants that you want to grow, then you can add the nutrients and mix in additional soil content to make the perfect mix for your plants’ needs. You’ll notice that your seed packs often list the growing conditions for the different vegetables you are planting, see below images under the “growing” section.

Learning Objectives For This Activity:

  • Understand the basic components of healthy, nutritious soil

  • Identify the main soil types 

  • Learn about why we need to examine our soil and that different plants prefer different types of soil

What is Soil?

Soil is a combination of water, air, minerals, and organic matter. Soil is at the top layer of the earth’s surface and can be thought of as a living thing, and as the ‘skin’ of the earth. People often refer to soil as dirt, but there is an important difference. Dirt is soil that has been misplaced on Earth, and no longer has any life left to feed plants. Dirt is something we can find under our finger-nails, or on our clothes after playing outside. 

Soil Types:

Clay Soil: Soil with a high clay content is considered a ‘heavy’ soil that is made up of tiny particles that can not be seen by your eye without a microscope. This type of soil has a smooth texture, which tells us that the tiny particles are packed very closely together and therefore the water drains through clay soils very slowly. Clay soil holds water so tightly, that it is hard for the plants to get a nice drink of water. 

You can tell if you have clay soil if you roll it into a ball in your hand, and the soil will hold its shape. 

Plants that like clay soil:

  • Brassicas: cabbage, broccoli, Brussels sprouts.  

  • Some tall growing vegetables: beans, peas, and corn like tightly packed clay soil to help anchor their roots.

  • Leafy greens: kale, chard, etc.

  • Squash and pumpkins.

Sandy Soil: Sandy soil has small pieces of minerals that you can see with your eyes, and feel with your hands. Because this type of soil has texture that you can feel, and therefore tells us that there is space between the pieces of sand. This shows us that it allows water to drain through it quickly, which is important for plants that do not like to sit in water, and like to dry out in between having their drink of water. When soil allows for water to move through it quickly, that also means that nutrients move through the soil quickly as well. This would mean that in sandy soils, it may be hard for plants to soak up the nutrients. Sandy soils hold heat well, which helps many seeds grow in the Spring. 

Plants that like sandy soil:

  • Root crops: potatoes, carrots, radishes, turnips, beets etc.

  • Bulb plants: onions, garlic, etc.

Loamy Soil: Loamy soil contains high levels of organic matter, and is the ideal type of soil for growing mostly all fruits and vegetables. Loamy soil is well-balanced with sand, clay, silt and organic content. Having a nice mix of all of these elements gives plants all the benefits of each soil type, without many of the disadvantages. 

Remember, just like it is important for us to have a balanced meal with all of the food groups, soil should also have a well-balanced mix of ingredients (sand, clay, organic matter) as soil is the main source of food for plants. 

Soil-ologist Science Activity

Items needed:

  • 1+ Glass Jars

  • 2 or 3 soil sample(s) from your yard or garden

  • Water

Activity Instructions:

For a fun science experiment today we are going to explore the soil in our own gardens to see if we can learn more about the different components of this soi...

1. Collect soil samples from as many different locations as you want in your growing space, for each sample you will need one glass jar (soil samples should be collected from 20cm deep in ground).

2. Place one soil sample into each jar.

Soil Samples 1-3 Dry.png

3. Fill your with water, and place it on a flat surface.

add water to jars.png

4. Let the soil settle for a minimum of one hour.

let soil settle for 1 hour.png

5. Examine and identify the soil content using the guidelines below!

soil%2Bsamples%2B1-3%2Bsettled.jpg

Here we can see that in:

  • Soil Sample #1: The water is murky, and the soil has settled at the bottom, which tells us that there is heavy content in there such as sand and clay

  • Soil Sample #2: The water is pretty clear, and the soil has most of its content at the top, but also some has settled at the bottom. This tells us that there is lots of organic matter, but also has some sand content.

  • Soil Sample #3: The water is murky, and has soil floating at the top, but also has some that has settled at the bottom. This tells us that this soil sample has a nice balance of lots of organic matter, sand, and some clay content

Note: Soil Sample #3 is potting mix from the store that is specially made to have a nice balance of sand, clay and organic matter.

LOAMY SOIL: Large organic particles will float on top

CLAY SOIL: Fine clay and silt particles will settle in the middle

SANDY SOIL: Sand and small stones will settle at the bottom

If water is clear after soil settles: SANDY SOIL TYPE

If water is murky and cloudy after soil settles: CLAYEY SOIL TYPE

What soil type is in your jar?

Understanding Compost: Creating your own Soil-arium

This week is all about soil and the importance of composting.

Do you compost at home? Have you ever thought about what is actually happening in your compost? Christine teaches us how to make our own soil-arium at home so we can observe and track the decomposition process that occurs when we compost organic matter turning it into nutrient-rich soil for our plants! Join us!

Why is Composting so Important?

Composting is an important process that recycles the nutrients in food - to be reused to grow more food. When we throw our food scraps into the garbage we lose those nutrients forever. Not only are we throwing away very important nutrients, but food scraps in the landfill release something called methane gas which contributes to global warming. By composting, we are saving valuable nutrients that we can use to grow more nutritious food - and we are also helping to protect our environment.

A great example of composting takes place on the forest floor! We don’t see people going to clean up all the fallen leaves, trees, branches, etc. This is because decomposers (living organisms) such as worms, fungi, beetles, and bacteria help break down these materials. By creating a soil-arium or compost, we are building a home for decomposers to do their important work! Even if you can’t see these organisms, they are there and busy helping to create soil for us. It is important we give these living organisms the things they need to survive!

Learning Objectives

  • Be able to explain what composting is and why it is important

  • Understand how to start a basic composting system

  • Learn about the life cycle of food

Activity Preparation

Items needed:

Set-up

Little to no set-up is required. Find a sunny windowsill spot where the soil-arium can be observed throughout the composting process (approximately 12 weeks).

Activity Instructions

1. Add a small handful of dirt to the bottom of your glass jar.

add dirt.png

2. Add a layer of shredded newspaper or cardboard.

3. Add a layer of kitchen scraps.

4. Add a layer of organic yard debris.

5. Repeat this order of layering until your jar is almost full to the top.

Soil-arium still.png

6. Add your water and then cap the top with holes poked in the lid.

7. Draw a line to mark the top of your original composting pile.

8. Add a little bit of water as needed, and stir daily to provide oxygen and move around the bacteria so they can find new food.

9. Every two weeks, draw a line to mark the new top as the composting process continues.

Observing Changes in Your Soil-Arium

The composting process will be different with each person’s soil-arium. The composting process can take several months, so we can make some observations during this time.

Measuring/Tracking Compost:

  1. On Day 1 of your soil-arium, mark and measure the height from the bottom of the container to the top of the pile of compost.

  2. Every week or two, you can re-measure, and note changes in the height of the compost as things decompose.

  3. How much water are you adding?

  4. How big are the pieces of food scraps that you have added to your compost? We can help speed up the composting process by breaking down what we add into smaller pieces.

  5. How heavy is your soil-arium?

  6. You may want to try making some predictions of what may happen in your soil-arium over time.

Making Observations of the Composting Process:

  1. You may want to try creating a journal to record and keep track of what you have added to your soil-arium.

  2. What changes are you noticing with your soil-arium? After a few weeks, can you still see and identify all the food scraps that you have added? 

  3. Have some of the food scraps decomposed more quickly than others?

  4. Can you see any flies, worms, or other insects in your soil-arium?

  5. How does your soil-arium smell? Adding more dry browns to the top layer in the Soil-arium will help it from getting stinky! Adding more browns will slow down the composting process, but it also helps from ‘drowning’ the compost with too much moisture - which can kill the living organisms responsible for composting.

  6. How does the texture of it feel in your hand? Remember, healthy compost should have a similar moisture to a wrung out sponge.

Compost Recipe

Remember that your compost is a living thing, and it requires our love and attention to make it thrive - just like a pet! It needs a balanced diet of browns and greens, air, and water (as needed). 

Now, it is your turn to go find some browns and greens to add to your soil-arium!

Growing Chefs! at Home: Lesson 7

Growing Chefs! staff member Christine is here to talk to you about the basics of soil and composting and why they are important for growing our food, and Chef Brennen from our volunteer team brings us into his backyard to introduce us to some of his friends.

Plus we’ve got two fun science experiments you can try at home to explore more about soil and compost!

Lesson 7 compost.jpg

Getting ready for exploring soil and composting - For this lesson, all you need is is your thinking cap!

Today we will talk about Soil and Composting. This is an introductory video to understanding what soil is, and why composting is so important. Not only for environmental reasons, but also for the added benefits of using compost as a delicious food for your plants at home. 

Now we know a little more about what components make up healthy soil, what compost is and why composting is important!

Below we have a great video for you with another of our incredible classroom volunteers - Chef Brennen! Brennen brings us into his backyard and introduces us to his worm farm!

Our Spring program is aimed at kids in grades 1, 2, and 3, but folks of all ages will likely learn something new! If it’s possible for an adult to be around during these lessons, that would be great. Our growing chefs might need their help a couple of times. We will let you know in the video when there are good moments to offer some help.

Related Activities:

Understanding Compost - Build your own at home Soil-arium and explore how compost breaks down creating nutrient-rich soil for our plants. Full activity outline and video found here.

Identifying Soil Type - Become a soil-ologist and examine the soil in your own yard and garden. Learn about the different components of soil and find out what grows best in each type of soil. Full activity outline and instructional video found here.

You can find this new online content here on our website, and we are making announcements about it on our social media (Facebook, Twitter, Instagram). 

Thank you so much for your patience while we reinvent ourselves and our programs.

How Plants Grow - Celery Experiment

This week, we are learning about how plants grow and how all the parts of the plant contribute to their growth. Here is a fun and easy way to demonstrate how the stem (also called a stalk or leaf stalk) of a celery plant carries water and nutrients all the way from its roots up to the leaves of even the tallest of plants.

You Will Need:

  • A celery stalk (or two) with leaves still attached

  • A cup or mason jar

  • Water 

  • Food Colouring (red or blue work best for this experiment)

Instructions: 

1) Cut the bottom inch off on the celery stalk.

2) Fill the jar about halfway up with water.

3) Add 5 or so drops of food colouring into the water (a few more drops if you have a larger vessel with more water).

4) Place the jar in a sunny location and wait 2 hours.

5) Observe the celery stalks. You may see the food colouring working its way up the stalk (moving through the xylem of the celery plant). Xylem are tiny tubes in the plant (like veins in our bodies) that move water from the roots to the leaves in a plant. Because we have added food colouring to the water, you should be able to see the colour as the water moves up the stalk toward the leaves.

6) Break off a small piece of the leaf stalk, you may see food colouring in the xylem.

Celery Photo 4.jpg

7) Wait overnight. In the morning, observe your celery stalks and leaves. Did the food colouring make its way to the celery leaves?

Celery Photo 5.jpg

Discussion Questions:

What happens to the water once it reaches the leaves?

  • Some of the water is used by the plant’s leaves to make food through the process of Photosynthesis. Sunlight provides the energy for plants to make carbon dioxide (what we breathe out) and water into sugars (food) and oxygen (what we breathe in).

  • Sometimes you might notice droplets of water on the ends of the leaves of a plant, this often is a good indicator for houseplants that the soil is very moist. When a plant has more water than it needs the leaves release some of this water to be evaporated into the air from its leaves. This process is called Transpiration and can actually help the plant take up more water.

How is the water and food colouring moving up the plant?

  • The process of water moving from roots to leaves is called Capillary Action. Water molecules like to stick together and to the walls of the tubes that make up what is called a plant’s xylem. These tubes run from the plant’s roots, up the stem, and all the way up to their leaves. As water then evaporates from the leaves it pulls up more water from the roots helping water to move up the plant.

This week we’ve been talking about and learning the six different parts of a plant. In this activity, we learned about how the roots, stem, and leaves of a plant all work together to help it get the water it needs using a celery stem. When we eat celery we are eating the stem of the plant (also called a stalk or leaf stalk) of the celery plant.

  • Think about what other stems, roots, flowers, seeds and leaves we eat on a regular basis. You may never look at your favourite vegetables in the same way! 

Expansion Activity:

Try using a large celery stalk and splitting it from the bottom to about halfway up the stalk. Place one half of the stalk into a container with blue food colouring and the other half into a container with red food colouring. What do you think will happen when the colour from each reaches the part of the stalk where the two halves are joined? What will happen when the colours reach the leaves?

Don’t forget to wrap up this experiment by enjoying a delicious celery snack. That’s right - this celery is still edible and yummy, so don’t let it go to waste!