

Welcome back to another week of Gardening Q&A’s with the Vancouver Master Gardeners. This is the second round in a series of six, that gives us the opportunity to tap into the wealth of knowledge of Master Gardeners in our community.
Thank you for sending in all of your questions! We received so many that we will be splitting the responses into two separate posts this week - so stay tuned! These Gardening Q&A’s are focusing on Successful Summer Harvests & Winter Crop Planning - send in your questions today to be featured in our next blog post! Now, let’s dig in, and learn together!
Question from Karen in Vancouver:
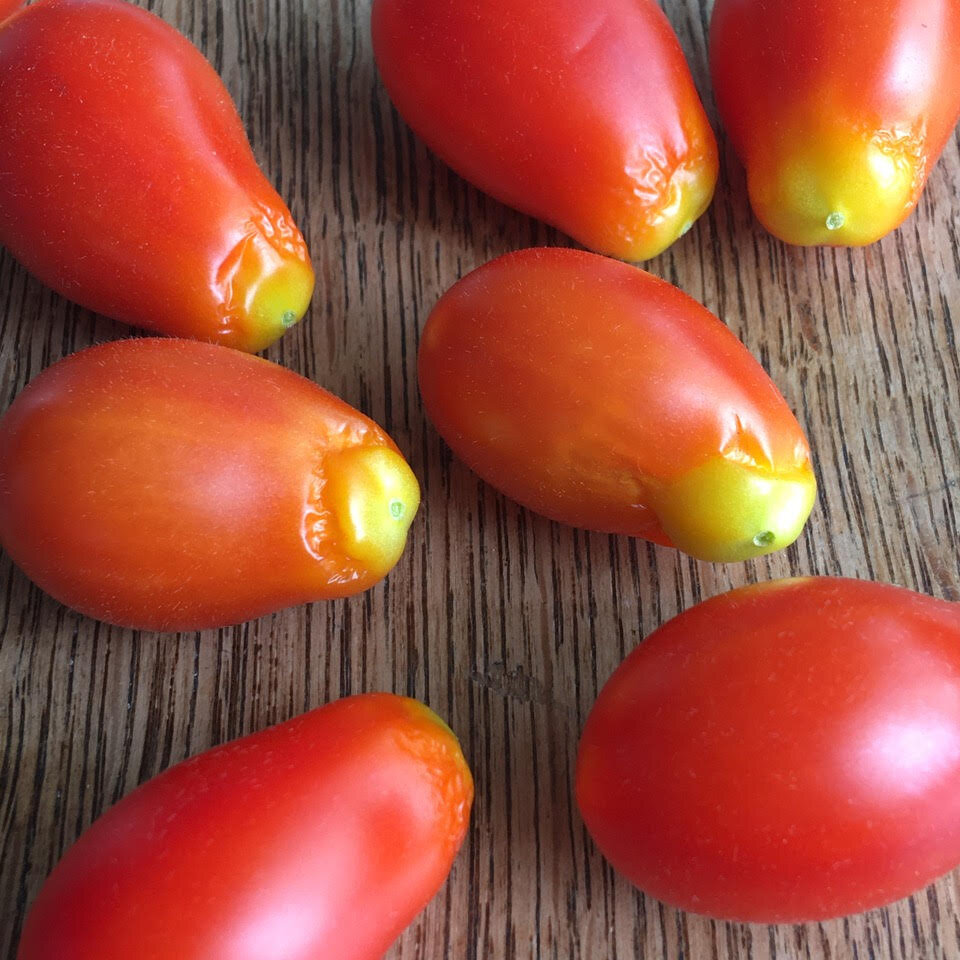
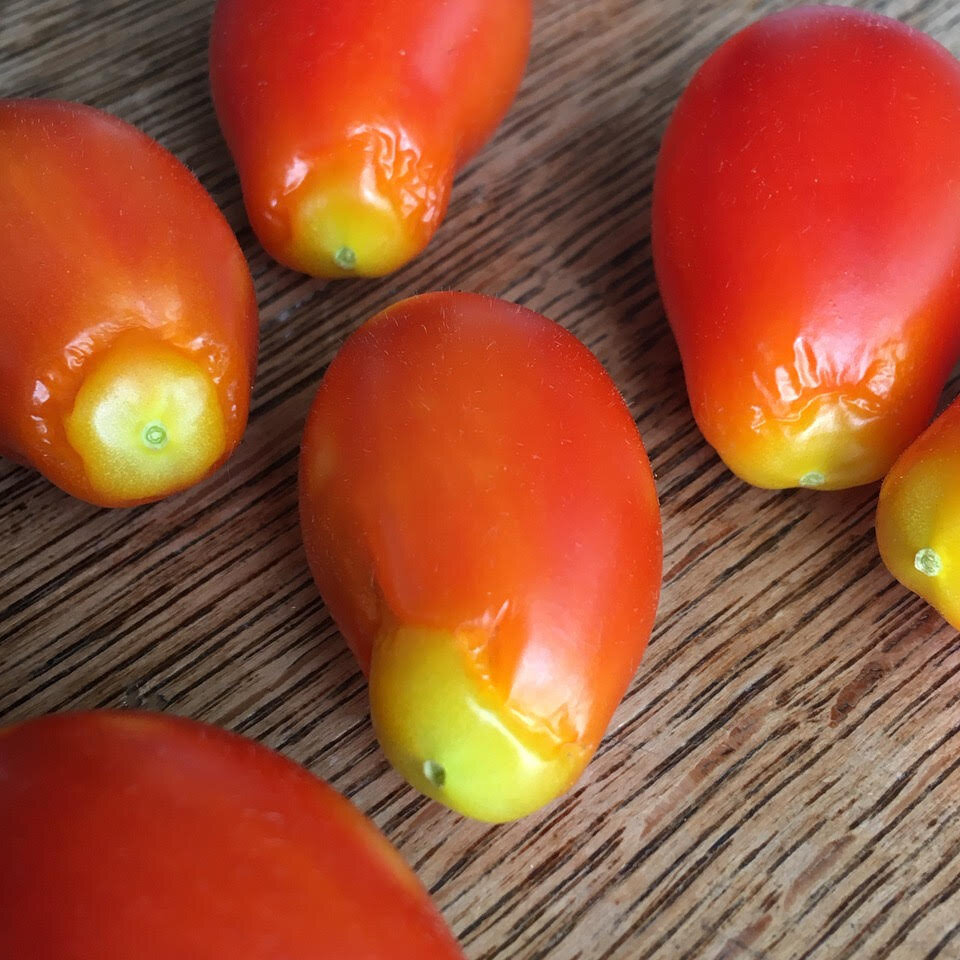
What’s happening to my tomatoes? Any idea what is causing this disfigurement?
Answer:
Great to see you growing tomatoes as they are not the easiest to grow in our climate! Tomatoes like warmth but not excessive heat. It looks like your tomatoes have yellow/green shoulders disorder. It is not exactly clear what causes it, but in most cases, it’s due to extreme temperature change of unusually hot weather (over 32 degrees Celsius) which we did get at the end of July. If the fruit is exposed to strong sunlight and intense heat, this disorder can occur. If you’re growing these in a greenhouse, you have to be particularly mindful of excessive heat as the temperature in a greenhouse can increase quickly.
One way to prevent yellow/green shoulder is to ensure that you’re not over-pruning your tomatoes and taking all the stems off. The leaves provide necessary shade during these hot periods and also give your tomatoes better flavour. Pruning off “suckers” between the main stem and the leaf stem is fine though. A potassium deficiency in your soil can also cause this disorder, so you may want to consider getting your soil tested. Potassium is a primary plant nutrient which helps to develop strong roots and stems. It is unlikely you have a root issue, as the ripe part of the fruit looks great! Just cut that yellow part off and they’ll be good to eat.
Digging in with the Kids - Growing Chefs Integration Idea:
Last week we talked about getting the kids involved with picking suckers off of tomato plants. Check it out here - but good to note that in this case, we must be careful to not over prune! Another fun activity which can be a perfect fit for unsightly fruit and vegetables, is to think about different preserving methods that we could use to transform our food, and keep it longer. Stay tuned for our Growing Chefs at Home program this Fall, we will be covering the topic of ‘Food Preservation’ - canned tomato sauce anyone?
Question from Susan in North Vancouver:
Can I plant peas in the fall?
Answer:
No, unfortunately not in our area. While they grow best in cool, humid weather, temperatures below 10°C will kill the plants. Of course, if you have a greenhouse with cool but not freezing temperatures, they would grow there. To quote from Linda Gilkeson’s Newsletter April 30, 2018:
“You can sow peas every month through June to ensure fresh peas into October. I start my early plantings of peas in vermiculite indoors to avoid the main egg-laying period of pea leaf weevil, which is now common in my area. The weevils have one generation a year and only lay their eggs in the spring. Peas planted later than mid-May after the egg laying period are done generally to escape damage from the weevil larvae, which eat the nitrogen fixing nodules on the roots. Pea attacked by weevil larvae can’t make their own nitrogen, but still grow well if the soil is enriched with nitrogen sources, such as fish compost, blood meal, alfalfa meal, etc. And while I am on peas, this is a reminder to sow varieties resistant to enation mosaic virus (EMV) for peas that will be present in your garden from mid-summer onward. The virus is spread by aphids and usually shows up in mid-summer. So, to summarize my pea planting plans: In March and April, I plant any varieties I want, but start them indoors and compensate for weevil damage by enriching the planting bed with nitrogen amendments. For peas sown in May and June, I choose EMV resistant varieties, sow them directly in the garden and don’t add nitrogen to the soil since these plants can make their own.”
Question from Susan in North Vancouver:
What soil preparation do I need for winter vegetables?
Answer:
Growing crops in permanent beds is popular in this region for good reason. Compared to a garden plot that is tilled from edge to edge every year, there are several advantages to permanent beds: Once beds are laid out, pathways and growing areas don’t change over the years. Only planted areas need to be fertilized, watered and weeded which saves work and resources. Soil in beds doesn’t become compacted because you don’t walk on it. It can be easier to control weeds between beds when the pathways are permanent. Permanent pathways can provide a refuge for beneficial insects that eat plant pests.
If you know that your soil is balanced, healthy and has supported summer crops it’s recommended that the soil is left relatively un-worked. Don’t cultivate beds deeply as this destroys soil structure and brings the ‘weed bank’ to the surface (the countless dormant weed seeds in the ground). If you’re unsure about the qualities of your soil, it’s advisable to have your soil tested by a lab (DIY tests are often inaccurate).
If you’ve not done so this year, add agricultural lime (ground up limestone) or dolomitic lime to raise soil pH above 6.5. The exception to not cultivating deeply is that lime needs to be worked deeply into the soil. But it should only be needed if the soil is particularly acidic. Veggie beds need a minimum of 30 cm soil depth; 45 cm is better. Winter veg needs well-drained soil that won’t get waterlogged over our wet winters. Plants suffer if they are planted where water stands for more than 24 hours. While this isn’t such a problem in summer as soil has time to dry out, drainage needs to be improved to channel water away in winter.
Easy solutions are to mound up the soil or build raised beds high enough to raise the root zone above the water line. Adding organic matter to soils provides food for the soil microbiome and this, in turn, releases nutrients to plants.
Sources of organic matter include homemade and commercial compost (especially the fish plus wood waste composts) and leaf mold.
When you harvest summer veg, cut the stems off at the soil line and leave their roots in the ground to decompose and return nutrients to the soil. Adding organic matter is the single most effective strategy for improving soil. Apply the compost to the top of the soil and work it in very lightly and gently, going no deeper than about 10 cm, with a garden fork.
To summarize: to prep soil for winter veg, when your bed(s) are empty in late summer add compost, a complete organic fertilizer and lime (if needed). When plants are in the ground, start mulching. This is not optional! Mulches keep the shoulders of root crops from freezing and they insulate the soil. Use ‘fluffy’ mulches such as whole leaves, bracken fern or straw.
Digging in with the Kids - Growing Chefs Integration Idea:
Preparing soil for winter vegetable crops is a great opportunity for kids to get involved by having them create their own compost to add nutrients and food into the soil. If you grew crops in the Spring and Summer, your soil worked so hard producing lovely food for us, and now it is our time to give back! Have the kids check out our lesson on Soil and Compost - learn how to make your own plant food by ‘Creating Your Own Soil-Arium’ and more videos on soil science, and different composting methods here.

Question from Selma in Vancouver:
What is a good cover crop for a small veggie gardening space? Can I use a cover crop in between/with my winter vegetables? When is a good time to start with a cover crop?
Answer from Jennifer:
Cover crops are mainly used for commercial vegetable gardens. For small veggie gardens, Linda Gilkeson, our local veggie expert, recommends "interplanting" instead. With interplanting you just plant other vegetables in these open spaces. For example, lettuce is good for this as it can be tucked in just about anywhere between Brussels sprout, winter cauliflower or winter broccoli. Right now you could plant winter harvest vegetables such as winter greens (kale, spinach, chard.)
West Coast Seeds publishes a free magazine on ‘Harvesting Winter Vegetables’ which is available at most local nurseries if you would like specific information on what to plant and their growing schedules. Mixing plants together is actually good for your garden as it creates biodiversity, attracts more beneficial insects resulting in less disease and a more sustainable garden. Even mixing in flowers is good, particularly if they are pollinators. You can use cover crops if you want but they rob the soil of valuable nutrients that are best used for your vegetables. If you're concerned about weeds, I would recommend a light mulch such as dried leaves or straw that can be used all year round. Mulch also retains moisture, protects the soil from sunscald and it's easy to brush it aside when you need to plant something or to topdress your garden. Mulch will also decompose over time feeding the soil so you will need to keep replenishing it. I hope you will consider interplanting and mulching instead. Interplanting or dense planting, using every available space makes your garden more productive. Timing for interplanting depends on your available space. Once you have harvested one vegetable, you can fill that space with seedlings of lettuce, kale, Chinese cabbage, leaf beet and other vegetables you may have already started in your nursery bed. Linda Gilkeson provides specific information on interplanting on p43 of her book "Backyard Bounty", organic vegetable gardening in the Pacific Northwest. Good luck with your gardening and I hope you will find this approach rewarding.
Digging in with the Kids - Growing Chefs Integration Idea:
Have the kids help collect leaves in the fall around the yard to use as mulch to protect the moisture in your soil, and feed your soil as they decompose. Alternatively, planting a winter pollinator garden with kids is a great way to learn about the importance of pollinators in our food system. Check out our blog post on pollinator gardens here.
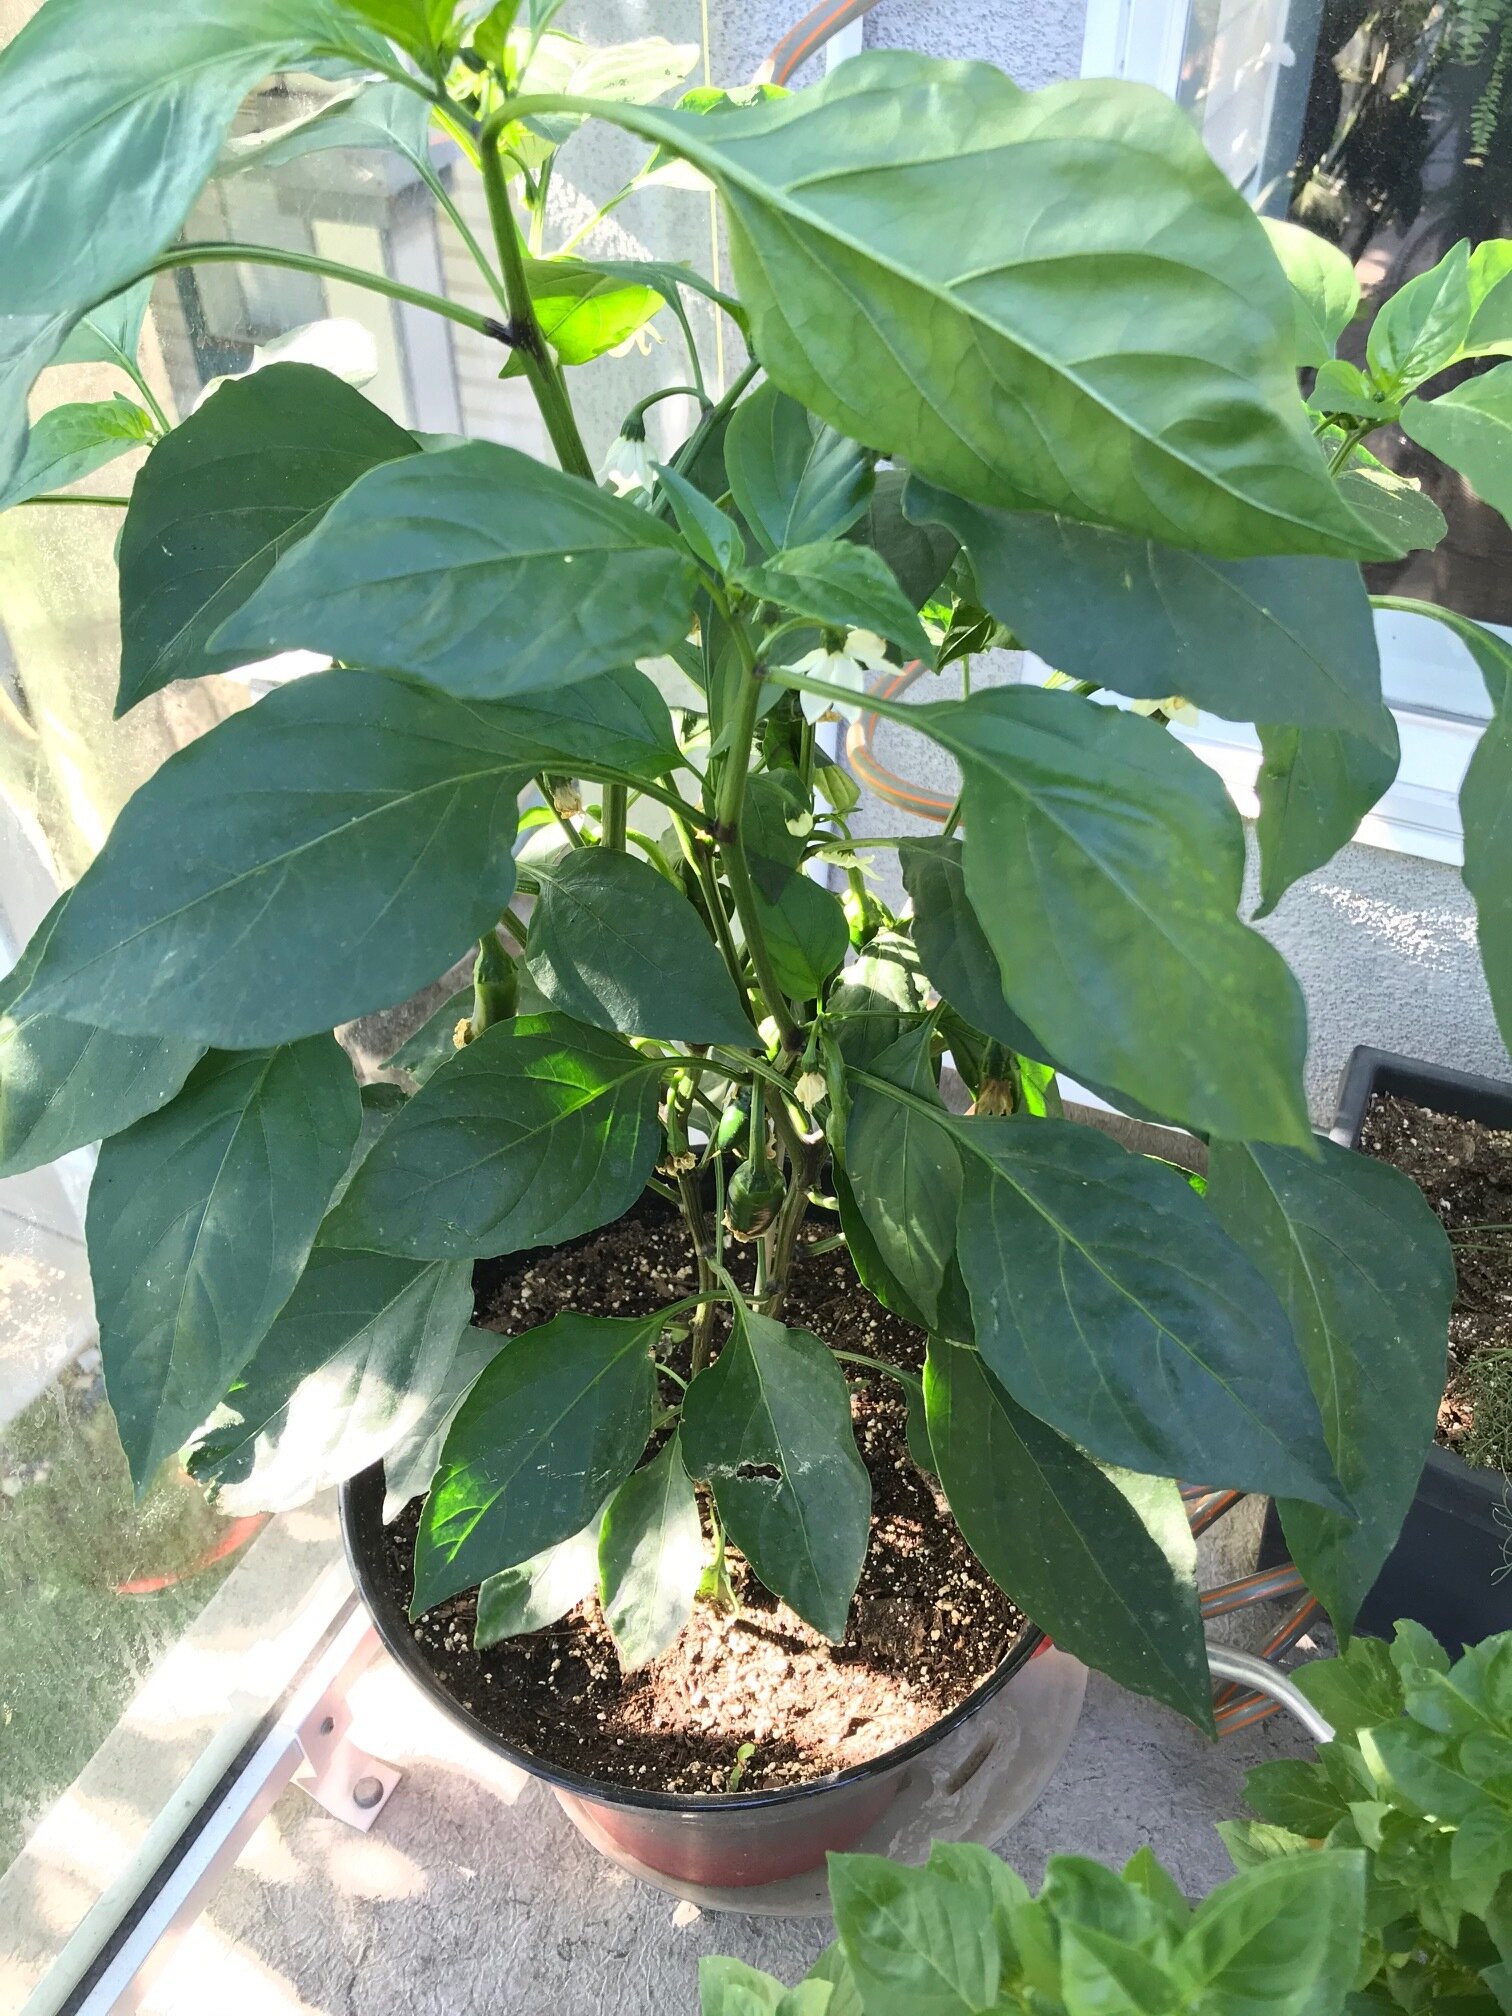
Question from Llew in Calgary:
When do you harvest sriracha peppers? What colour?
Answer:
All peppers (Capsicum annuum) love heat and generally require a long warm season to ripen. Sriracha is actually a sauce made up of various types of chilli peppers. There is no pepper called “sriracha” unless the one you have is one that has been created through hybridization of peppers to make a commercially named pepper called “sriracha.” A “hot” pepper can be harvested when the fruit is firm. If you wait until the pepper changes colour (red, yellow, brown, purple) the vitamin-C content increases dramatically. Even if you harvest before the colour of the fruit is not what it should be (but make sure it’s firm), it will continue to ripen and turn red, yellow, brown, purple or stay green! If you pick the fruit when they are green you will likely get a larger harvest. If it’s getting late in the season, and before the first frost, you can pull out the entire plant/bush, hang it upside down in a dry, warm place or put them on trays to dry out.
Digging in with the Kids - Growing Chefs Integration Idea:
Speaking of peppers, invite your kids to be the chef and let them determine the spice level! This template will help you pick ingredients and write a recipe for your very own stir fry and stir fry sauce.