

We are so grateful for the friendship and knowledge that students from the Vancouver Master Gardeners are providing our community with, to support in successfully growing food.
This is the first in our series of six Gardening Q&A’s focused on Successful Summer Harvests & Winter Crop Planning, brought to you in partnership with the Vancouver Master Gardeners and Growing Chefs Let’s dig in, and learn together!
Question from Rachel in Vancouver:
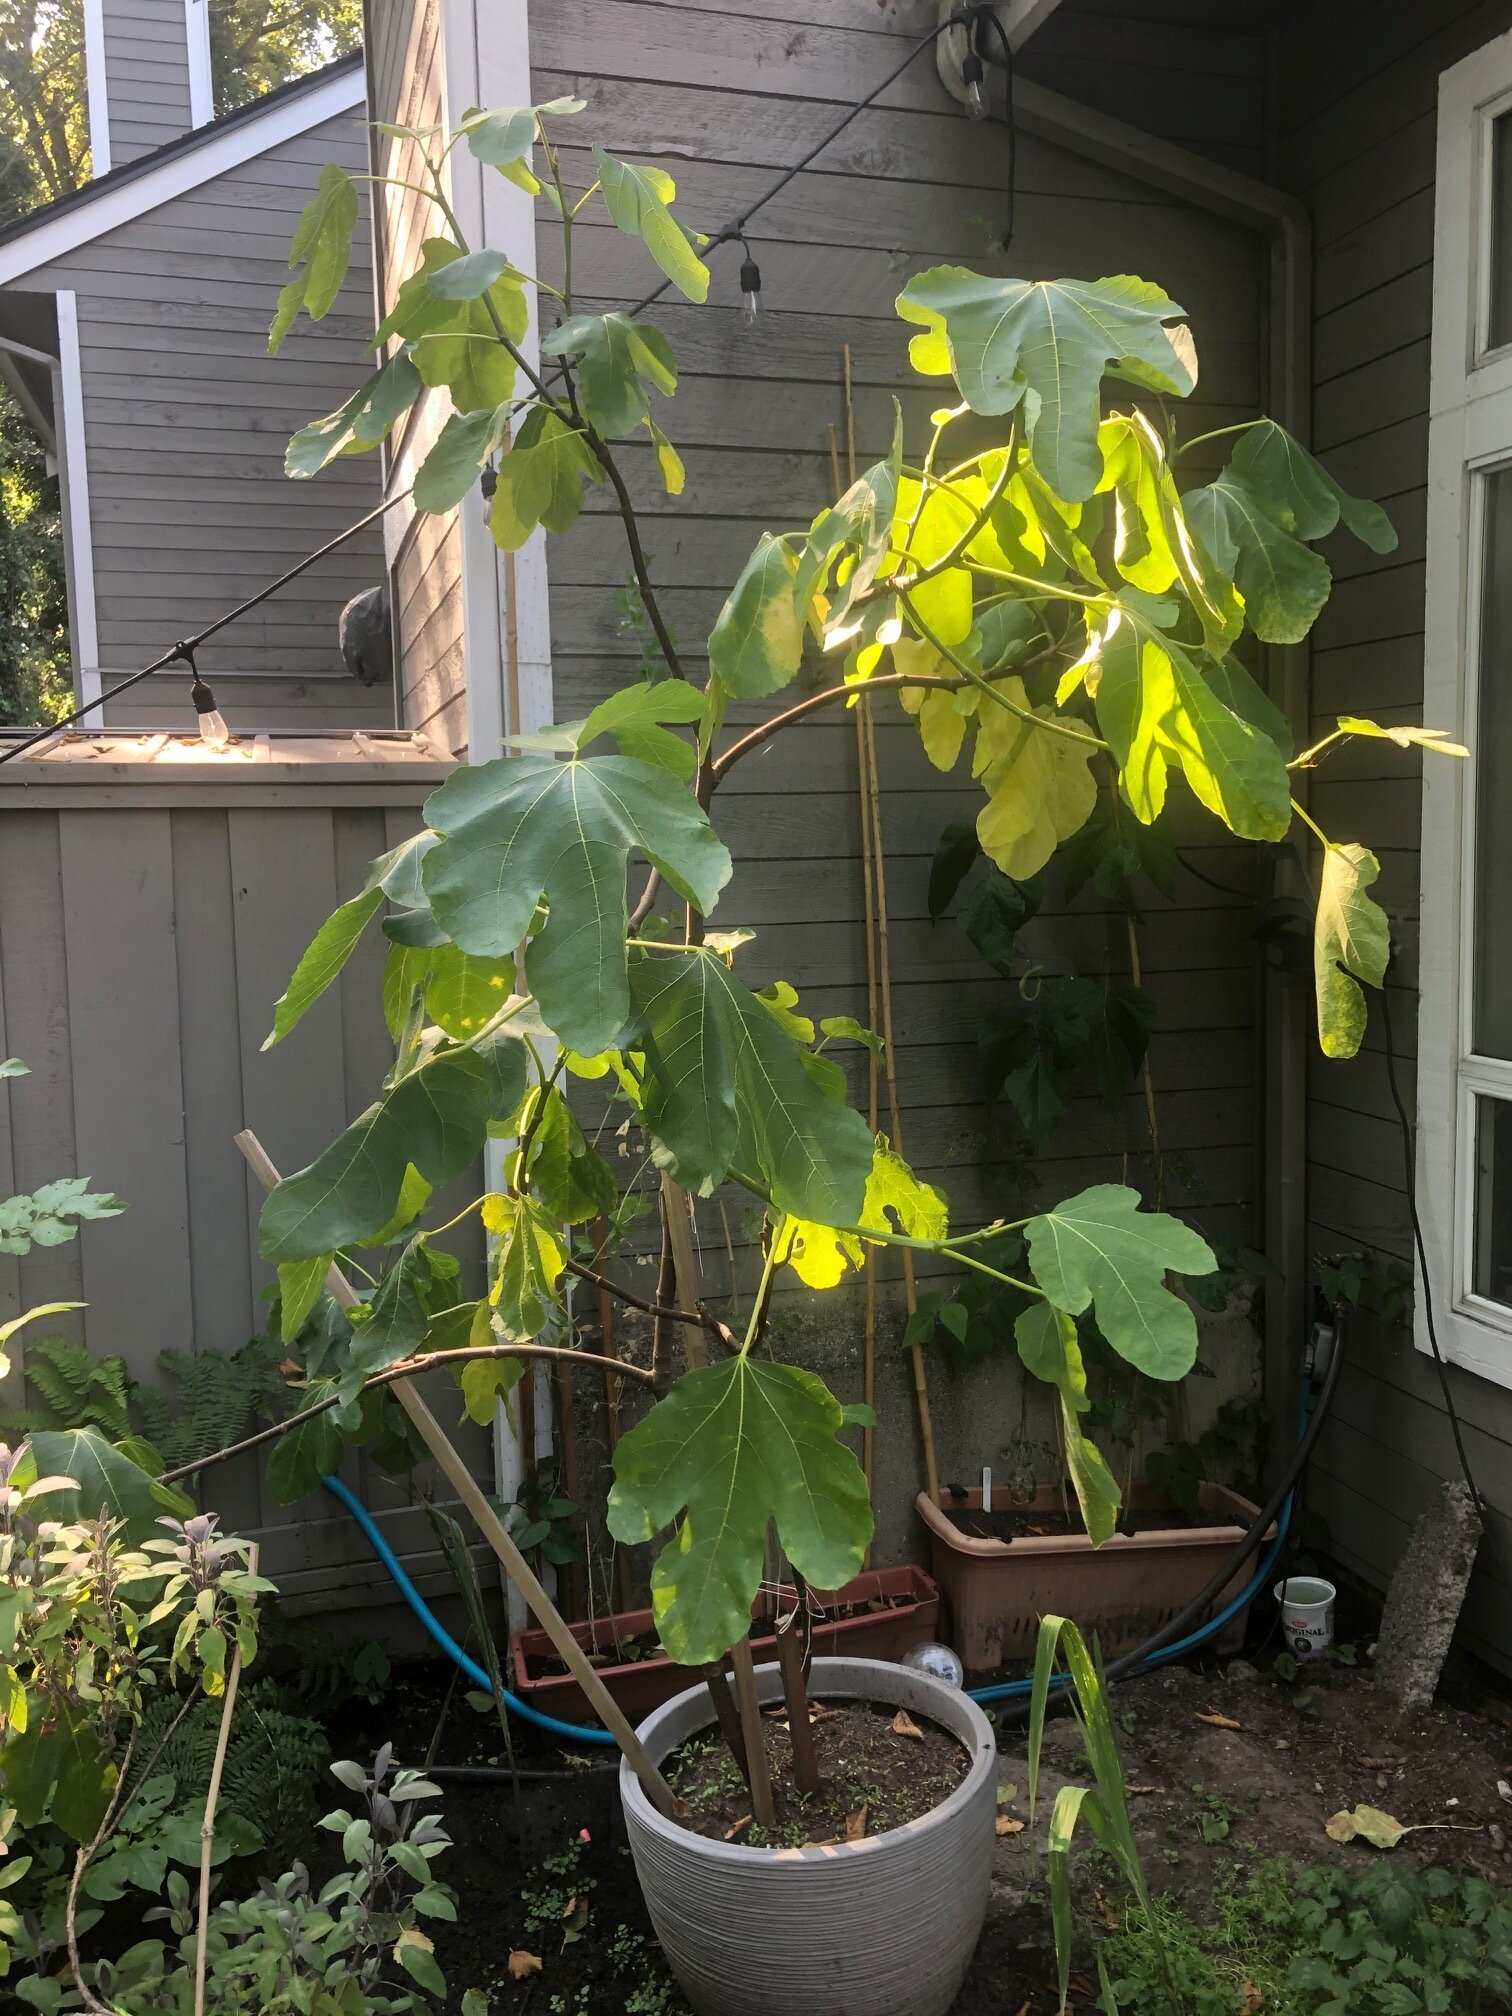
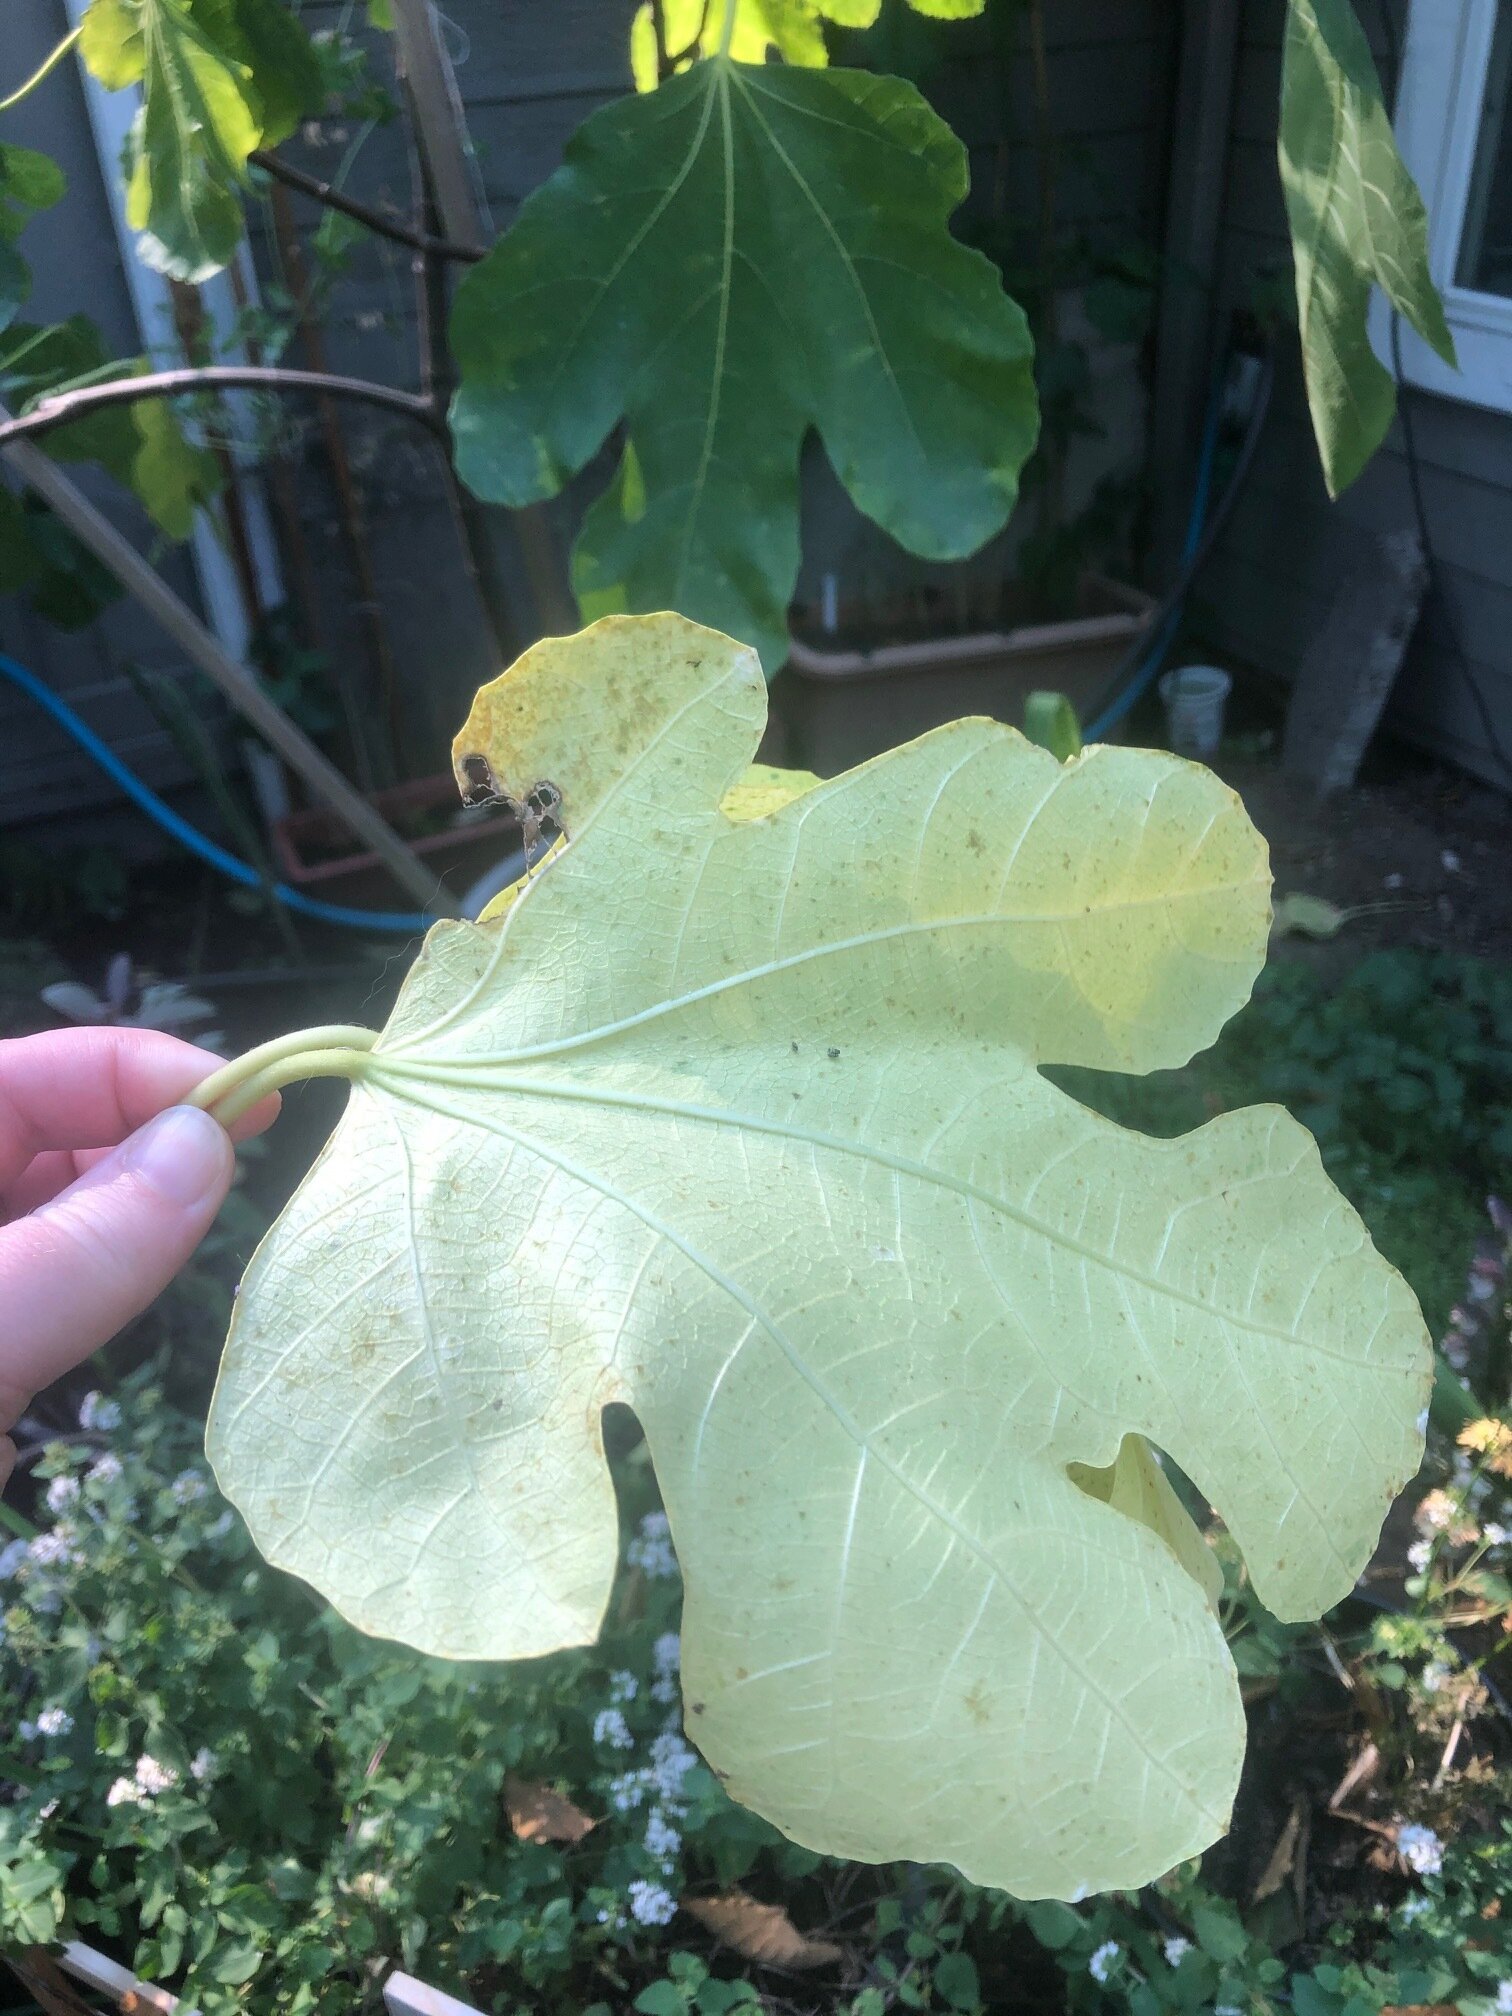
We have a fig tree we grew from a cutting we received four years ago. It is currently nine feet tall and has a handful of figs ripening. In the last couple of weeks, the leaves have started to yellow. We removed them but wondered if that was a mistake. What is happening?
Answer from Sally:
The key to having a good crop of figs in our area is to choose the right variety, as some are better-suited to growing in the Pacific Northwest (example, Desert King, Peter’s Honey, and Brown Turkey are reliable). In warm climates figs crop twice, but if grown outdoors here we can only expect to get one crop a year. Ficus carica – edible fig – is native to rocky, sunny Mediterranean and western Asian sites. They like a lot of warmth, full sun (to part shade), and to have their roots somewhat constricted. It’s good to see this one growing in a pot – that works well because it mimics the constrained, rocky conditions they like. They like a somewhat alkaline soil (pH 6 – 7.8) but the soil doesn’t have to be rich.
Figs stress easily, so changes to lighting, humidity, or temperature need to be done gradually or they may drop leaves. They do not like the cold and will die back. It’s possible our rather cool spring and early summer have affected it, leading to yellowing leaves. Removing a few yellow leaves won’t hurt. The plant overall looks a bit droopy. In our area the tree needs to receive at least six hours sun a day and ideally be positioned against a south-facing wall to maximize the heat. Since it’s container grown, it needs regular watering- it doesn’t like erratic watering or being allowed to dry out - and feeding.
In spring and summer feed it every week, alternating between a high potassium fertilizer such as tomato food and a general-purpose fertilizer. Mulching around the base with 2.5 – 5 cm of compost will help to keep the soil in the pot more evenly moist. Conversely, figs don’t like to be overwatered. Check the soil 3 cm below the surface. If it’s dry to the touch then it’s time to water. Water deeply until plenty of water comes out the bottom of the pot. Don’t let it sit in water. In winter when they’re dormant, figs need to be protected from the cold either by moving the container to a frost-free place (garage or other sheltered spot), and covering the pot with bubble wrap for insulation. If it can’t be moved then the bare branches should be covered with a few layers of horticultural fleece. The leaf doesn’t appear to show signs of pests such as scale, aphids, mealy bugs or spider mites. The chewed corner and specking on the underside are not indicative of serious problems. The chewing is possibly caterpillar. If it’s only in small areas it shouldn’t be a problem. So, check sun exposure, heat, watering, and fertilizing.
Digging in with the Kids - Growing Chefs Integration Idea:
Invite the kids in your life to help test how dry the soil in your garden is! As Sally mentioned, if you stick your figure in the soil 3cm deep, and it is dry - that means that it is time for more water. This is a great way to engage kids in the garden and help them identify when more water is needed. This can change all the time based on our weather, and when they have a fun trick to use, they often feel more ownership over caring for the garden. Have them stick their finger in up to their first, or second knuckle - noting that the surface of the dirt may dry up before the layers beneath. Let them know that when growing plants, what we see above the surface is only part of what is going on! Often our soil may be dry on top, but have plenty of moisture below the surface - and this trick can help us from overwatering. Have the kids test how dry the soil is with all of your plants, and note how there are changes amongst different containers, and areas of your garden based on their environment and exposure to sun and heat.
Question from Sevan in Pemberton:
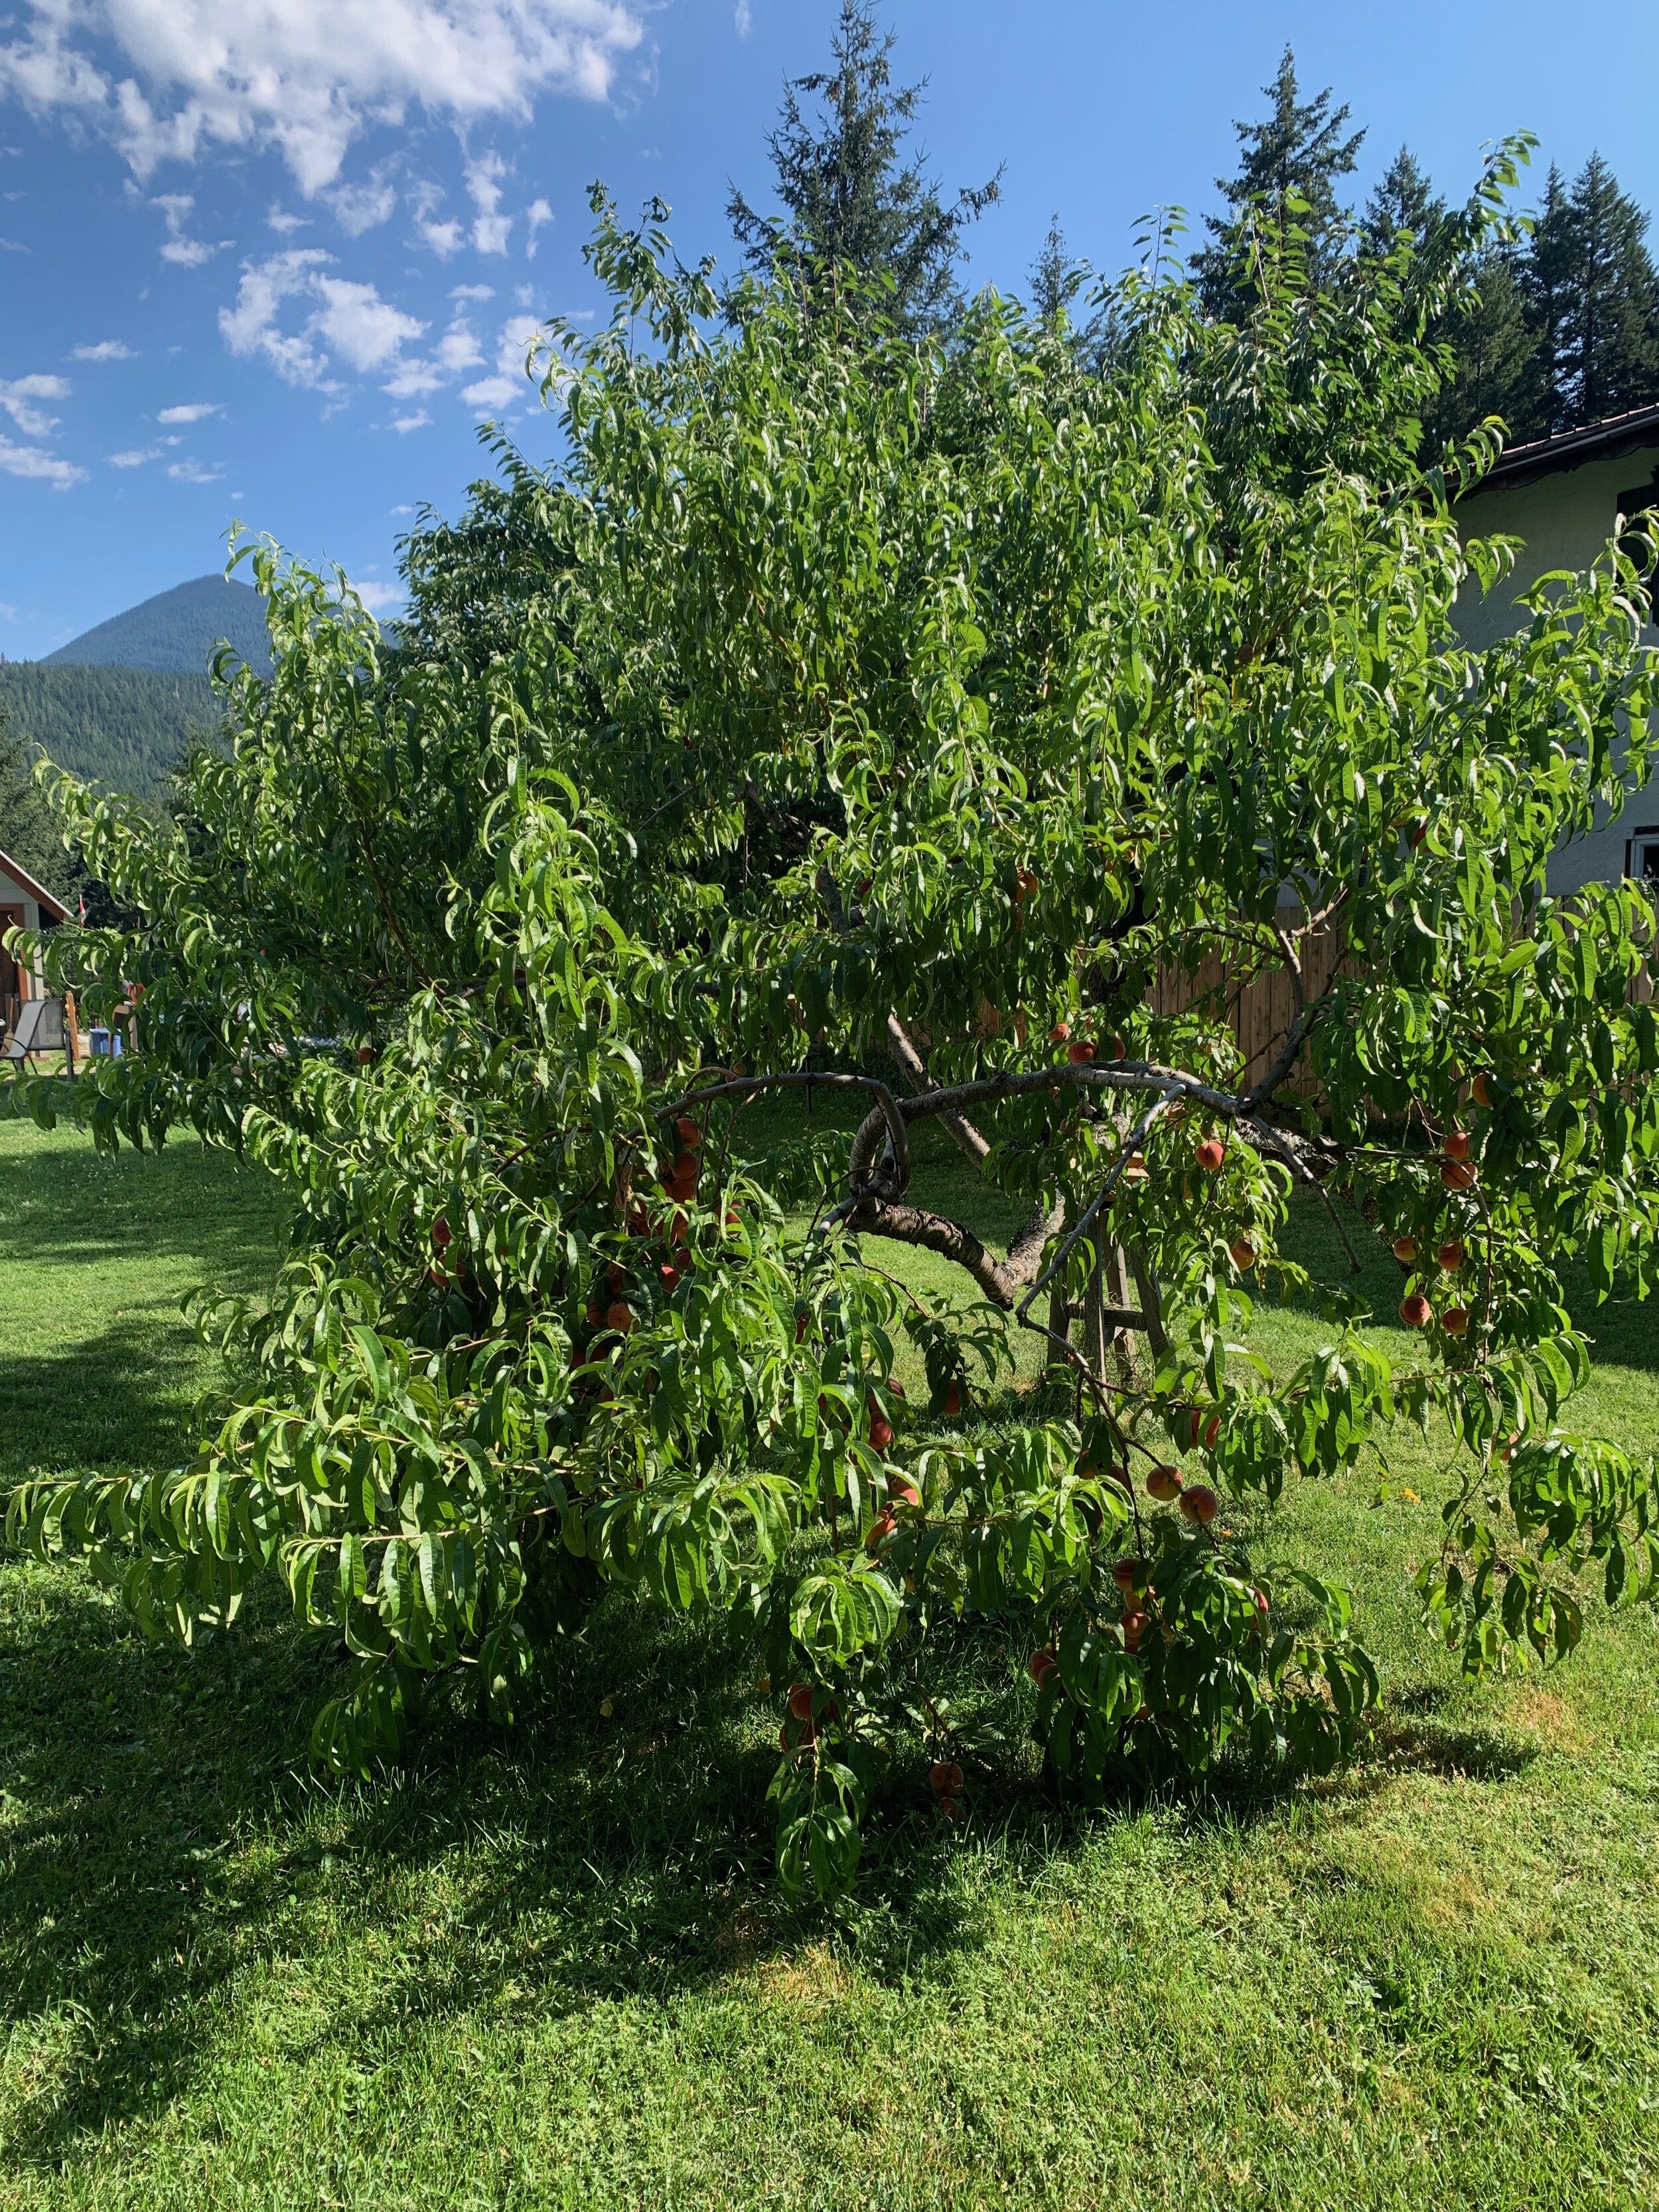
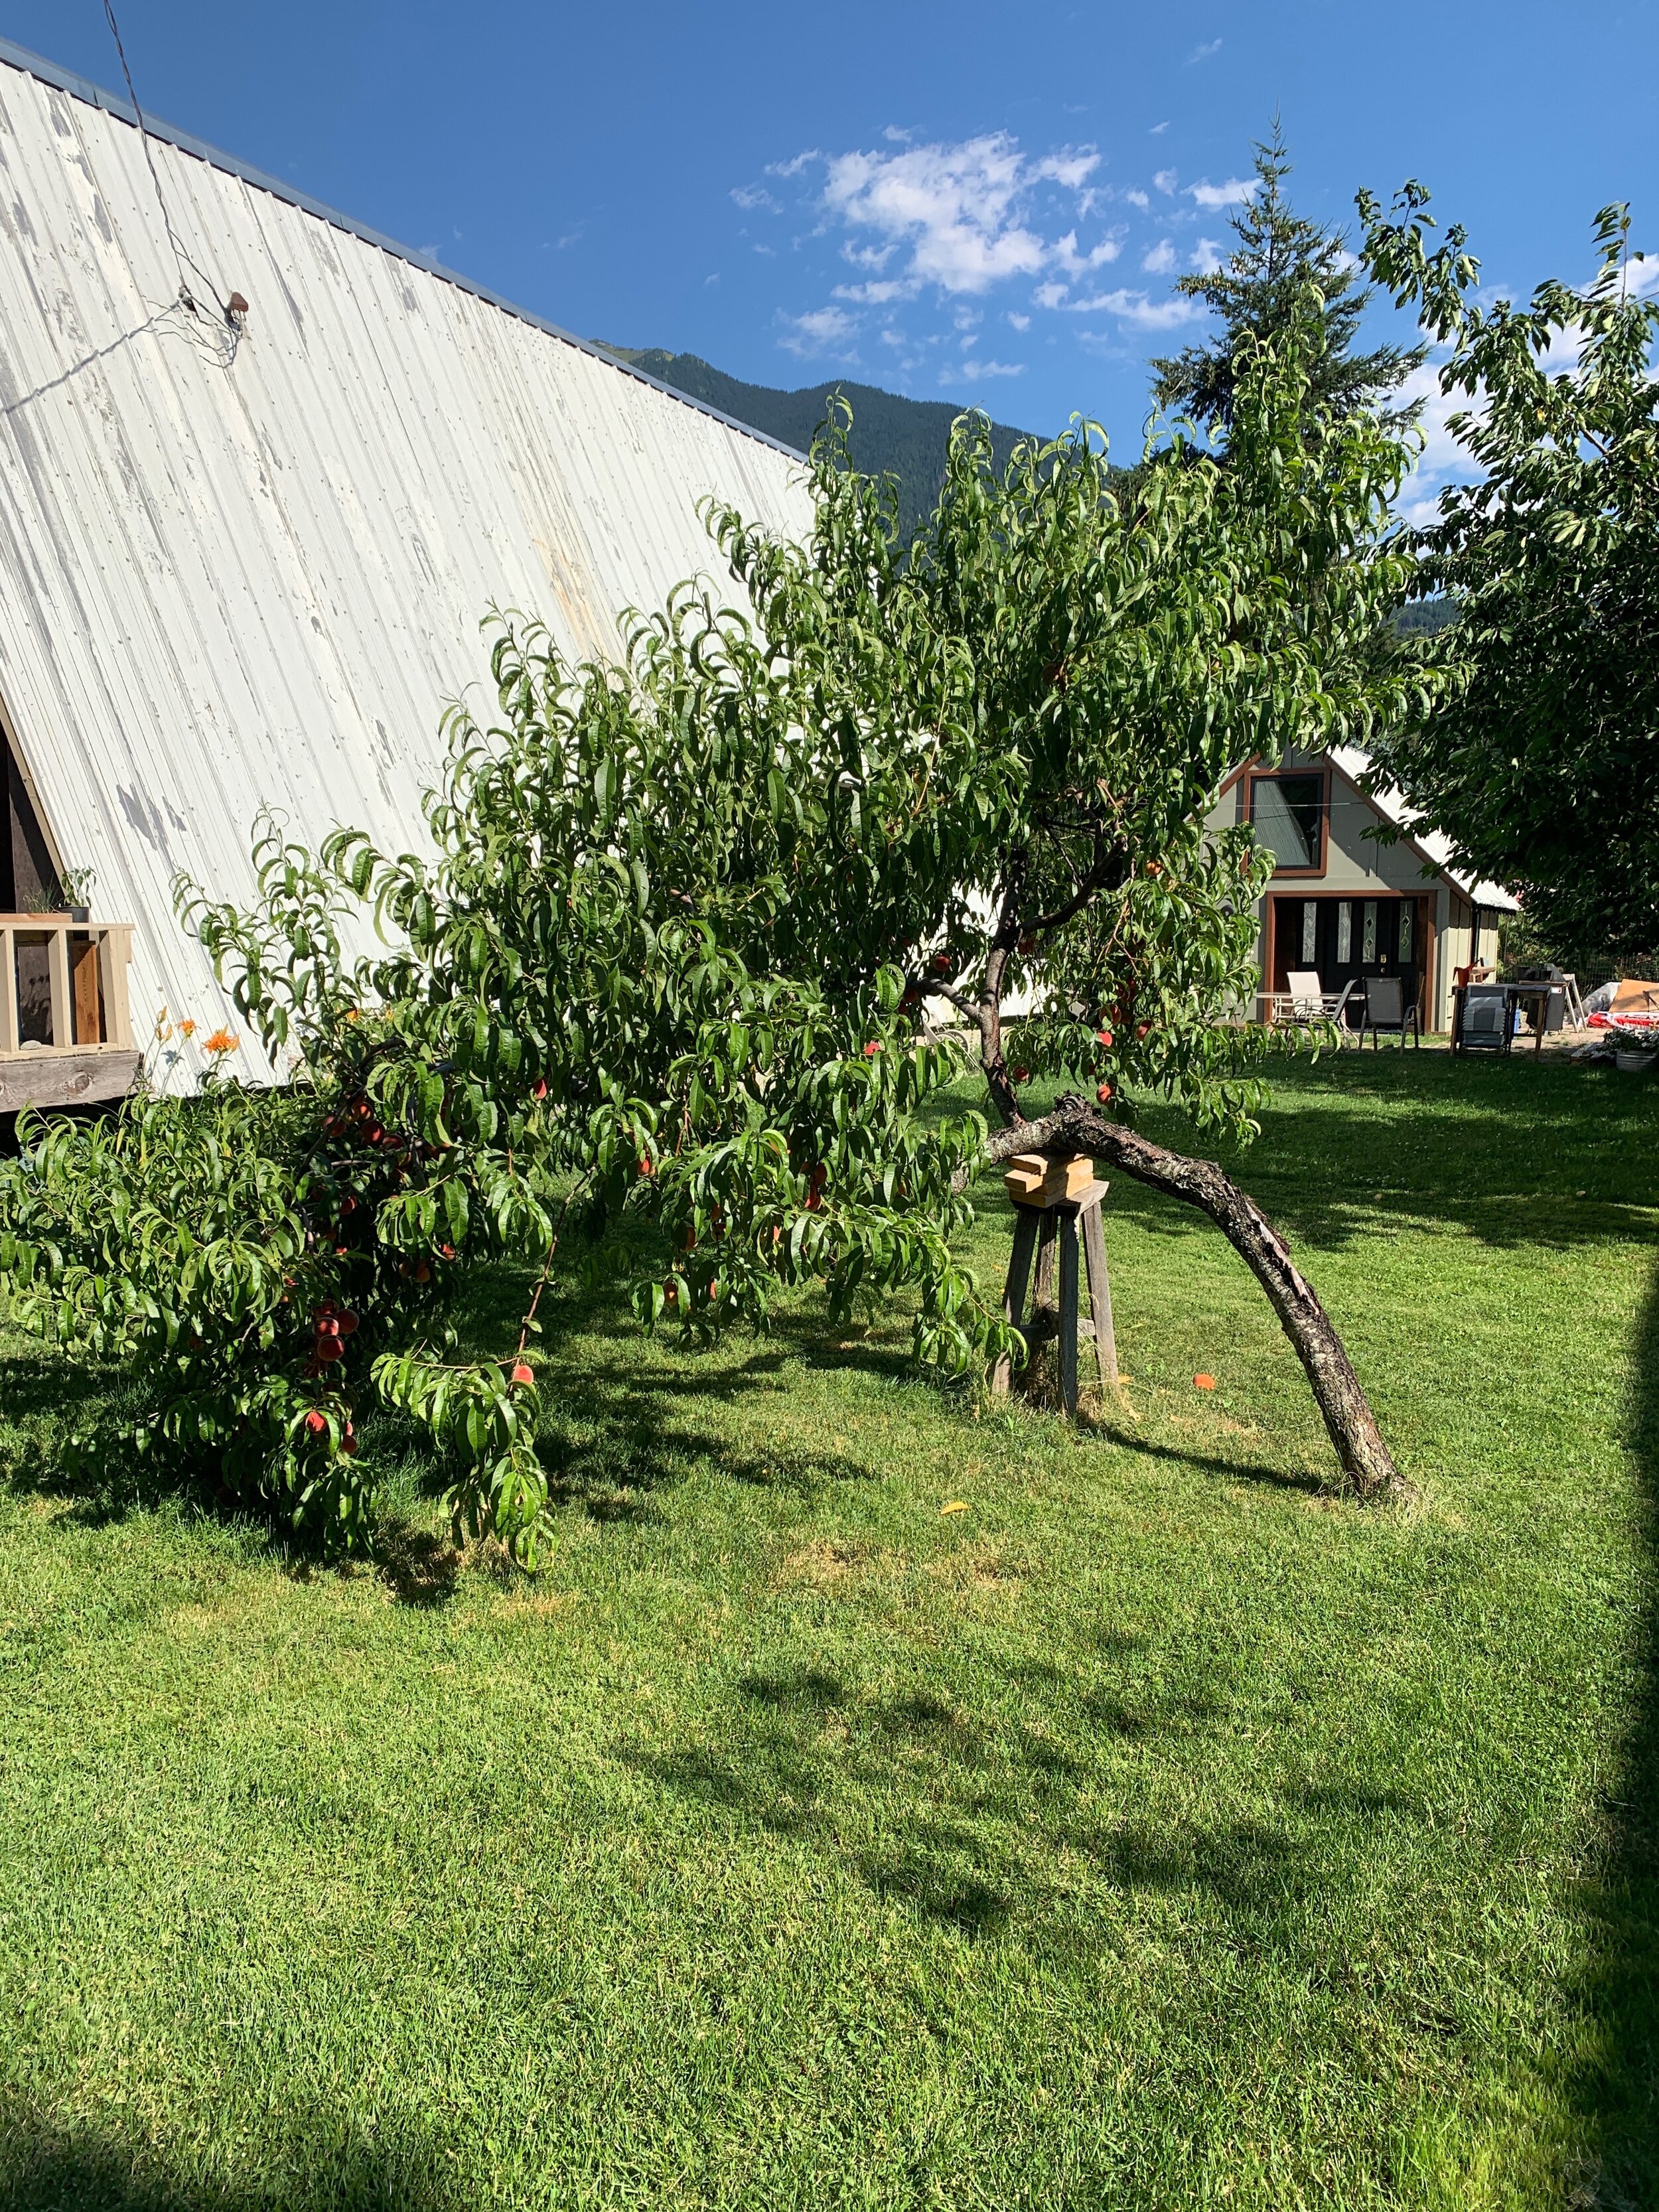
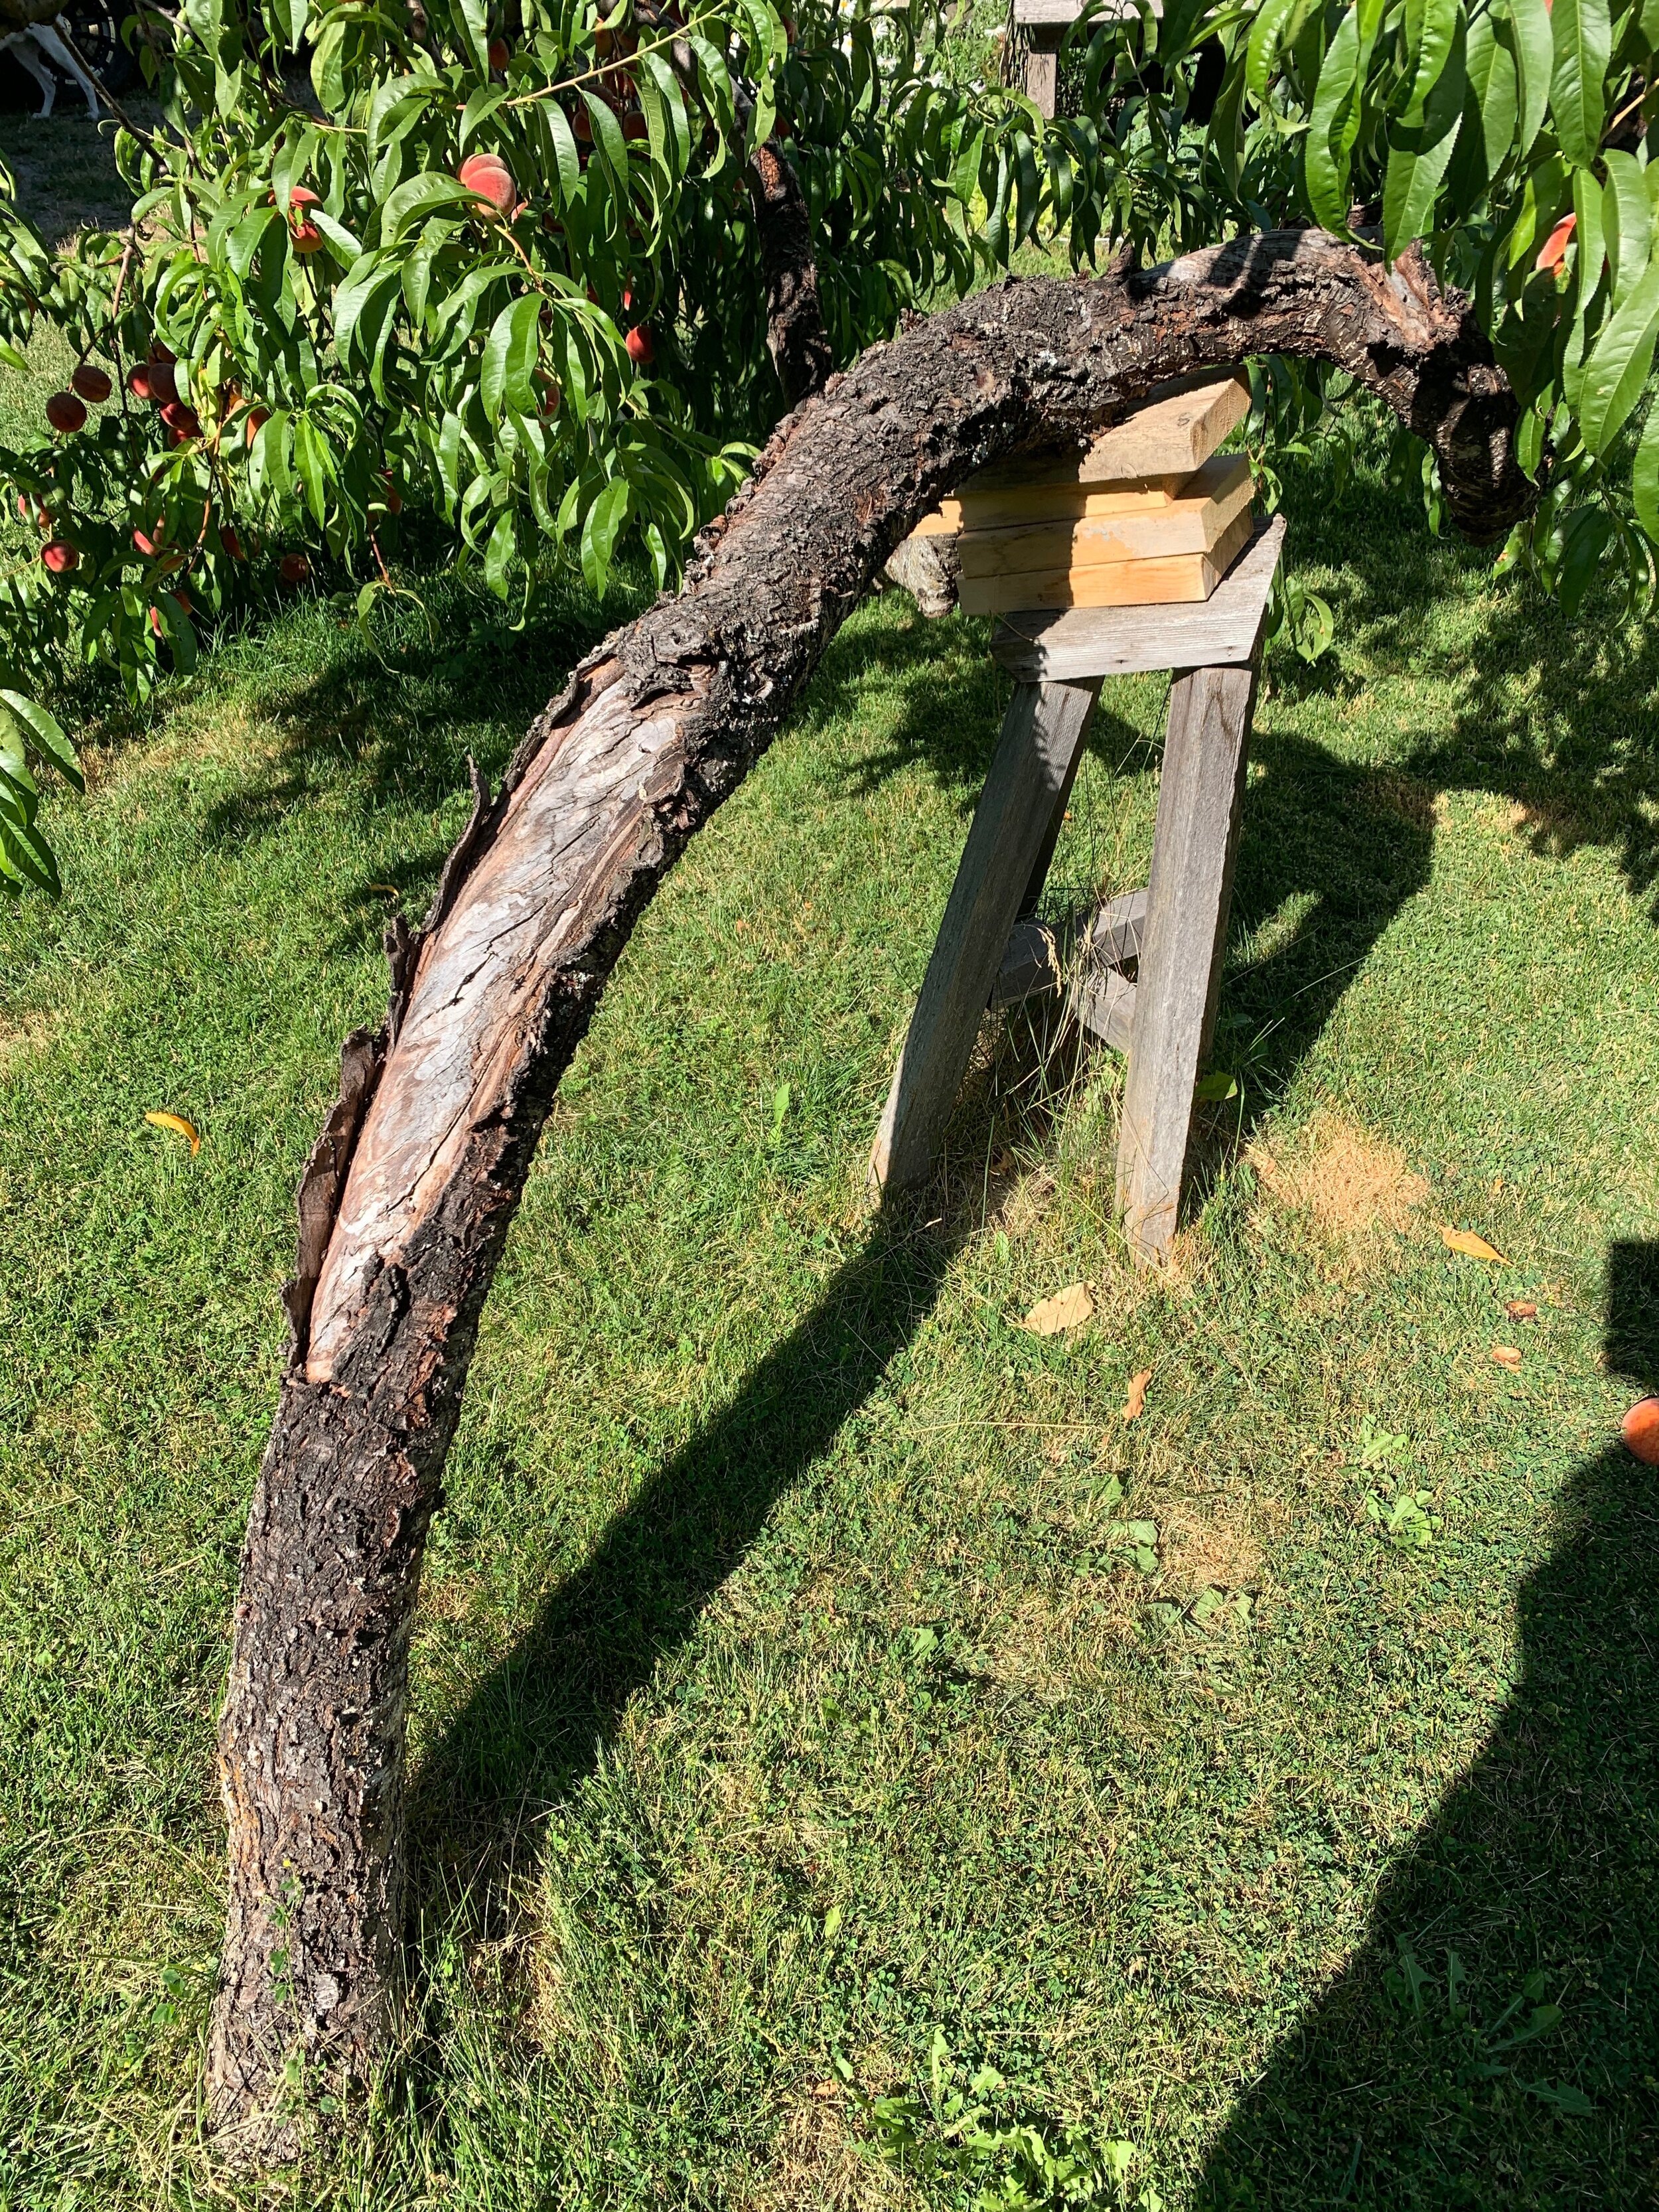
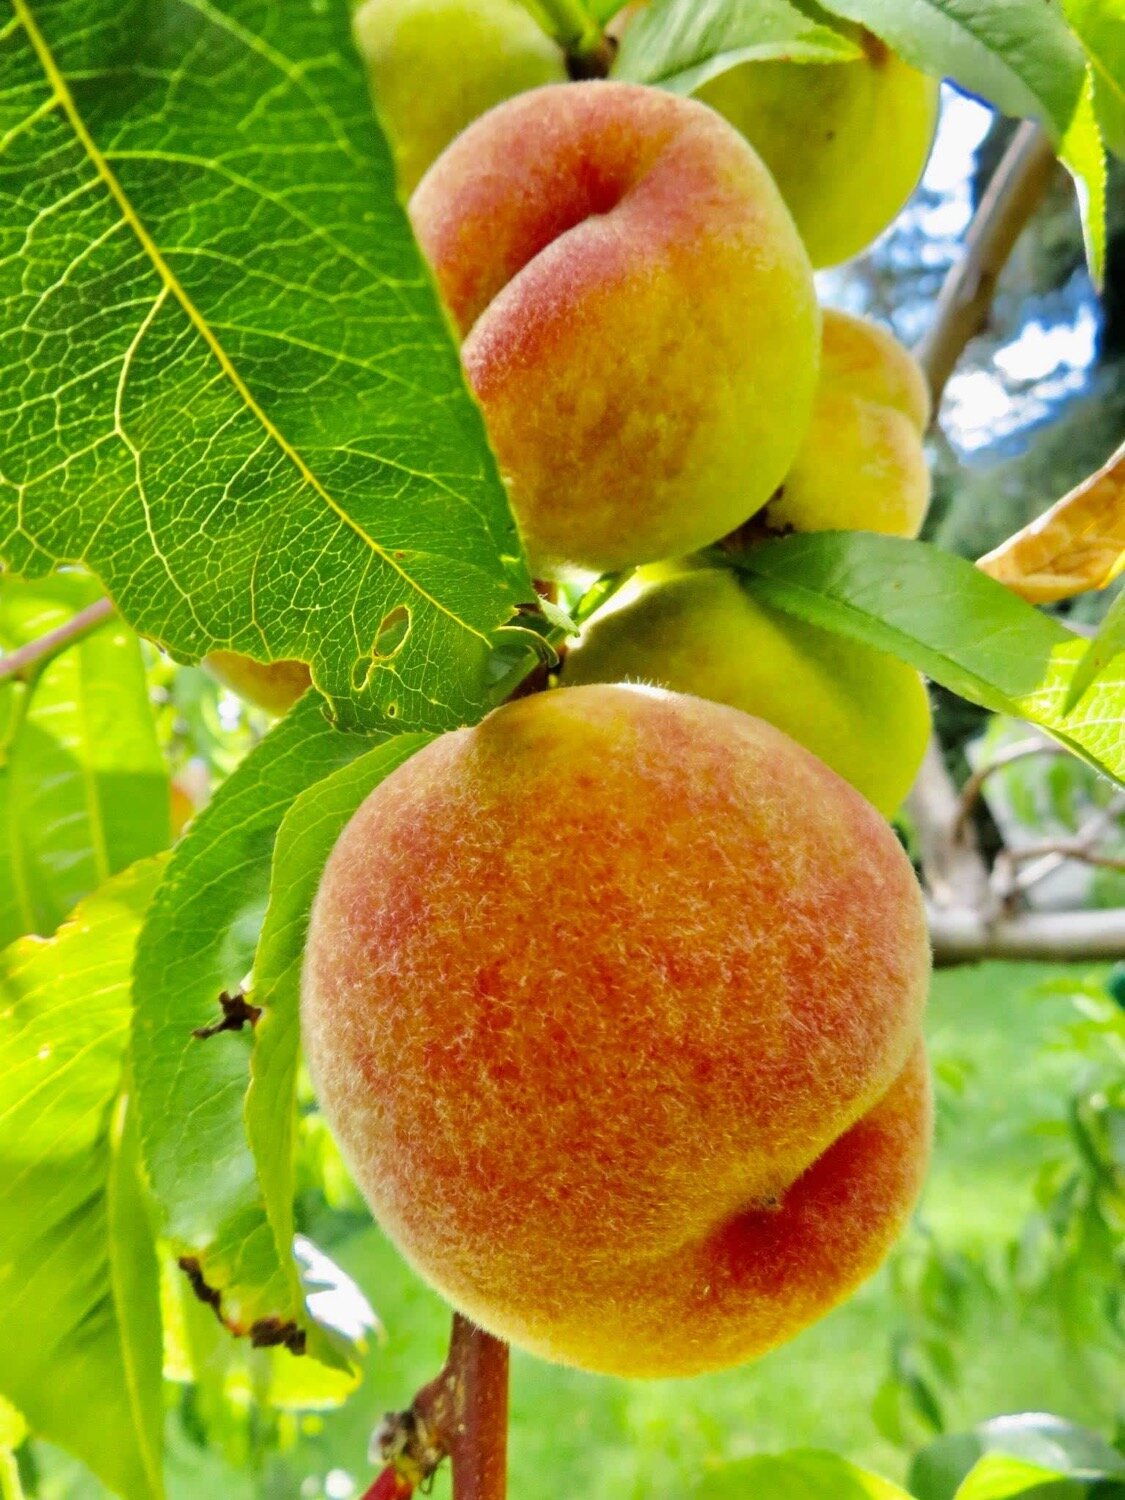
The bark on our peach tree is peeling, and it has fallen over. The owners before us attempted to keep it standing with some support. Despite its struggles, the tree is producing gorgeous fruit! Should we do anything more to take care of it, or is it ok the way it is?

Answer from Jennifer:
Hi Sevan, the pictures look like this is a mature tree with peeling bark and a fairly large canker on its trunk. There are a number of factors that could be contributing to the peeling bark. Sunscald and extreme temperature changes are the likely ones, as the tree appears to be in a very sunny location, so if the canker is on the South or West side of the trunk this could be due to sunscald.
Fruit trees have very thin bark so they are more susceptible to this. It certainly wouldn't hurt to try and shade the trunk portion of the tree during really hot periods and remove any damaged, dried or loose bark around the surface of the wound. If the bark is removed around the entire circumference of the tree (called "girdling"), it will die, but trees can survive smaller wounds. There are also trunk wraps but these may cause more harm than good because they can create breeding areas for insects and hold moisture in so you need to be careful with this type of remedy. Painting or cementing cankers in trees are also not recommended. Thankfully, this canker does look healed and your tree is producing nice fruit. The bark also looks discoloured and black which could indicate a fungal disease, although the canker looks fairly dry and benign, so perhaps a previous fungal disease.
Fruit trees are susceptible to fungus diseases so you want to make sure your soil is well drained and there is not a lot of water sitting near the base of the trunk. Usually you see curling leaves and sunken spots on the peaches if there is an active fungus problem. It is hard to tell why your tree has fallen over. It could be poor pruning, unbalanced branch structure, heavy winds, disease or all of the above.
The concern here is the branches, leaves and fruit touching the ground which creates an entry point for insects and disease. It is always best to keep branches off the ground, if you can, for good air flow and to discourage entry points and contact with the ground. As the tree is producing some really nice fruit (well done!), I would just keep an eye on it and see how it progresses. This darling tree definitely has a lot of character and appears to be a survivor!! Good luck with it.
Digging in with the Kids - Growing Chefs Integration Idea:
This Gardening Q&A sounds like it has great potential for some detective work! Take note of the things to look out for that would indicate disease in your plants. Have the kids in your life join you on an ‘eye spy’ hunt for indications of disease in your plant like Jennifer mentioned!
Question from Johanna in Vancouver:
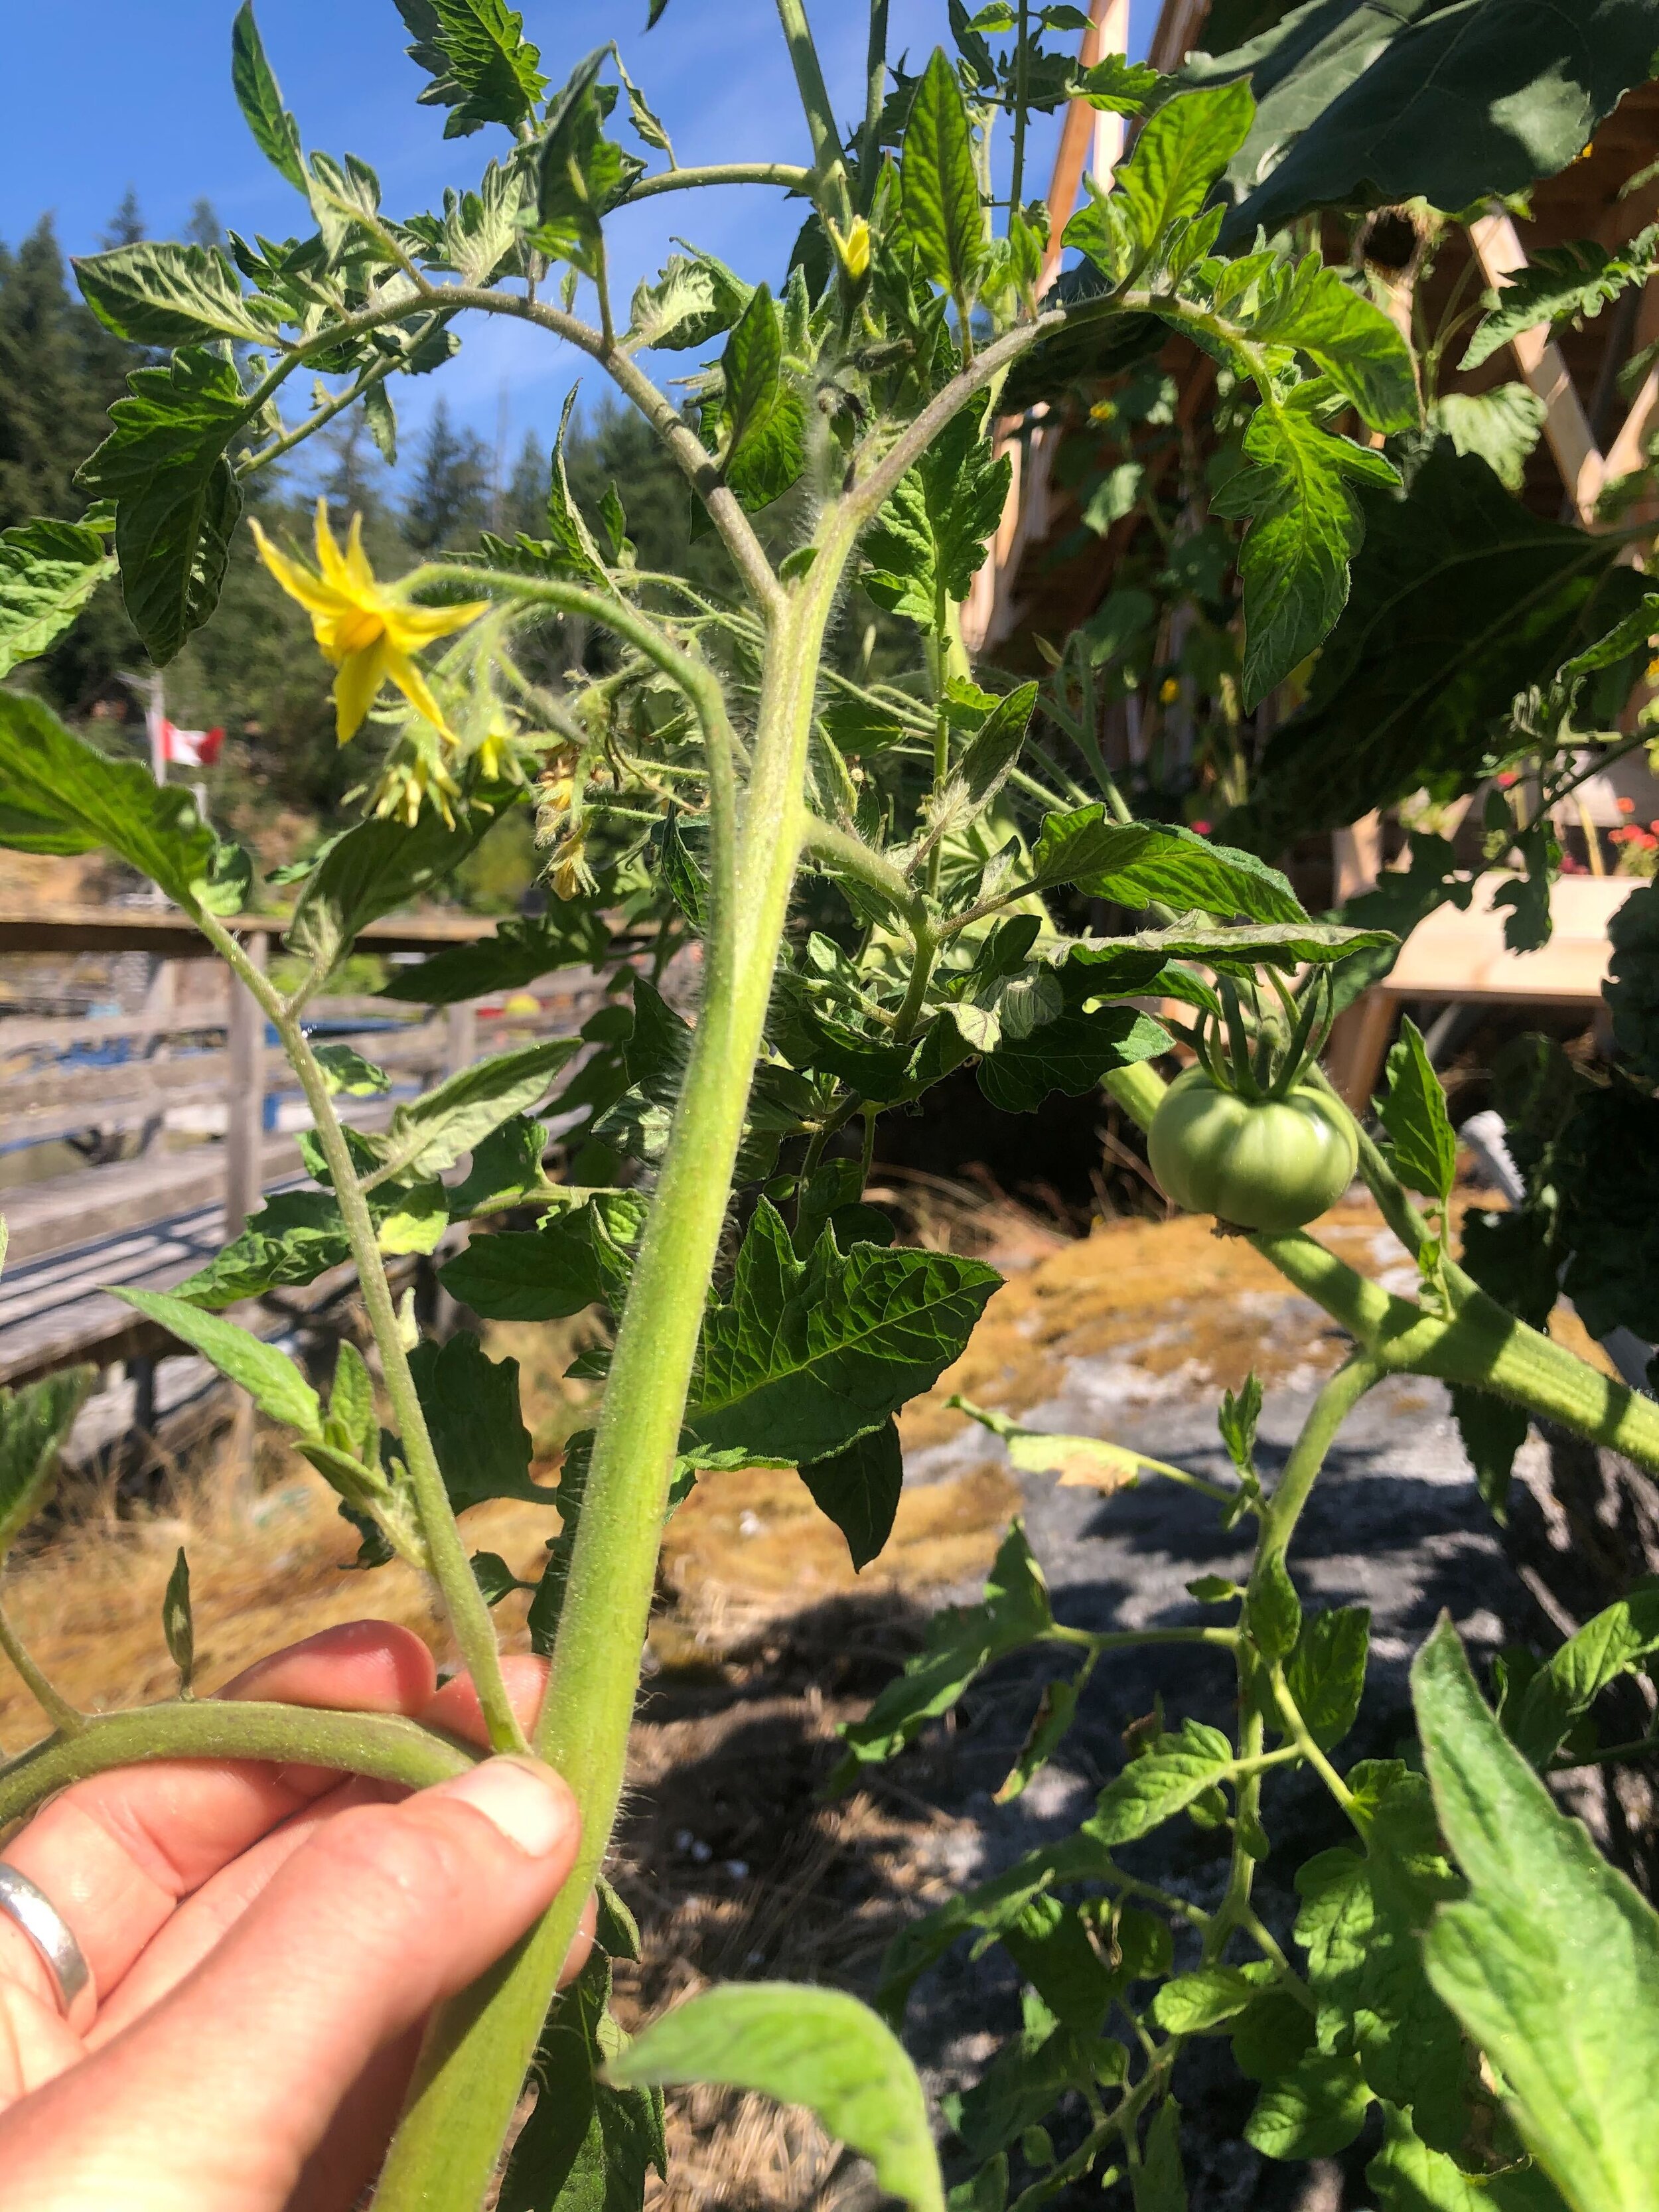
My tomato plants seem to be growing like crazy but some of them have zero flowers/fruit. Help!
Answer:
Our cool weather so far this year has not been conducive to good tomato growing. The plants will grow lots of large, soft leaves in cooler weather and produce fewer flowers leading to fruit. If you’ve had success with tomatoes in the past then the issue is very likely to be attributed to the cool weather.
If this is your first time, here are some points to consider. Tomatoes are moderately difficult to grow and need more doting care than many other crops. To grow well, they need the following:
Full sun
Fertile, well-drained soil that’s high in organic matter, with a pH level 6.0 – 6.8.
Warmth, but not high heat. Temps between 26° to 30° are best. Higher temperatures can kill flowers, so if your plants are in a greenhouse that’s getting super hot that could be an issue.
Regular watering to keep the soil evenly moist. Don’t let the soil dry out, but don’t let the plants sit in water either. Expect to water about 2.5 cm per week during peak growth. Overwatering produces leaf growth at the expense of flowers. Container grown plants need extra water.
Feeding every 10 – 14 days with a balanced organic fertilizer.
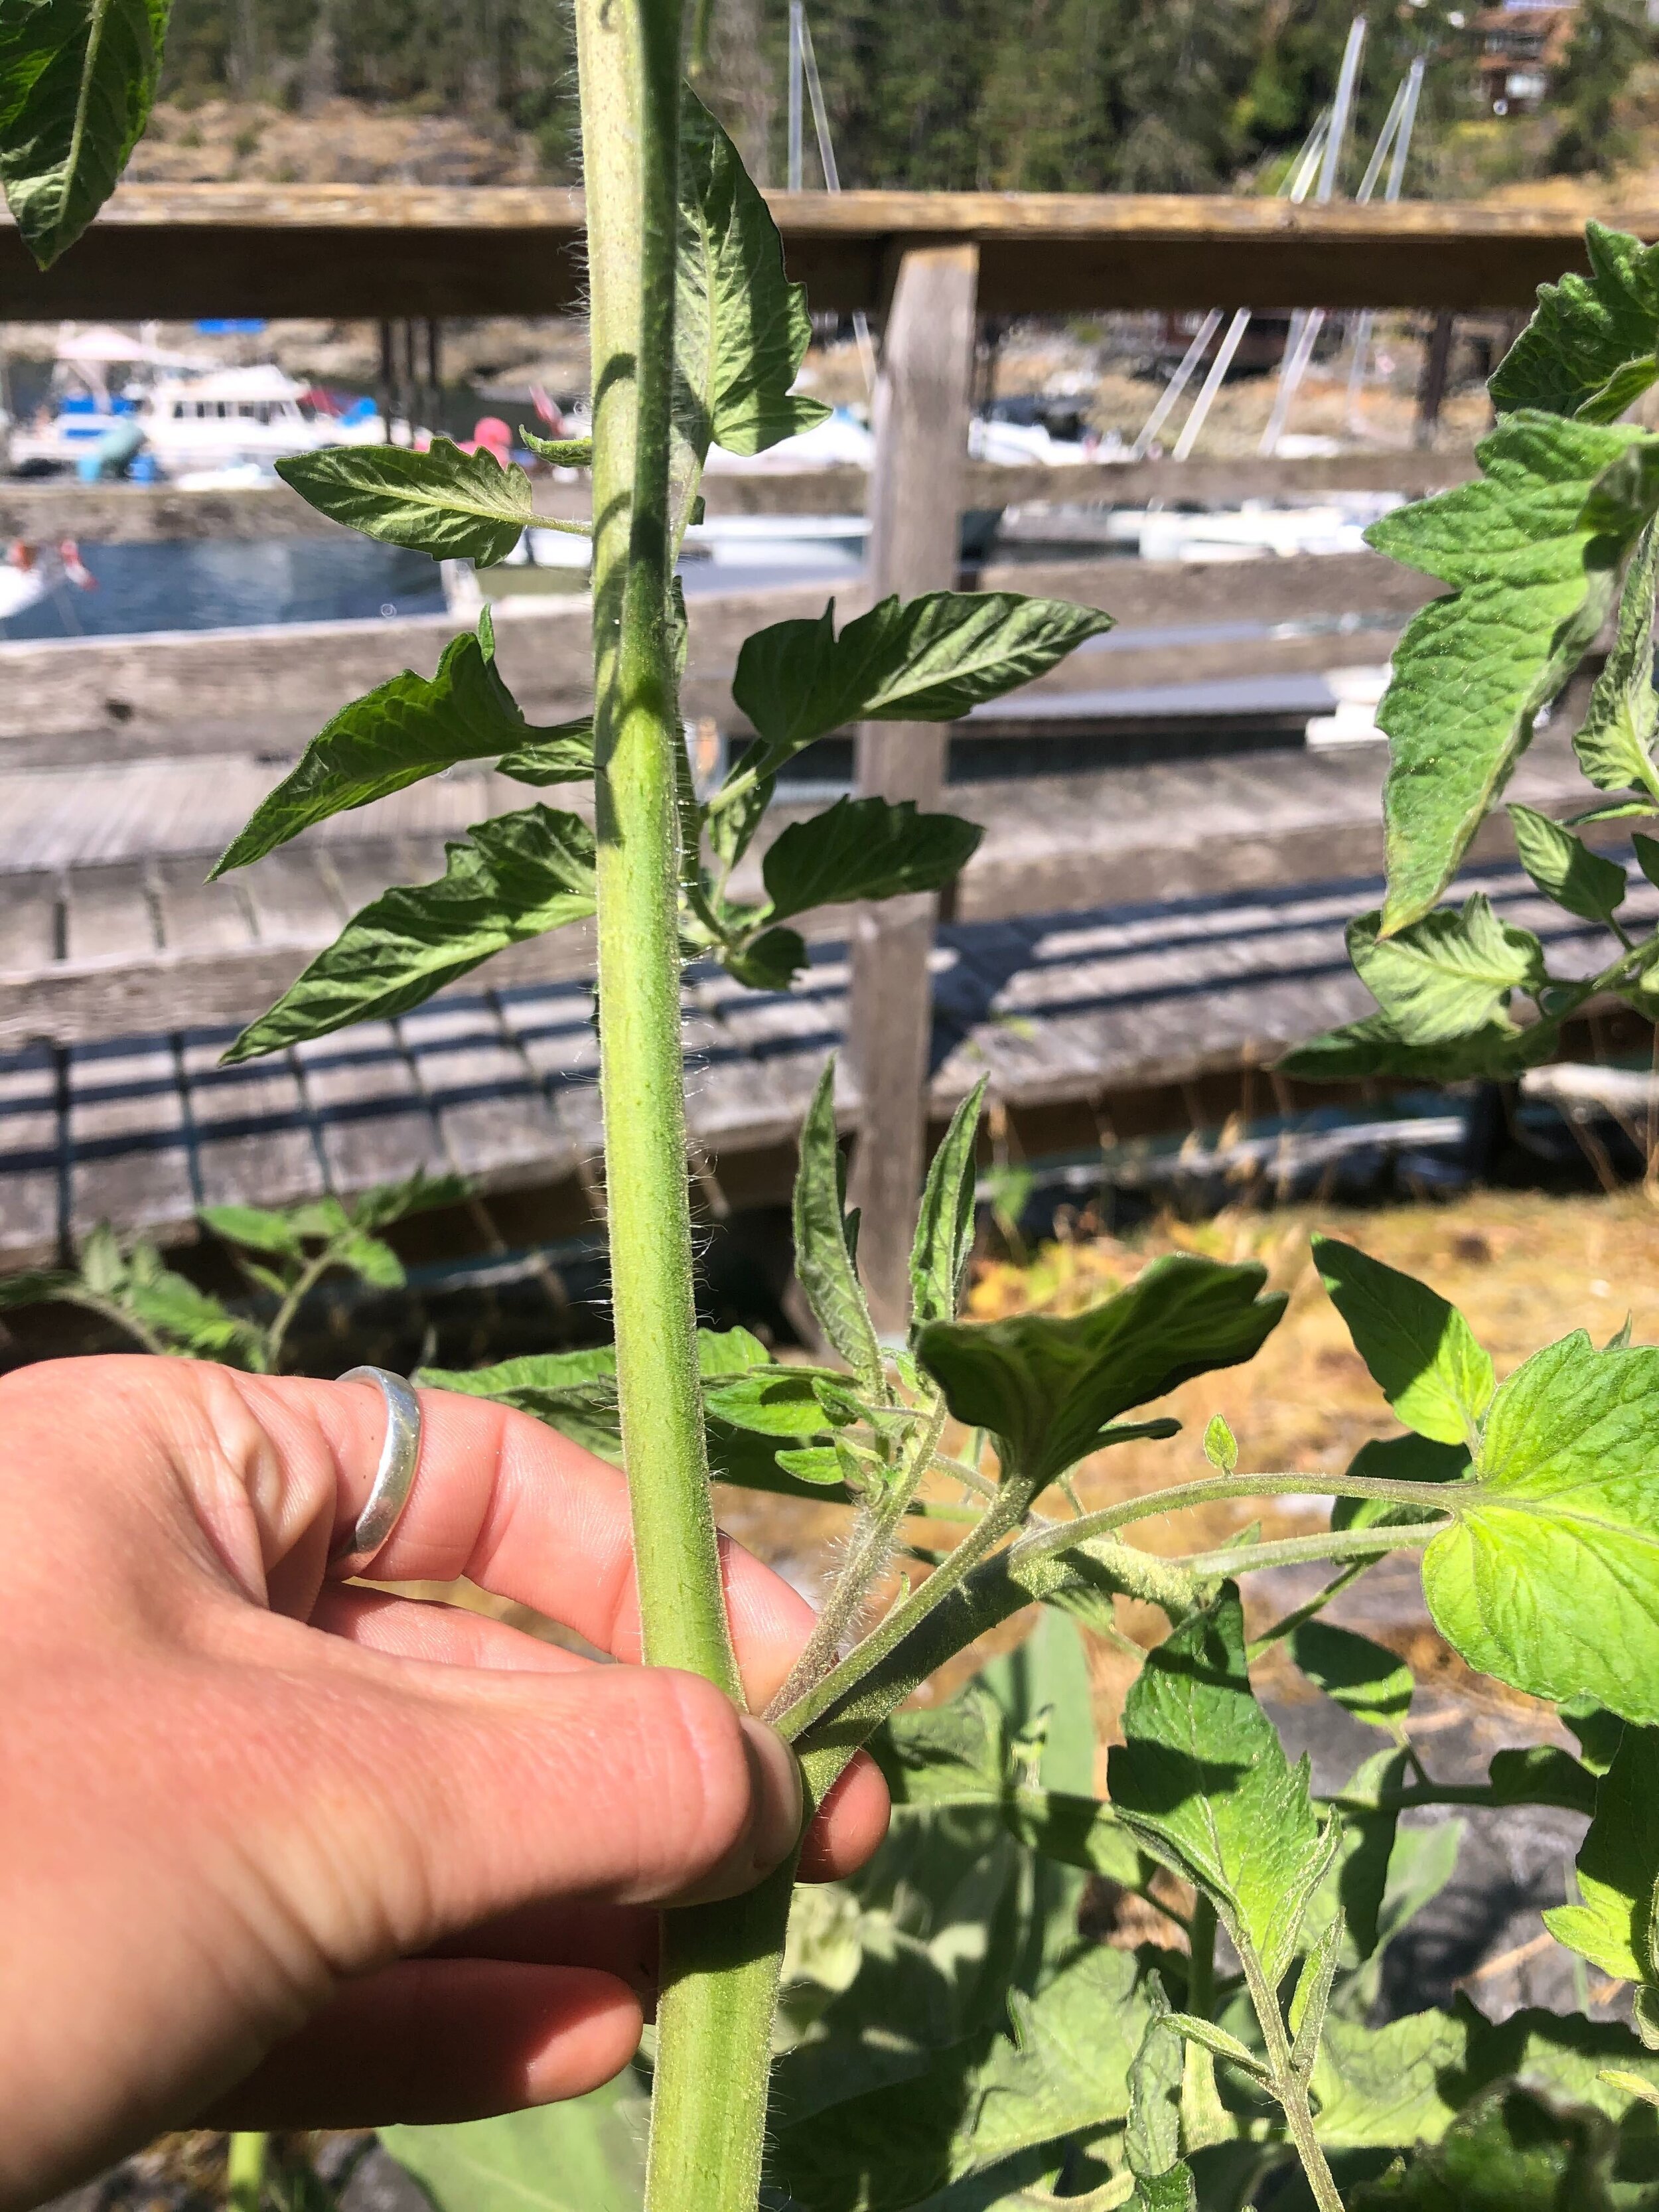
Conversely, large-fruited and long-season varieties such as Brandywine don’t ripen many fruits in cool summers (such as ours recently). Vine tomatoes need to have their suckers pinched out (these are the little side shoots growing between the main stem and a leaf stem). If they aren’t pinched out, all the plant’s energy will go into producing shoots, and not flowers and fruit. If you’ve got bush tomatoes you won’t need to remove side shoots.
Above-ground parts of the plant need to be kept dry, and have good ventilation around plants - they don’t want to be crowded. A purple tinge to the undersides of leaves indicates the plants are not taking up enough phosphorus due to the cool weather (it’s not necessarily that there’s a phosphorus deficiency in the soil). Phosphorus deficiency is linked to less fruit production. Feeding with higher potassium encourages good fruit development. Feeding with excess nitrogen can promote a lot of lush leaf growth and very few flowers/fruit. Bonemeal has an appropriate proportion of N-P-K nutrients: 2 - [11-14] – [0-2] and could be used sparingly. Wood ashes (0-1-5) also have good proportions of flower/fruit producing nutrients. But really, it sounds like the most likely problem has been our very cool early summer. Tomatoes just don’t do well in the cool.
Digging in with the Kids - Growing Chefs! Integration Idea:
Mmmmmmm! One of our favourite things to do in the garden is pinch the shoots on tomato plants! It is totally a kid-friendly activity, and pinching the shoots, and pruning excess leaves to promote air flow gives off the most wonderful aromatics. When you are looking down the main stem of your tomato plant, you will see little ‘shoots’ come out at a 45-degree angle from the ‘elbow’ of the main stem and main branches which produce fruit. See the picture below! You can invite kids to pinch them with their fingers when the shoots are still small, no snips needed. For thicker stems, best to use some snips with adult discretion, and supervision required. Make sure to stop and….smell your hands - it smells so fresh! Ask the kids if the smell reminds them of anything familiar.

Question from Kim in Vancouver:
I have been harvesting my kale all summer. I know kale can also be grown in the winter but do I need to plant new seeds? Or, will it keep growing?
Answer from Jennifer:
Hi Kim, yes, Kale is a biennial plant (lives for 2 years) so it will keep growing over the winter in zone 8-10 as it is very hardy and can survive temperatures down to -10C\14F. As with all vegetables, it's always good to add a light mulch (eg. dried leaves, straw) to the soil surface to protect from freezing temperatures in winter and hot sun in summer. Kale survives over winter as long as you harvested it correctly by removing the older outside leaves first and leaving the centre stem intact that has the smaller leaves. However, by next Spring this kale plant will bolt and die. It's also a good idea to reseed or transplant small kale plants so you have more plants to harvest from over the winter as kale leaves do not regenerate as quickly in colder months. You will need to get these new plants to maturity before the first frost so timing is critical. Also it's helpful to add more plants now to replace the plants you will lose next spring so you have plants at different stages of their growth cycle (called succession planting). If you are going to reseed, I would consider some winter varieties such as Winter Red, Rainbow Lacinato, or a winter kale blend. You can pick up a free copy of West Coast Seeds, Planting for Fall/Winter harvests at your local nursery (or view it online here). On p. 8 they list a dozen different varieties of winter kale with planting instructions. You will find similar information on p. 38 of West Coast Seeds Gardening Guide 2020 which is also available at most nurseries (or view it online here). Good luck with your Winter harvest!
Digging in with the Kids - Growing Chefs! Integration Idea:
Similar to pinching the shoots on the tomato plants, have kids help with removing the older, outside leaves to harvest, and leaving the centre intact with the smaller leaves. Also, if you haven’t checked it out already, have your kids watch our lesson video on starting seeds - and have them help with re-seeding more kale plants!