You Can Eat That? Make a Carrot Top Pesto

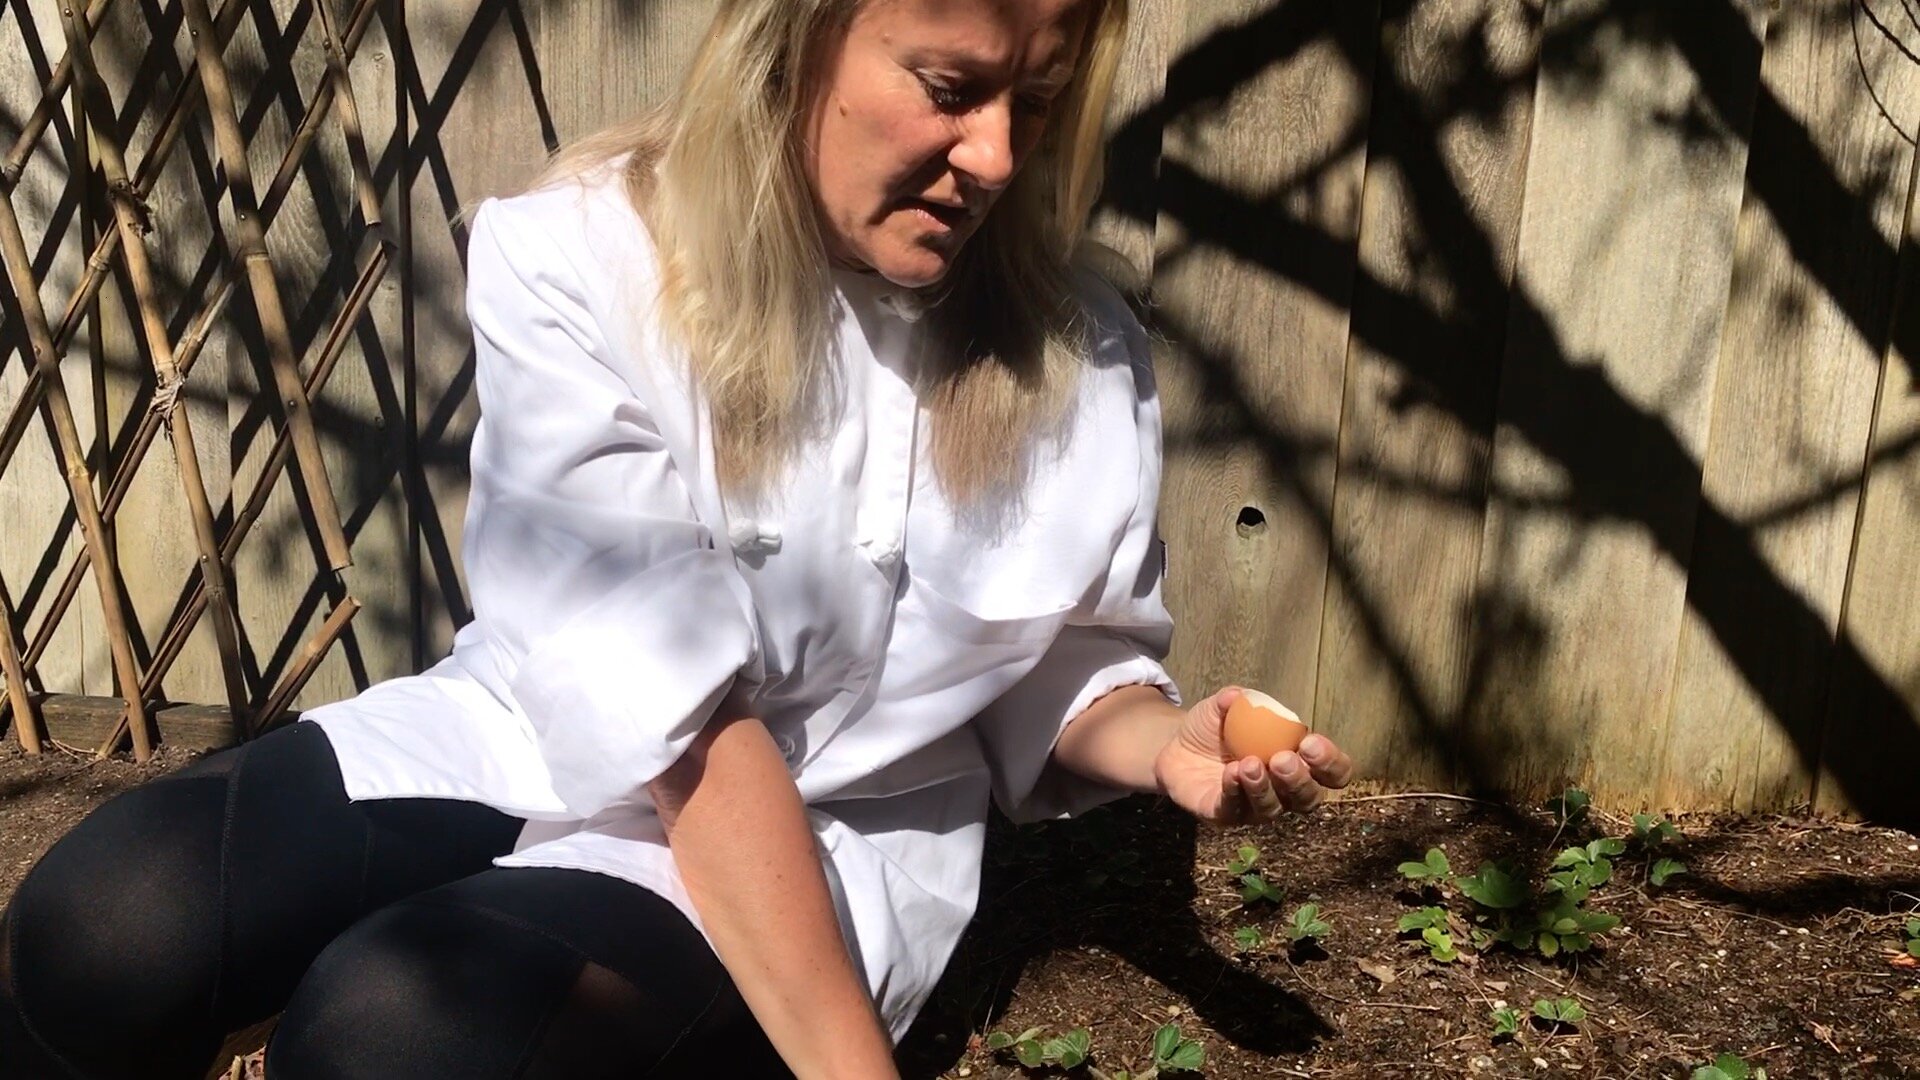
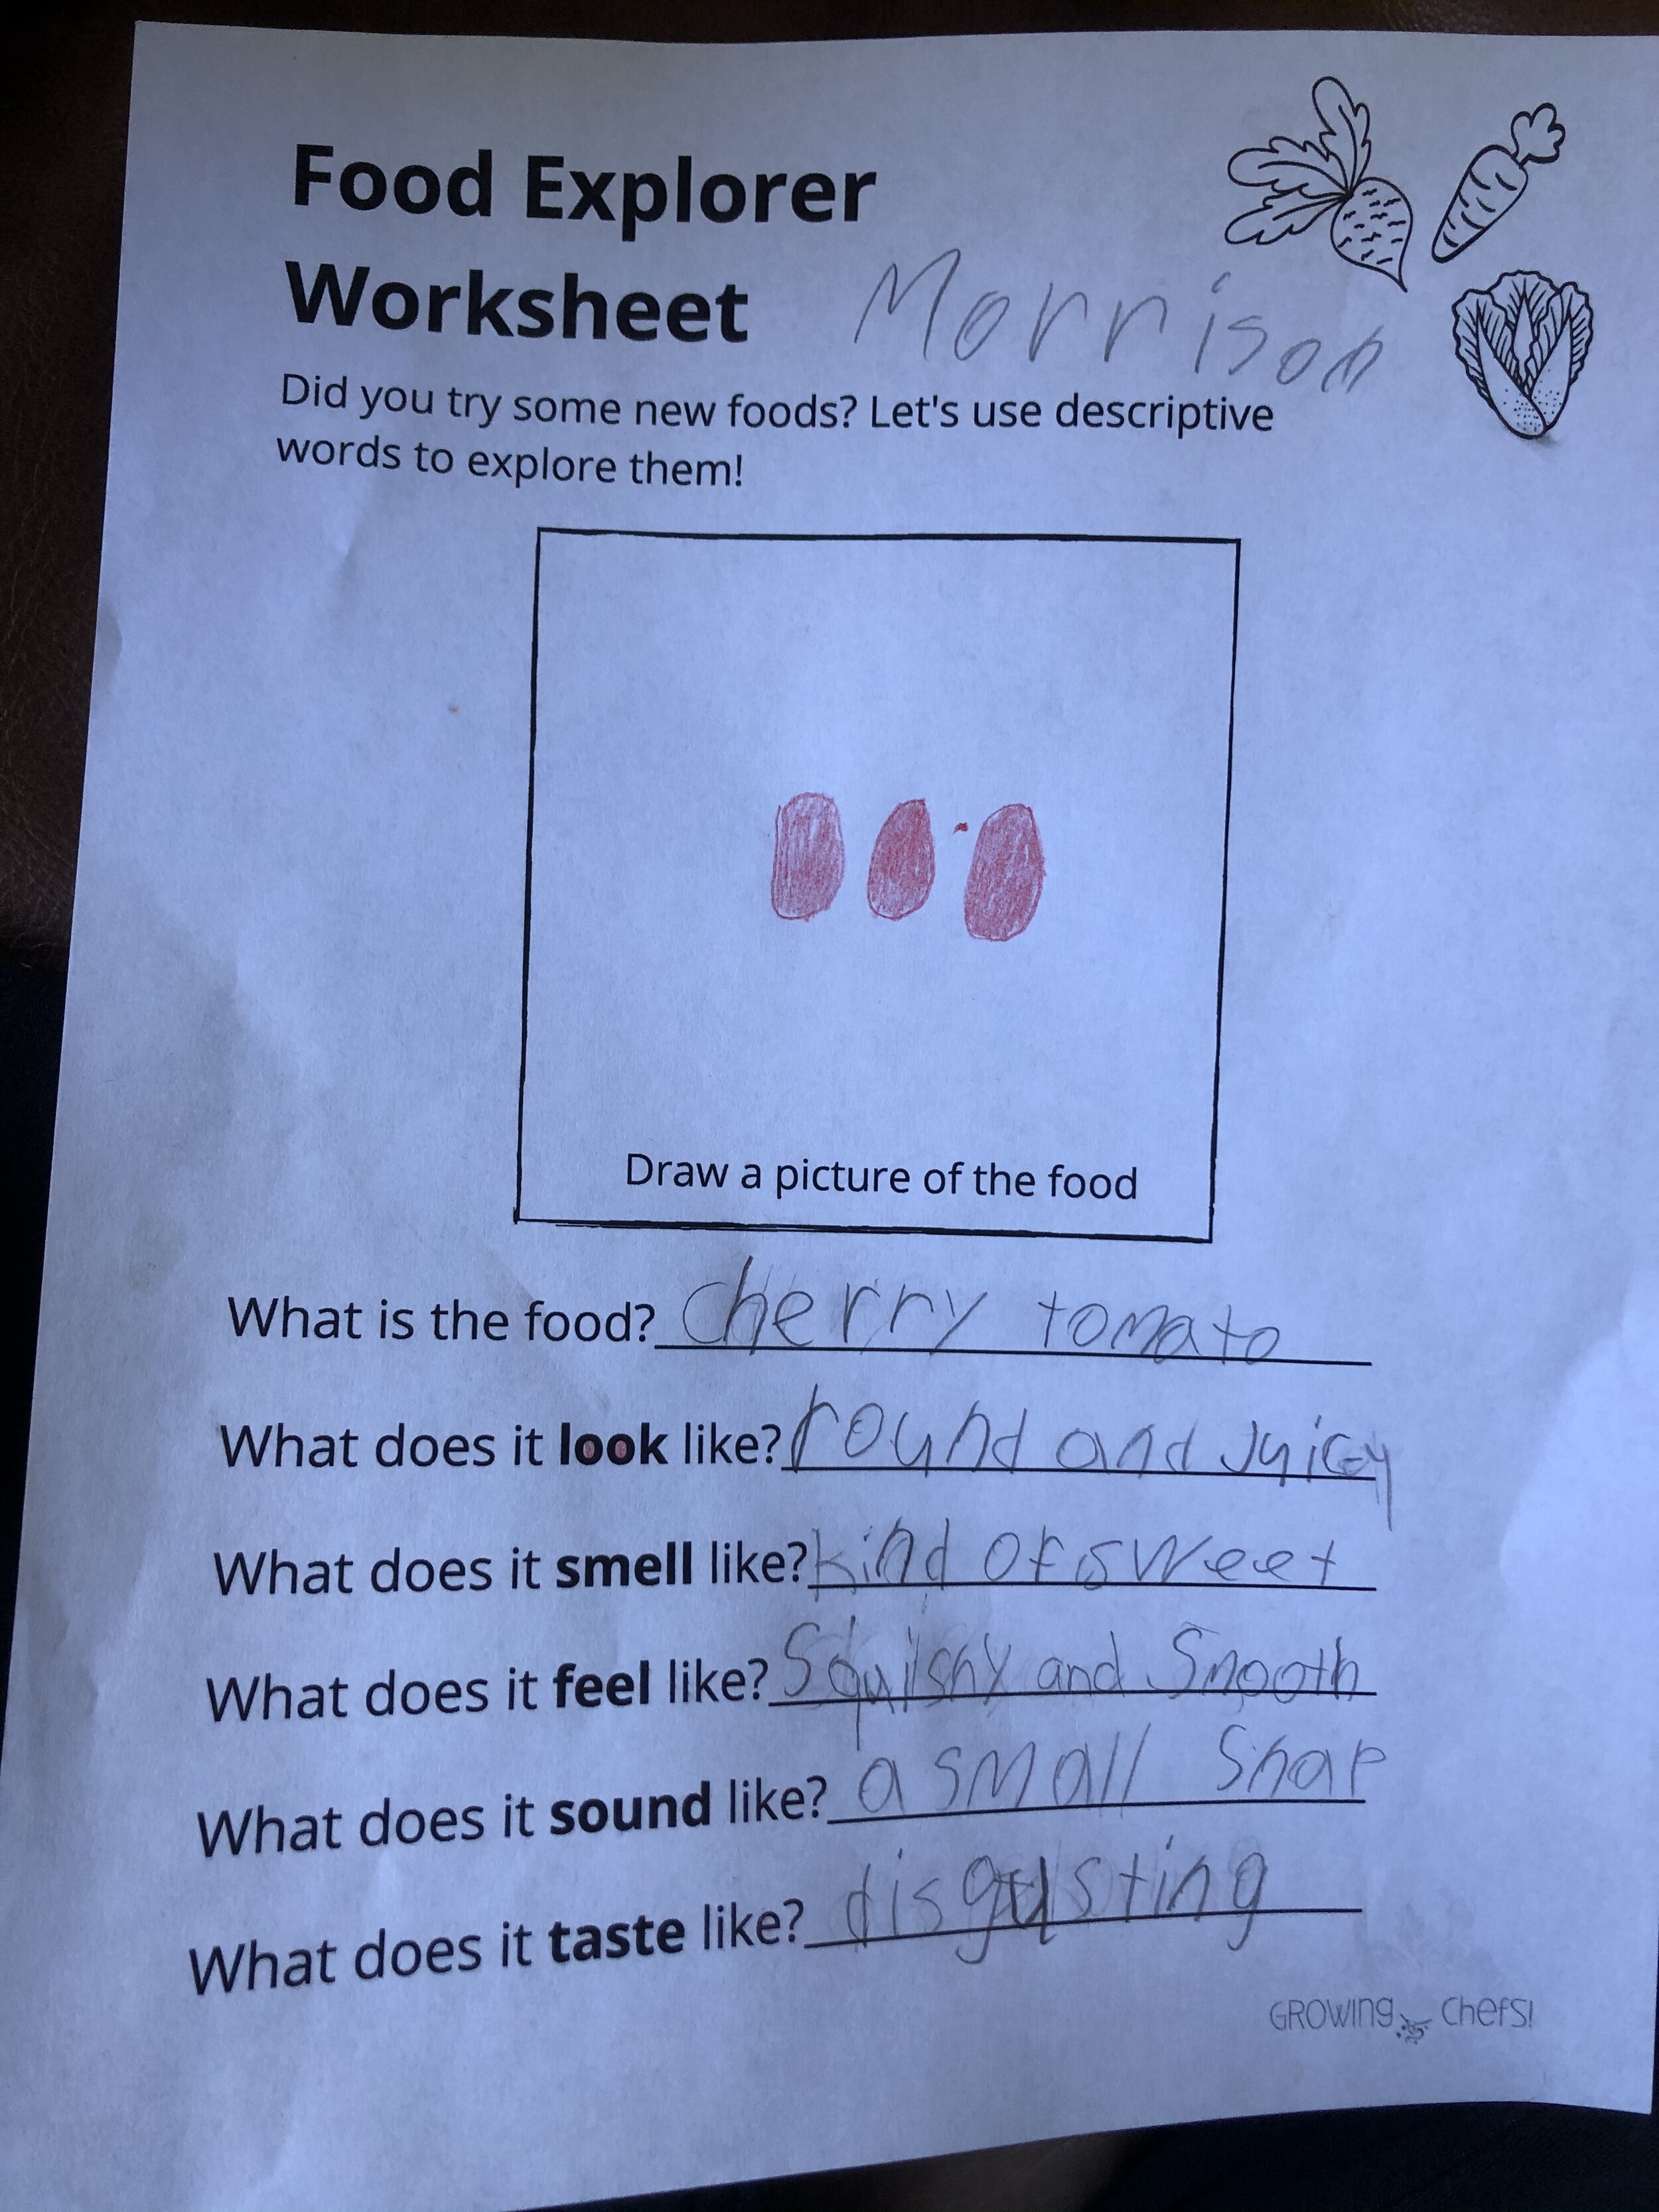
Working at Growing Chefs! I have the pleasure of working with many chefs, cooks, gardeners and other folks that are passionate about food. It is always inspiring to hear them talk about their favourite vegetables and what they cook with them. I am constantly learning something new about food. That is why I was surprised (but also not surprised) when Selma, our Chef Educator at Growing Chefs!, mentioned in a team meeting that she would be making pesto with carrot tops. “What?” I thought. “You can eat that?” I’ve eaten a lot of carrots in my life so this seemed like a strange thing for me not to know. I happily bought some carrots (with tops) and along with my kid and some help from google made a carrot top pesto. Turns out carrot greens are mildly sweet, easy to work with and totally tasty. During my google research, I learned that you can make a pesto out many types of greens (arugula, parsley, basil etc…) and that pesto recipes are really very flexible (you only need a few key ingredients to make it work and you can easily substitute with what you have). Best of all it is a great way to use greens that are a bit wilted and might otherwise go in the compost. 

We have included a video tutorial of how to make carrot top pesto below as well as the recipe that we adapted below (we have nut allergies in our house so we opted to make our pesto with pumpkin seeds instead of nuts). We have also included a Make Your Own Pesto Worksheet that will help you design your own pesto. I hope you enjoy it and are inspired to make pesto of your own this summer. 


The below recipe is highly adaptable based on your preferences and the ingredients you have available to you. Download our Make Your Own Pesto Worksheet and explore more ways you can adapt this recipe and make it your own.

Carrot Top Pesto Recipe:

Tools:

  • a zipper bag (see below for directions using a food processor/bender)

  • measuring cups

  • measuring spoons

  • knife or scissors

Yield: 1 cup of pesto (enough for about 4 portions of pasta)
Prep Time: 15 minutes

Ingredients:

2 cups cleaned carrot tops
½ cup parmesan cheese
¼ cup pumpkin seeds
1 tablespoon lemon juice
½ cup olive oil
½ teaspoon sea salt 
¼ teaspoon pepper


Instructions:

  1. Clean your carrot tops and cut (with knife or scissors) into very small pieces. Compost the stems that are looking brown.  

  2. Place all ingredients in your zipper bag.

  3. Squeeze out the air and seal it tight.

  4. Crush your pesto (from the outside of the bag) by using a mug, rolling pin or anything else suitable.

  5. Use a spoon to taste your pesto 

  6. Adjust the flavours to your liking

Enjoy as a pasta sauce on sandwiches, on salad, meats, fish or tofu.

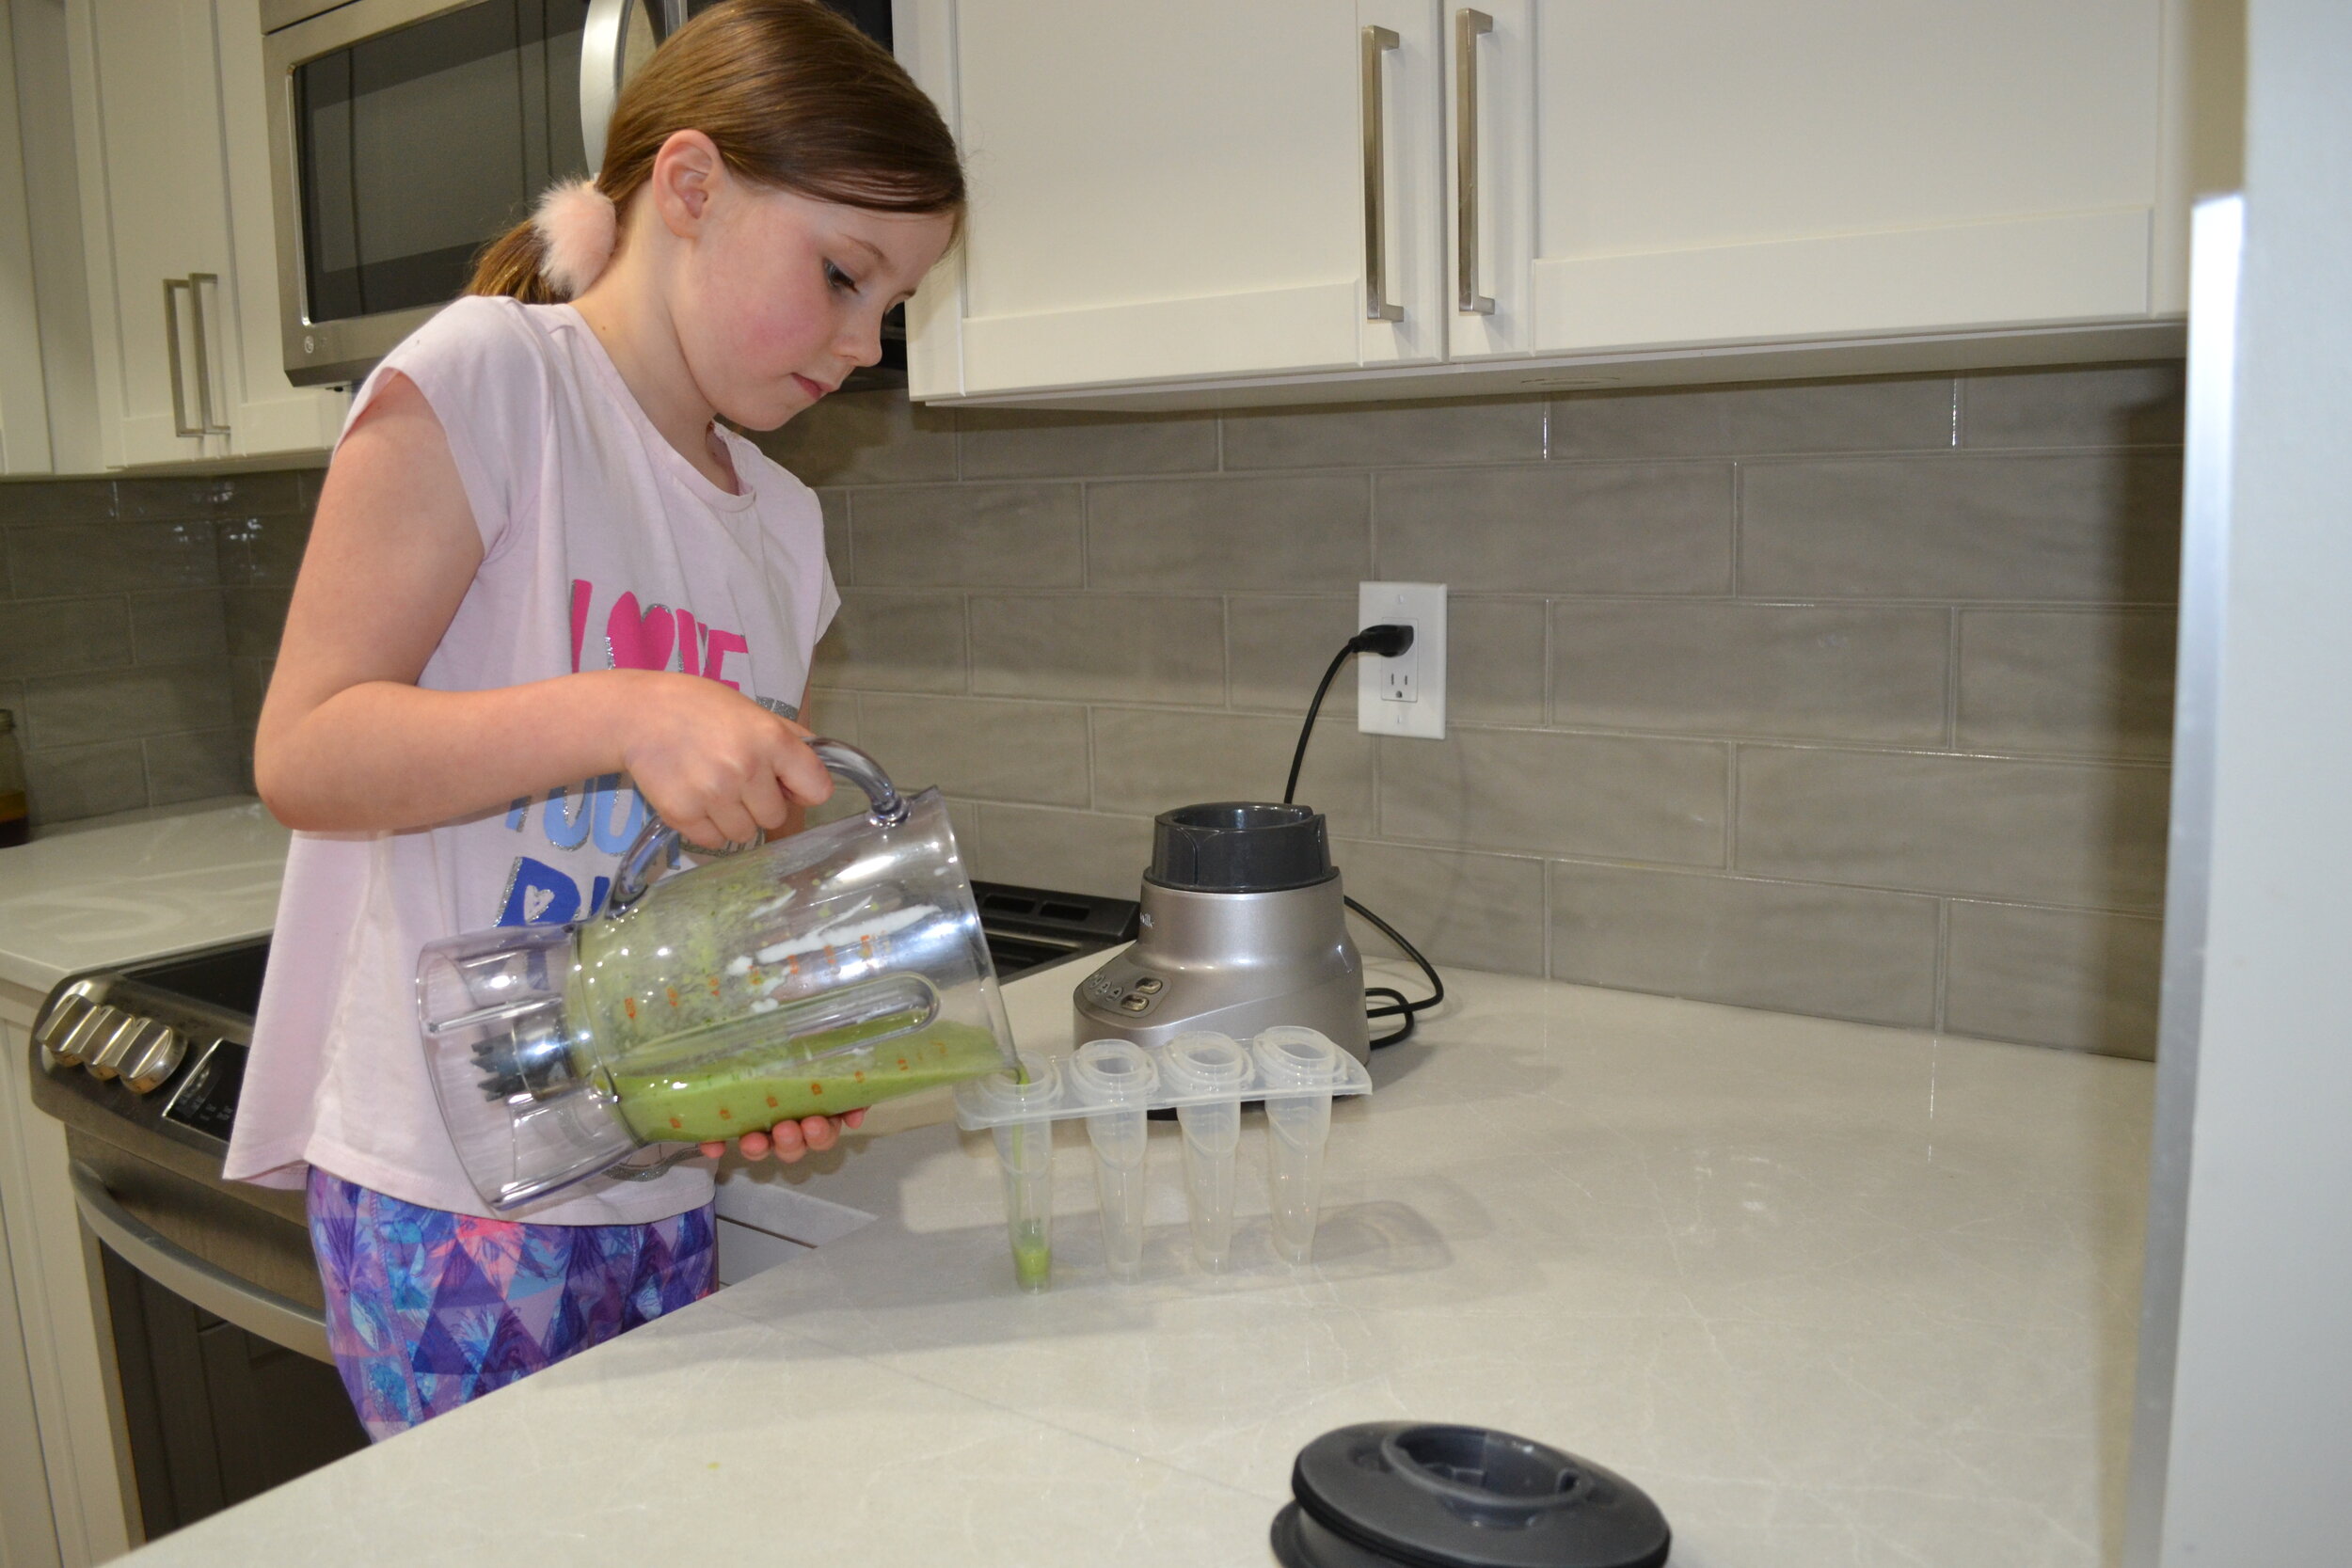
*If you want to use a food processor or blender, simply place all the ingredients in the bowl of the food processor and blend until smooth. If your pesto is too thick add some extra oil. 

IMG_9100.jpg

Week One - Successful Summer Harvests and Winter Crop Planning

We are so grateful for the friendship and knowledge that students from the Vancouver Master Gardeners are providing our community with, to support in successfully growing food.

This is the first in our series of six Gardening Q&A’s focused on Successful Summer Harvests & Winter Crop Planning, brought to you in partnership with the Vancouver Master Gardeners and Growing Chefs Let’s dig in, and learn together!

Question from Rachel in Vancouver:
We have a fig tree we grew from a cutting we received four years ago. It is currently nine feet tall and has a handful of figs ripening. In the last couple of weeks, the leaves have started to yellow. We removed them but wondered if that was a mistake. What is happening?

Answer from Sally:
The key to having a good crop of figs in our area is to choose the right variety, as some are better-suited to growing in the Pacific Northwest (example, Desert King, Peter’s Honey, and Brown Turkey are reliable). In warm climates figs crop twice, but if grown outdoors here we can only expect to get one crop a year. Ficus carica – edible fig – is native to rocky, sunny Mediterranean and western Asian sites. They like a lot of warmth, full sun (to part shade), and to have their roots somewhat constricted. It’s good to see this one growing in a pot – that works well because it mimics the constrained, rocky conditions they like. They like a somewhat alkaline soil (pH 6 – 7.8) but the soil doesn’t have to be rich. 

Figs stress easily, so changes to lighting, humidity, or temperature need to be done gradually or they may drop leaves. They do not like the cold and will die back. It’s possible our rather cool spring and early summer have affected it, leading to yellowing leaves. Removing a few yellow leaves won’t hurt. The plant overall looks a bit droopy. In our area the tree needs to receive at least six hours sun a day and ideally be positioned against a south-facing wall to maximize the heat. Since it’s container grown, it needs regular watering- it doesn’t like erratic watering or being allowed to dry out - and feeding.

In spring and summer feed it every week, alternating between a high potassium fertilizer such as tomato food and a general-purpose fertilizer. Mulching around the base with 2.5 – 5 cm of compost will help to keep the soil in the pot more evenly moist. Conversely, figs don’t like to be overwatered. Check the soil 3 cm below the surface. If it’s dry to the touch then it’s time to water. Water deeply until plenty of water comes out the bottom of the pot. Don’t let it sit in water. In winter when they’re dormant, figs need to be protected from the cold either by moving the container to a frost-free place (garage or other sheltered spot), and covering the pot with bubble wrap for insulation. If it can’t be moved then the bare branches should be covered with a few layers of horticultural fleece. The leaf doesn’t appear to show signs of pests such as scale, aphids, mealy bugs or spider mites. The chewed corner and specking on the underside are not indicative of serious problems. The chewing is possibly caterpillar. If it’s only in small areas it shouldn’t be a problem. So, check sun exposure, heat, watering, and fertilizing.

Digging in with the Kids - Growing Chefs Integration Idea:

Invite the kids in your life to help test how dry the soil in your garden is! As Sally mentioned, if you stick your figure in the soil 3cm deep, and it is dry - that means that it is time for more water. This is a great way to engage kids in the garden and help them identify when more water is needed. This can change all the time based on our weather, and when they have a fun trick to use, they often feel more ownership over caring for the garden. Have them stick their finger in up to their first, or second knuckle - noting that the surface of the dirt may dry up before the layers beneath. Let them know that when growing plants, what we see above the surface is only part of what is going on! Often our soil may be dry on top, but have plenty of moisture below the surface - and this trick can help us from overwatering. Have the kids test how dry the soil is with all of your plants, and note how there are changes amongst different containers, and areas of your garden based on their environment and exposure to sun and heat.

Question from Sevan in Pemberton:
The bark on our peach tree is peeling, and it has fallen over. The owners before us attempted to keep it standing with some support. Despite its struggles, the tree is producing gorgeous fruit! Should we do anything more to take care of it, or is it ok the way it is?

Answer from Jennifer:
Hi Sevan, the pictures look like this is a mature tree with peeling bark and a fairly large canker on its trunk. There are a number of factors that could be contributing to the peeling bark. Sunscald and extreme temperature changes are the likely ones, as the tree appears to be in a very sunny location, so if the canker is on the South or West side of the trunk this could be due to sunscald.

Fruit trees have very thin bark so they are more susceptible to this.  It certainly wouldn't hurt to try and shade the trunk portion of the tree during really hot periods and remove any damaged, dried or loose bark around the surface of the wound. If the bark is removed around the entire circumference of the tree (called "girdling"), it will die, but trees can survive smaller wounds.  There are also trunk wraps but these may cause more harm than good because they can create breeding areas for insects and hold moisture in so you need to be careful with this type of remedy. Painting or cementing cankers in trees are also not recommended. Thankfully, this canker does look healed and your tree is producing nice fruit. The bark also looks discoloured and black which could indicate a fungal disease, although the canker looks fairly dry and benign, so perhaps a previous fungal disease. 

Fruit trees are susceptible to fungus diseases so you want to make sure your soil is well drained and there is not a lot of water sitting near the base of the trunk. Usually you see curling leaves and sunken spots on the peaches if there is an active fungus problem. It is hard to tell why your tree has fallen over. It could be poor pruning, unbalanced branch structure, heavy winds, disease or all of the above. 

The concern here is the branches, leaves and fruit touching the ground which creates an entry point for insects and disease. It is always best to keep branches off the ground, if you can, for good air flow and to discourage entry points and contact with the ground. As the tree is producing some really nice fruit (well done!), I would just keep an eye on it and see how it progresses. This darling tree definitely has a lot of character and appears to be a survivor!! Good luck with it.

Digging in with the Kids - Growing Chefs Integration Idea:

This Gardening Q&A sounds like it has great potential for some detective work! Take note of the things to look out for that would indicate disease in your plants. Have the kids in your life join you on an ‘eye spy’ hunt for indications of disease in your plant like Jennifer mentioned!

Question from Johanna in Vancouver:
My tomato plants seem to be growing like crazy but some of them have zero flowers/fruit. Help!

Answer:
Our cool weather so far this year has not been conducive to good tomato growing. The plants will grow lots of large, soft leaves in cooler weather and produce fewer flowers leading to fruit. If you’ve had success with tomatoes in the past then the issue is very likely to be attributed to the cool weather. 

If this is your first time, here are some points to consider. Tomatoes are moderately difficult to grow and need more doting care than many other crops. To grow well, they need the following:

  • Full sun

  • Fertile, well-drained soil that’s high in organic matter, with a pH level 6.0 – 6.8.

  • Warmth, but not high heat. Temps between 26° to 30° are best. Higher temperatures can kill flowers, so if your plants are in a greenhouse that’s getting super hot that could be an issue.

  • Regular watering to keep the soil evenly moist. Don’t let the soil dry out, but don’t let the plants sit in water either. Expect to water about 2.5 cm per week during peak growth. Overwatering produces leaf growth at the expense of flowers. Container grown plants need extra water.

  • Feeding every 10 – 14 days with a balanced organic fertilizer.

Conversely, large-fruited and long-season varieties such as Brandywine don’t ripen many fruits in cool summers (such as ours recently). Vine tomatoes need to have their suckers pinched out (these are the little side shoots growing between the main stem and a leaf stem). If they aren’t pinched out, all the plant’s energy will go into producing shoots, and not flowers and fruit. If you’ve got bush tomatoes you won’t need to remove side shoots. 

Above-ground parts of the plant need to be kept dry, and have good ventilation around plants - they don’t want to be crowded. A purple tinge to the undersides of leaves indicates the plants are not taking up enough phosphorus due to the cool weather (it’s not necessarily that there’s a phosphorus deficiency in the soil). Phosphorus deficiency is linked to less fruit production. Feeding with higher potassium encourages good fruit development. Feeding with excess nitrogen can promote a lot of lush leaf growth and very few flowers/fruit. Bonemeal has an appropriate proportion of N-P-K nutrients: 2 - [11-14] – [0-2] and could be used sparingly. Wood ashes (0-1-5) also have good proportions of flower/fruit producing nutrients. But really, it sounds like the most likely problem has been our very cool early summer. Tomatoes just don’t do well in the cool.

Digging in with the Kids - Growing Chefs! Integration Idea:

Mmmmmmm! One of our favourite things to do in the garden is pinch the shoots on tomato plants! It is totally a kid-friendly activity, and pinching the shoots, and pruning excess leaves to promote air flow gives off the most wonderful aromatics. When you are looking down the main stem of your tomato plant, you will see little ‘shoots’ come out at a 45-degree angle from the ‘elbow’ of the main stem and main branches which produce fruit. See the picture below! You can invite kids to pinch them with their fingers when the shoots are still small, no snips needed. For thicker stems, best to use some snips with adult discretion, and supervision required. Make sure to stop and….smell your hands - it smells so fresh! Ask the kids if the smell reminds them of anything familiar. 

Question from Kim in Vancouver:
I have been harvesting my kale all summer. I know kale can also be grown in the winter but do I need to plant new seeds? Or, will it keep growing?

Answer from Jennifer:
Hi Kim, yes, Kale is a biennial plant (lives for 2 years) so it will keep growing over the winter in zone 8-10 as it is very hardy and can survive temperatures down to -10C\14F. As with all vegetables, it's always good to add a light mulch (eg. dried leaves, straw) to the soil surface to protect from freezing temperatures in winter and hot sun in summer. Kale survives over winter as long as you harvested it correctly by removing the older outside leaves first and leaving the centre stem intact that has the smaller leaves. However, by next Spring this kale plant will bolt and die. It's also a good idea to reseed or transplant small kale plants so you have more plants to harvest from over the winter as kale leaves do not regenerate as quickly in colder months. You will need to get these new plants to maturity before the first frost so timing is critical. Also it's helpful to add more plants now to replace the plants you will lose next spring so you have plants at different stages of their growth cycle (called succession planting). If you are going to reseed,  I would consider some winter varieties such as Winter Red, Rainbow Lacinato, or a winter kale blend. You can pick up a free copy of West Coast Seeds, Planting for Fall/Winter harvests at your local nursery (or view it online here). On p. 8 they list a dozen different varieties of winter kale with planting instructions. You will find similar information on p. 38 of West Coast Seeds Gardening Guide 2020 which is also available at most nurseries (or view it online here). Good luck with your Winter harvest!

Digging in with the Kids - Growing Chefs! Integration Idea:

Similar to pinching the shoots on the tomato plants, have kids help with removing the older, outside leaves to harvest, and leaving the centre intact with the smaller leaves. Also, if you haven’t checked it out already, have your kids watch our lesson video on starting seeds - and have them help with re-seeding more kale plants!

Recipe: Very Berry Smoothie

Very Berry Smoothie.jpg

Looking for a morning (or afternoon) pick-me-up? Try out this delicious, antioxidant rich powerhouse smoothie!

Filled with the perfect amount of protein, quality fats, carbohydrates, and an array of vitamins and minerals, this smoothie is great for growing kids. Not to mention it takes very little time to prepare which is always a bonus when leading a busy lifestyle. 

If your child isn’t a fan of vegetables, smoothies are a fun and delicious way to ensure they are included in your little one’s diet. As well, due to smoothies being blended, this helps predigest nutrients and breakdown proteins, aiding in food sensitivity prevention as well.  This recipe can be varied based on what your kid likes and any allergy concerns. Start simple with this smoothie, even starting with just the dairy-free milk and fruit, slowly working your way up to incorporating greens, nuts, and seeds. Ensure that you blend the smoothie until it is a very creamy consistency to your child’s preference. You can also freeze these into popsicles or use less liquid to serve this as a smoothie bowl.

Check out some of the benefits of the different ingredients below. Enjoy, and share with us any photos or stories of your favourite smoothies! The recipe card for this smoothie can be found “here”.

Dairy-Free Milk: With dairy and lactose sensitivities and intolerances on the rise, dairy-free milk provides a great alternative. Store-bought dairy-free milks often have nutrients added to them (vitamin A, D, E, B-vitamins, zinc and magnesium) and home-made ones provide some nutrients as well. When using home-made, the leftover pulp which is packed with nutrients can be used in baking and other recipes. These vitamins and minerals are important for the nervous system, digestive, intestinal, hormone and bone health. Some of our favourite dairy-free alternatives include almond, cashew, oat, coconut and walnut milk.

Wild Blueberries: Berries are incredible sources of antioxidants that help combat free radical damage and inflammation in the body. Berries, especially when combined with protein and healthy fats, can improve blood sugar balance. They are also high in fibre and many nutrients (Vitamin C, K, Manganese to name a few) that are essential for our immune and bone health. Some of our favourite blueberry alternatives are raspberries, blackberries and strawberries. 

Nut & Seed Butters: All nuts and seed butters have incredible amounts of protein, healthy fats and nutrients including antioxidants (vitamin E), calcium, magnesium, zinc and iron. Healthy fats are essential for energy, cell growth, nutrient absorption, hormone production and organ protection. Protein is essential for repairing tissues and hormone and enzyme production. The aforementioned vitamins and minerals are important for bone health, muscle relaxation, wound healing, skin, hair and nail health, anti-aging, and hormone and digestive health. Some of our favourite nut and seed butters include peanut, almond and sunflower butters. 

Hemp Hearts: Not only is this local seed a perfect protein, but hemp hearts have incredible amounts of fibre, iron, B-vitamins, magnesium, manganese, phosphorus and Omega-3’s. These nutrients are essential for fighting inflammation and joint health. Some of our favourite alternatives include chia seeds, pumpkin seeds, flaxseed and sunflower seeds. 

Maca Powder: Maca is a type of adaptogen. Adaptogens are connected with detoxification and stress management. They work to normalize the stress response in the body. They are also considered an antioxidant, working to enhance mood, stamina and endurance, whilst promoting a calming energy. Adaptogens work with the body to promote its own balancing process. Alternatives to this include lion’s mane powder. 

Dark Leafy Greens: Our dark leafies (kale, spinach, dandelion, chard, collards) are great sources of many nutrients including vitamins A, C, E, K and B-vitamins. They also contain tons of fibre, iron, magnesium, potassium and calcium. These nutrients are important for regulating the digestive and intestinal systems, and supporting our bone and hormonal health.

Cinnamon: Cinnamon is an incredible spice, loaded with antioxidants, and helpful in combating inflammation, blood sugar and cholesterol imbalances. For its medicinal properties, ensure that you are using “Ceylon” or true cinnamon (and not Cassia). Other spices and herbs that would go great in this smoothie include cardamom, allspice, pumpkin spice and mint.

Make a Pollinator Garden Activity

Make a pollinator garden full of bee friendly flowers to attract bees to your garden or help support the gardens and farms in your neighborhood. 

IMG_0899.jpg

You Will Need:

  • a plant pot or any container you have on hand (a yogurt container, or used milk jug work well also). Click here for a tutorial on turning a recycled container into a plant pot. 

  • soil

  • a packet of wildflower or bee friendly seeds

Instructions:

  • Research what flowers attract bees in your area. Wildflowers or local flowers are best for local bees. Blue, purple, white and yellow flowers are very attractive to bees.

  • find your seeds 

  • find a container or a place outside to plant your seeds

  • plant your seeds according to the directions on the packet

  • watch your flowers grow and the bees buzz by

  • plant flowers from spring to fall so the bees have a consistent supply of nectar

What is pollination?

Pollination is when pollen is transferred from one flower to another or within one flower. When a flower is pollinated the plant can make seeds and fruit/vegetables. Bees are one way that plants pollinate. When bees land on a flower to drink its nectar, pollen from the flower sticks to the bee’s legs, the bee carries the pollen and spreads to the next flower. 

Some plants like beans and peas are self-pollinating that is why you can grow them inside on your windowsill. Other vegetables like squash and some types of cucumber need to be pollinated to produce fruit and vegetables.

Pollinator questions to ponder or research:

  • What are some other pollinators besides bees?

  • What else can you put in a pollinator garden to help the pollinators? Hint...sometimes bees get thirsty! 

  • What would happen if we didn’t have any bees?

Make a Garden Planter Out of a Recycled Container

You don’t need anything complicated to grow a container garden at home. In this activity you turn a recycled container into a planter pot. Watch the video below or simply follow the instructions to make your own planter.

You Will Need:

  • a used milk, juice or yogurt container (or any container you have on hand)

  • a small amount of soil (about 6 cups)

  • a packet of seeds (we planted wildflower seeds)

  • sharp scissors

  • a pen to poke drainage holes

  • a tray or larger container to catch drainage water (if you like)

 Instructions:

  • clean your recycled container so that it is free of food residue

  • decide what side of your container you want to be the top and what side will be the bottom

  • ask an adult to help poke about six drainage holes in the bottom of your container

  • ask an adult to help cut a rectangular opening in the top of the planter (skip this step if you are using a container with an open top)

  • fill your container about ¾ full with soil

  • plant your seeds according to the package directions

  • find a tray or larger container to put under your container (to catch any water that might drain out) 

  • water gently, place in a sunny location and wait for your seeds to grow

What other recycled items can you grow a garden in? Let us know your creative ideas!


The Coolest Way to Eat Your Greens! Frozen Greensicles

These Greensicles get their vibrant green color from spinach. Including spinach in a popsicle (or smoothie) adds vitamins A and C as well as potassium and magnesium. Making this easy recipe along with kids is fun and will help get them comfortable cooking with and eating greens. For extra fun make up your own name for the greensicles (hulksicles, grasshoppersicles, greenmonstersicles). 

Frozen Greensicles Recipe

Yield: This recipe makes 4 greensicles
Prep time: 5 minutes
Freeze time: 5 hours (or a bit longer depending on your freezer)

Ingredients:
½ cup spinach or other greens
½ cup pineapple (frozen, canned or fresh)
½ cup milk (dairy or dairy free)
½  cup yogurt (dairy or dairy free)
1 banana (frozen or fresh)

Tools:
Blender*
Popsicle molds**

 Instructions:

  1. Place all ingredients in a blender or food processor and blend mixture until it is smooth and creamy and there are no large chunks of spinach left. If your smoothie is too thick add some extra milk, yogurt or water and blend some more. Ask an adult to assist when working with a bender and food processor.

  2. Pour mixture into popsicle molds

  3. Freeze for 5 hours or until frozen

  4. Release popsicles from the molds and enjoy 

Modifications: 
You can add any fruit you have on hand to your greensicle recipe. Some fruits like blueberries will taste great and also change the color of your greensicle. Have fun experimenting with different flavor and color combos.

*If you don’t have a blender you can use a food processor or put all the ingredients in a zipper bag and smush the mixture with your hands (chop the spinach a fine as possible if you are using this method).

**If you don't have popsicle molds you can freeze this mixture in an empty yogurt container and eat it with a spoon like ice cream or “icegreen”.


Victoria Program Update

Hello Growing Chefs! community,

We want to bring you up to speed on some island-based happenings we have been working on, and introduce you to some of our friends and collaborators.

Springing into Action!

This spring, we had an amazing group of over 25 volunteers excited and ready to share their knowledge in Victoria classrooms. We were geared up for one of our biggest years yet, expanding our reach with 5 new teachers and 2 new schools to offer the Growing Chefs! program to over 100 kids. Unfortunately, we did not get the opportunity to connect in schools, but we found new ways to reach even more kids and families online!

As you may have seen, our team had a lot of fun finding creative ways to bring our Spring Classroom Gardening and Cooking program online, with Growing Chefs! at Home. We could not have done this without the help of our amazing volunteers who helped us continue to serve our mission by sharing their knowledge and expertise via video.

Growing Together From a Distance

Growing Chefs! is proud to have joined Growing Together as a key collaborator to form an island-based initiative of food literacy organizations and growers to support our communities in these unprecedented times. We look forward to curating educational materials and resource listings, as well as promoting opportunities for mentorship and volunteerism.

This website is the hub for the Growing Together initiative. Stay tuned! You can also check out this Growing Together video to learn more about our mission.

Want to support food literacy initiatives in Victoria? Head to the Growing Together Volunteer Form to sign up!

Make sure to check out and follow along with the Growing Together social media pages on Facebook and Instagram.

Feature Spotlight from our Victoria Growing Chefs! Community

Indecent Risotto

Chef Andrew brought the Growing Chefs! Program to the island in collaboration with the Island Chefs Collaborative (ICC) in 2014. Chef Andrew and his partner Shannon have been major supporters of the program, volunteering in the classroom and participating in our Eat. Give. Grow. fundraising campaign. Together as local food champions, they run Indecent Risotto. We dig what they are up to! *Virtually passes the mic*:

indecent risotto.png

Here at Indecent Risotto we believe that in order to cook great food you need to start with the best ingredients. From day one on our food truck we have always bought as many local ingredients as possible. From working with local farms for all of our produce, to local producers of meats, seafood and cheeses, we attain more than 80% local ingredients during the peak summer months.

The best part about doing things this way are the relationships that we have formed with our amazing suppliers. It is our way of building up our communities and truly understanding what it takes to create a local food economy. We feel honoured to be able to go directly to the farm 10 minutes down the road from us and see the changes the seasons bring. Being able to look at a crop and know in two weeks there will be a fantastic new ingredient ready for us to use is the best!

Andrew Paumier and Shannon Moriarty
Indecent Risotto Food Truck

Check out Indecent Risotto online at their website, or on Instagram or Facebook.

Make a Salad Bar Activity

Growing up in the 80’s my absolute favourite restaurant had an all-you-can-eat salad bar. I loved to pick from all the options and toppings and then add on one of the many dressings (I always went for Thousand Island). Then, I would hit up the soft serve ice cream bar! Kids today still really enjoy the variety and choice that a salad bar style presentation offers, set one up at home to relive your childhood and introduce your kids to a super fun way to eat greens. 

IMG_8779D.jpg

You Will Need:


Instructions:

  1. Talk with kids about what a salad bar is.

  2. Look at the list of salad ingredients below and pick a few that you would like to offer at your in-house salad bar (or brainstorm your own ingredients). You only need a few toppings and they don’t have to be fancy, so use what you have around the house (we made our croutons out of some stale bread).

  3. Draw a diagram of how your salad bar will be set-up (generally starting with lettuce at one end and ending with dressing at the other end).

  4. If you are feeling crafty, create a name and logo for your salad bar. We called ours Soopa Salad.

  5. Get your ingredients, wash and prepare them and set-up your salad bar.

  6. Enjoy experimenting with new toppings and flavour combinations.

  7. The best part about a salad bar is that you can go back for a second helping!

Ideas for Components of Your Salad Bar:

Snip20200708_2.png
SaladphotoB.jpg
Growing Chefs! Homemade honey vinaigrette.jpg

Growing Chefs! Programs Went Virtual

This year our Spring Classroom Gardening and Cooking Program, like so many things this year, looked a little different.

In early March, we were all set to bring our program to 54 classrooms across the Lower Mainland and in Victoria with a team of nearly 200 volunteers who were ready and eager to get into schools and teach kids about growing and cooking healthy food. Over the spring break, we made the difficult decision to postpone the start date of our programming due to concerns related to the coronavirus, but as April came closer, it became clear that our spring classroom program was not going to happen at all this year.

As schools were closed and learning moved to an online, distanced format, we wondered if and how we could still bring hands-on food literacy education to students at home. We chatted with some of the teachers who had signed up for our spring program, asked our volunteers if they’d be interested in helping us to develop some online learning materials, and were able to create Growing Chefs! at Home; a twelve-part video series bringing many of our regular program components to students and families at home.

Growing Chefs at Home.png

Just as with our regular classroom program, our virtual program began with some instructional videos to get kids and families growing their own home gardens. It was exciting to see how many different gardens students planted at home. Some had a few pots, some got creative repurposing containers into pots for growing, some had full windowsill gardens, while others had large gardens in their backyard… all showing the many ways we can grow food in an urban setting!

Every Tuesday from March 31st until June 26th, we released a new lesson video and at-home lesson outline on our blog that included art projects, at-home science experiments, scavenger hunts, activity worksheets, movement activities, writing exercises, story readings, and of course, recipes.

Growing Chefs! staff and volunteers invited students, teachers, and families into their home kitchens, living rooms, backyards, and home gardens through a series of videos that explored our connections to food throughout the whole food cycle. In these videos, staff and volunteers brought their skills, knowledge, and passion to each lesson, sharing all of this and more with students just as they would in the classroom. They led lessons on how plants grow, why soil and compost are important, exploring new foods through our senses, why eating healthy is important, how food makes us feel, some basic at home cooking lessons, and more.

The teachers that were going to be a part of our in-school program joined us, sending out each weekly lesson to their students as part of their online learning content. In addition to the classrooms that we would normally be reaching, we had thousands of views, likes, and shares as we shared all of this content through our Facebook, Instagram, and Twitter feeds.

We could not have made this shift so quickly and successfully if it weren’t for our amazing program team, the passionate teachers who were eager to incorporate food literacy into their online lesson plans and help us develop the most effective ways to do so, and of course, the incredible volunteers who were more than eager to still share their knowledge, passion, and skills with kids and families.

We have all missed being in schools and working in classrooms this year, but we have been so excited to see how many have been following along with our lessons at home and interacting with us online. Thank you to all the teachers, parents, and students who have shared videos and photos of what you’ve been up to with Growing Chefs! at Home. It has warmed our hearts to hear from you and see your amazing gardens and meals you’ve prepared following along with the lessons.

If you missed any of our Growing Chefs! at Home lessons or are looking to take part in these lessons at home, here is a complete list (with links to content) of all the lessons and activities we created this spring:

  1. Introduction to Growing Chefs! At Home

  2. Lesson 1- Planting our garden

  3. Lesson 2 - Vegetable Exploration

  4. Lesson 3 - What Vegetables do for us

  5. Lesson 4 - Mindful Eating

  6. Lesson 5 - Foods and Emotions

  7. Lesson 6 - Parts of a Plant & How Plants Grow

  8. Lesson 7 - Exploring Soil & Compost

  9. Lesson 8 - Making a healthy salad and salad dressing

  10. Lesson 9 - Where food comes from, exploring food systems

  11. Lesson 10 - Let’s Make a Stir Fry

  12. Growing Chefs! at Home Program Wrap-up and Review

While our virtual spring program wraps up with the end of the school year, over the summer we will continue to share ideas and outlines for fun at-home learning activities and recipes on our social media channels. We hope that you will continue to interact with us online!

Donor Profile: Mission Hill Family Estate

Connecting over a delicious meal and favourite beverage is something all of us have in common. We use this to offer comfort, make friends, celebrate special occasions, and show appreciation, gratitude and love. Food is more than just nourishment; it allows us to create memories and express our creativity. Through this experience we are able to go on a journey, connecting with different cultures, traditions and stories.

Pairing wine and food is deeply embedded in our culture, and is a way to not only enhance one’s dining experience, but tune in with your mood and the meal you are eating. Thanks to the continued support from Mission Hill Family Estate, we are able to deepen the relationships with our community members and celebrate the joy of connecting over local food and wine.

Thank you Mission Hill Family Estate for your wine sponsorship, and thank you Executive Chef Patrick Gayler for taking the time to introduce yourself to Growing Chefs!

How long have you been working at Mission Hill Family Estate?
7 years

As Executive Chef, what do you do?
I help the sous chefs source ingredients, make menus, and train new cooks in the restaurant. I also host culinary classes and dinners too.

What makes Mission Hill different from other B.C. wineries?
Our commitment to quality and the Okanagan.

What is the most exciting part of working at Mission Hill?
Being able to focus on putting together great ingredients and wine is always exciting.

What makes you proud to work for Mission Hill?
Seeing guests from all over the world enjoying our unique winery and valley .

What is your favourite vegetable?
Onion or potato. I could never pick just one.

What’s your favourite food memory?
Turkey dinner at my grandma’s house.

CLICK HERE to learn more about experiences offered at Mission Hill Family Estate.