food education

Food Scrap Dyed Eggs

Click here for printable activity instructions.

It’s officially spring, and in our house, that means that we are looking forward to Easter (and dying Easter eggs). This year we thought we would try something different and dye our eggs using food scraps instead of the food colouring we usually use. The idea of a homemade dye appealed to us for a few reasons:

  • We don’t need to buy a kit or food colouring.

  • Simmering our own dye mixture is a chance for us to be creative and learn about the science of making and applying dye.

  • Making our own dye adds some intrigue – we won’t know what colour our eggs will be until we are done! 

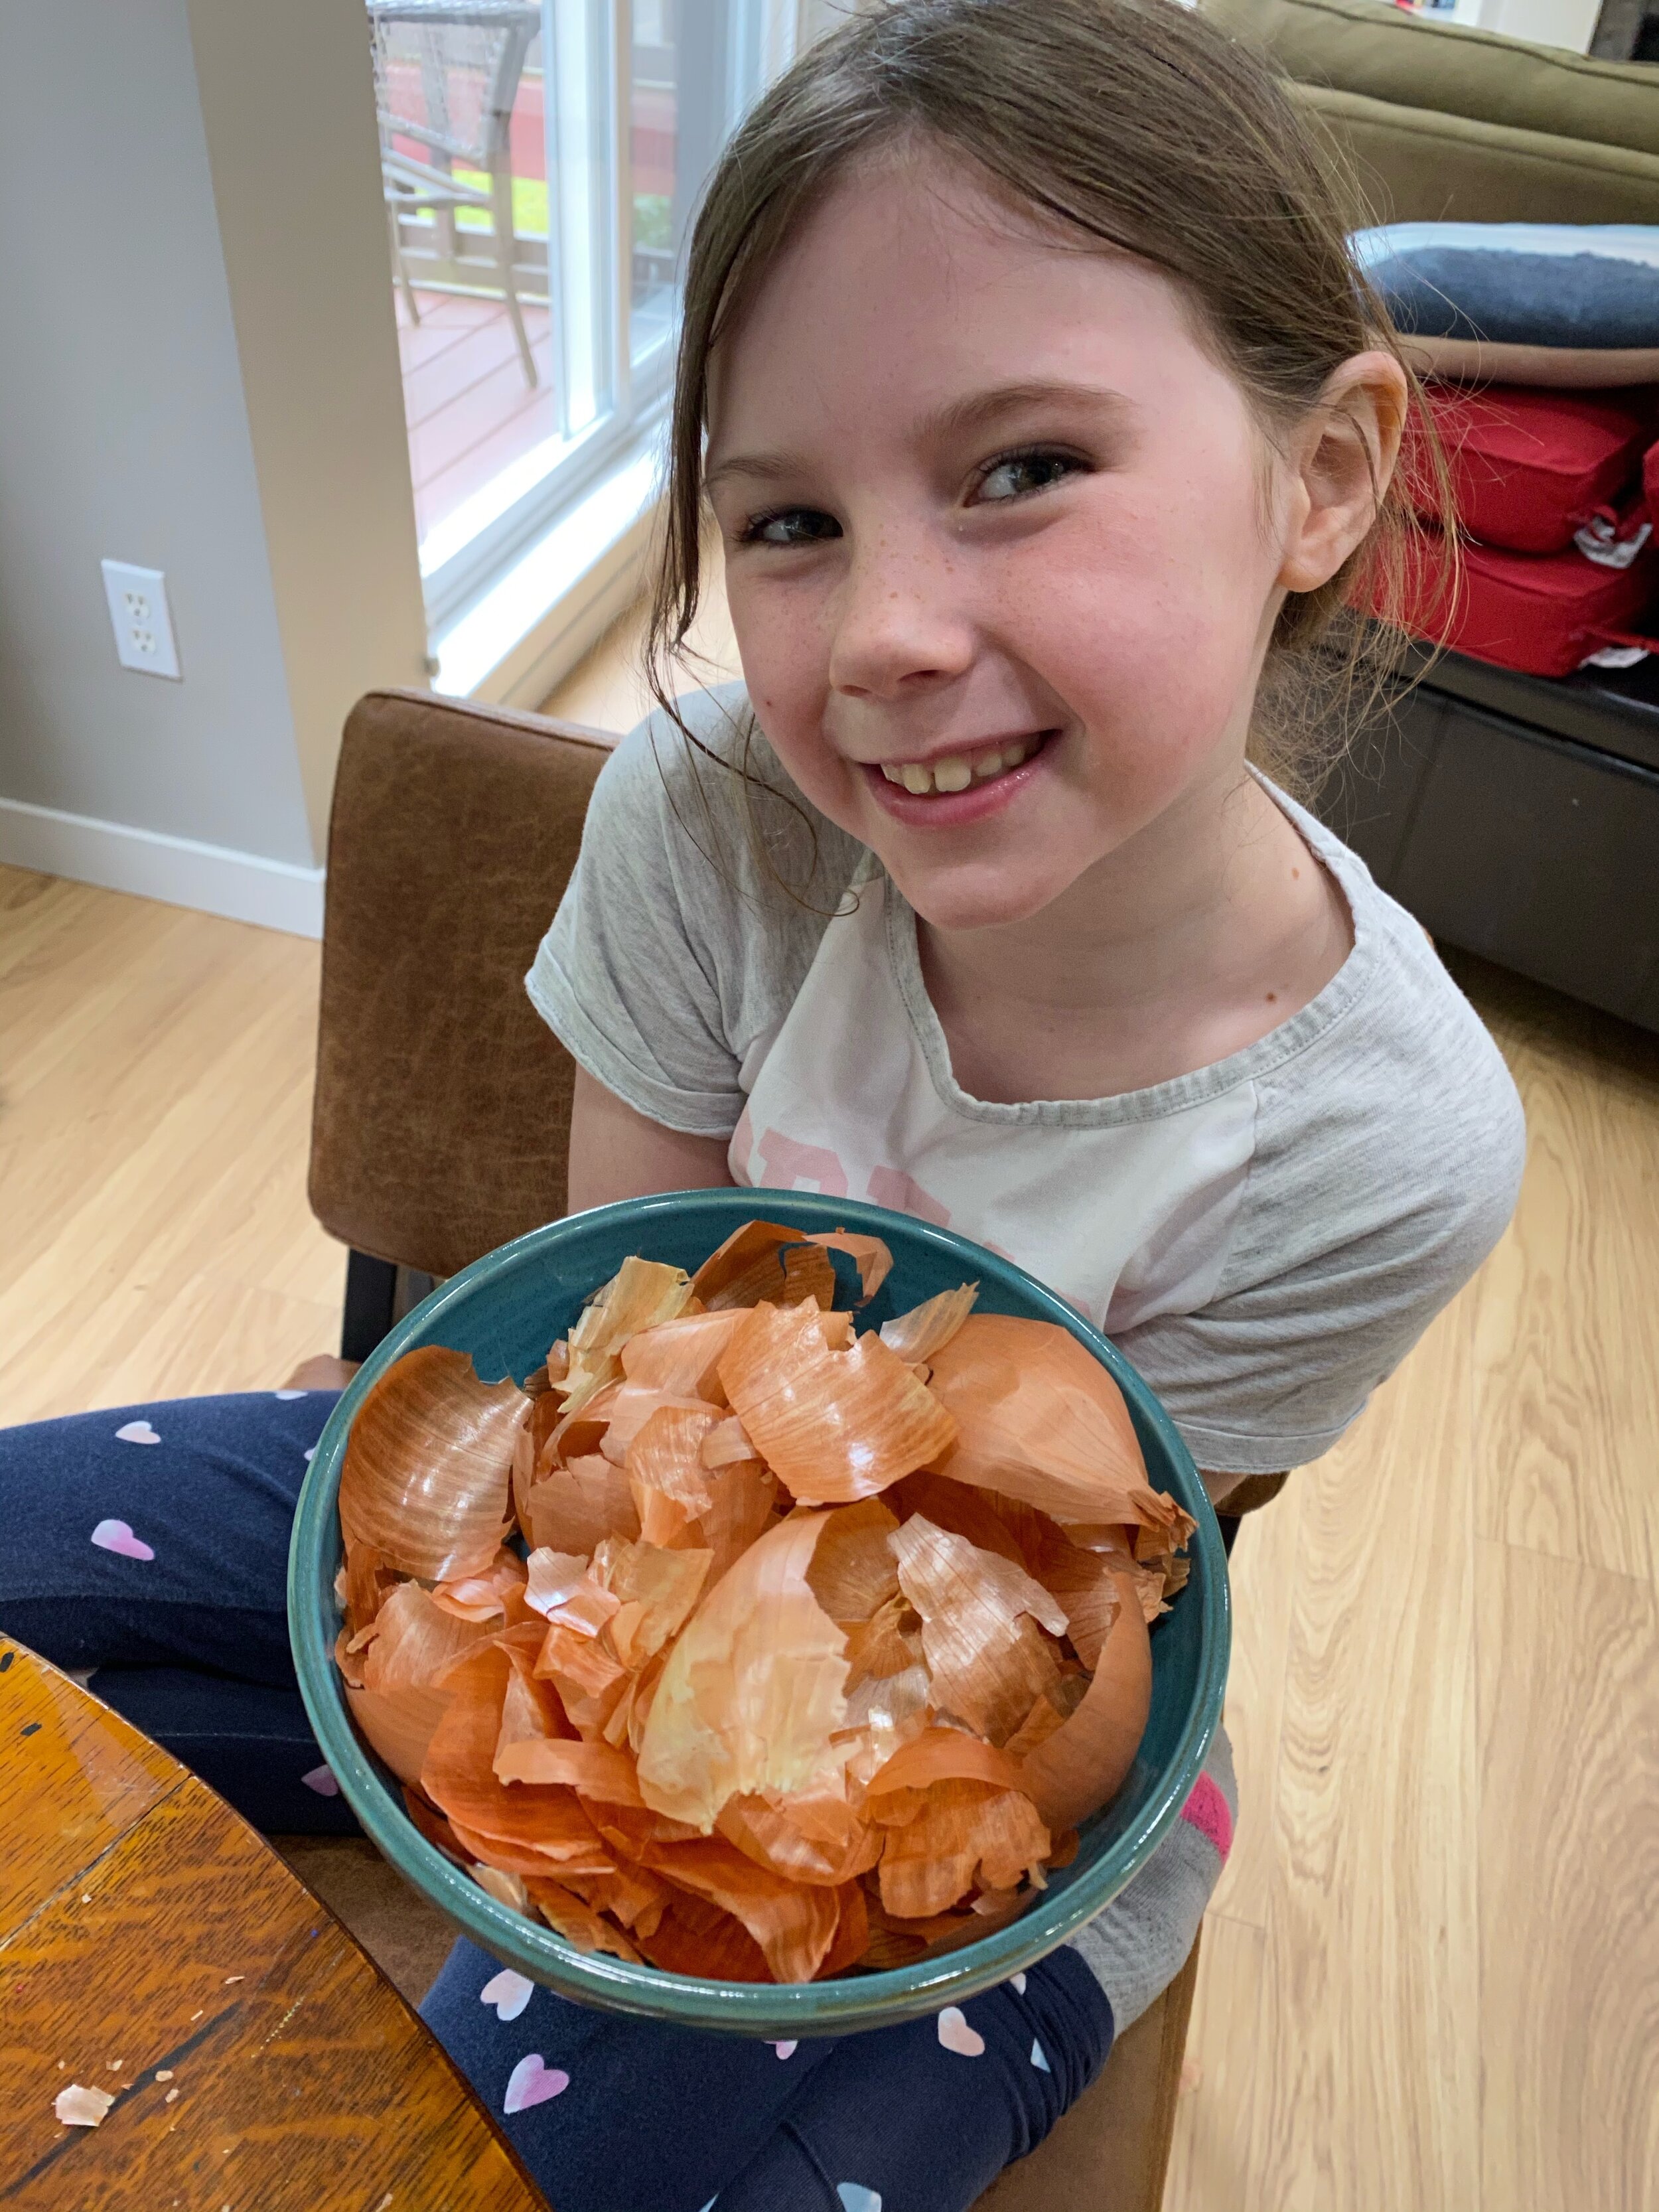
For our egg dye, we decided to make two dye baths using yellow onion skins and beet trimmings.

You may be wondering what colours these food scraps will make - and the answer is more surprising than you may think! Each of these food scraps have the potential to make several different colour results - depending on a few factors:

  1. What egg you apply the dye (white eggs vs. brown eggs).

  2. Mordants - This is what binds the dye to an object and can greatly alter the colour result. An example of a mordant is vinegar or salt. Read more on the science of mordants below.

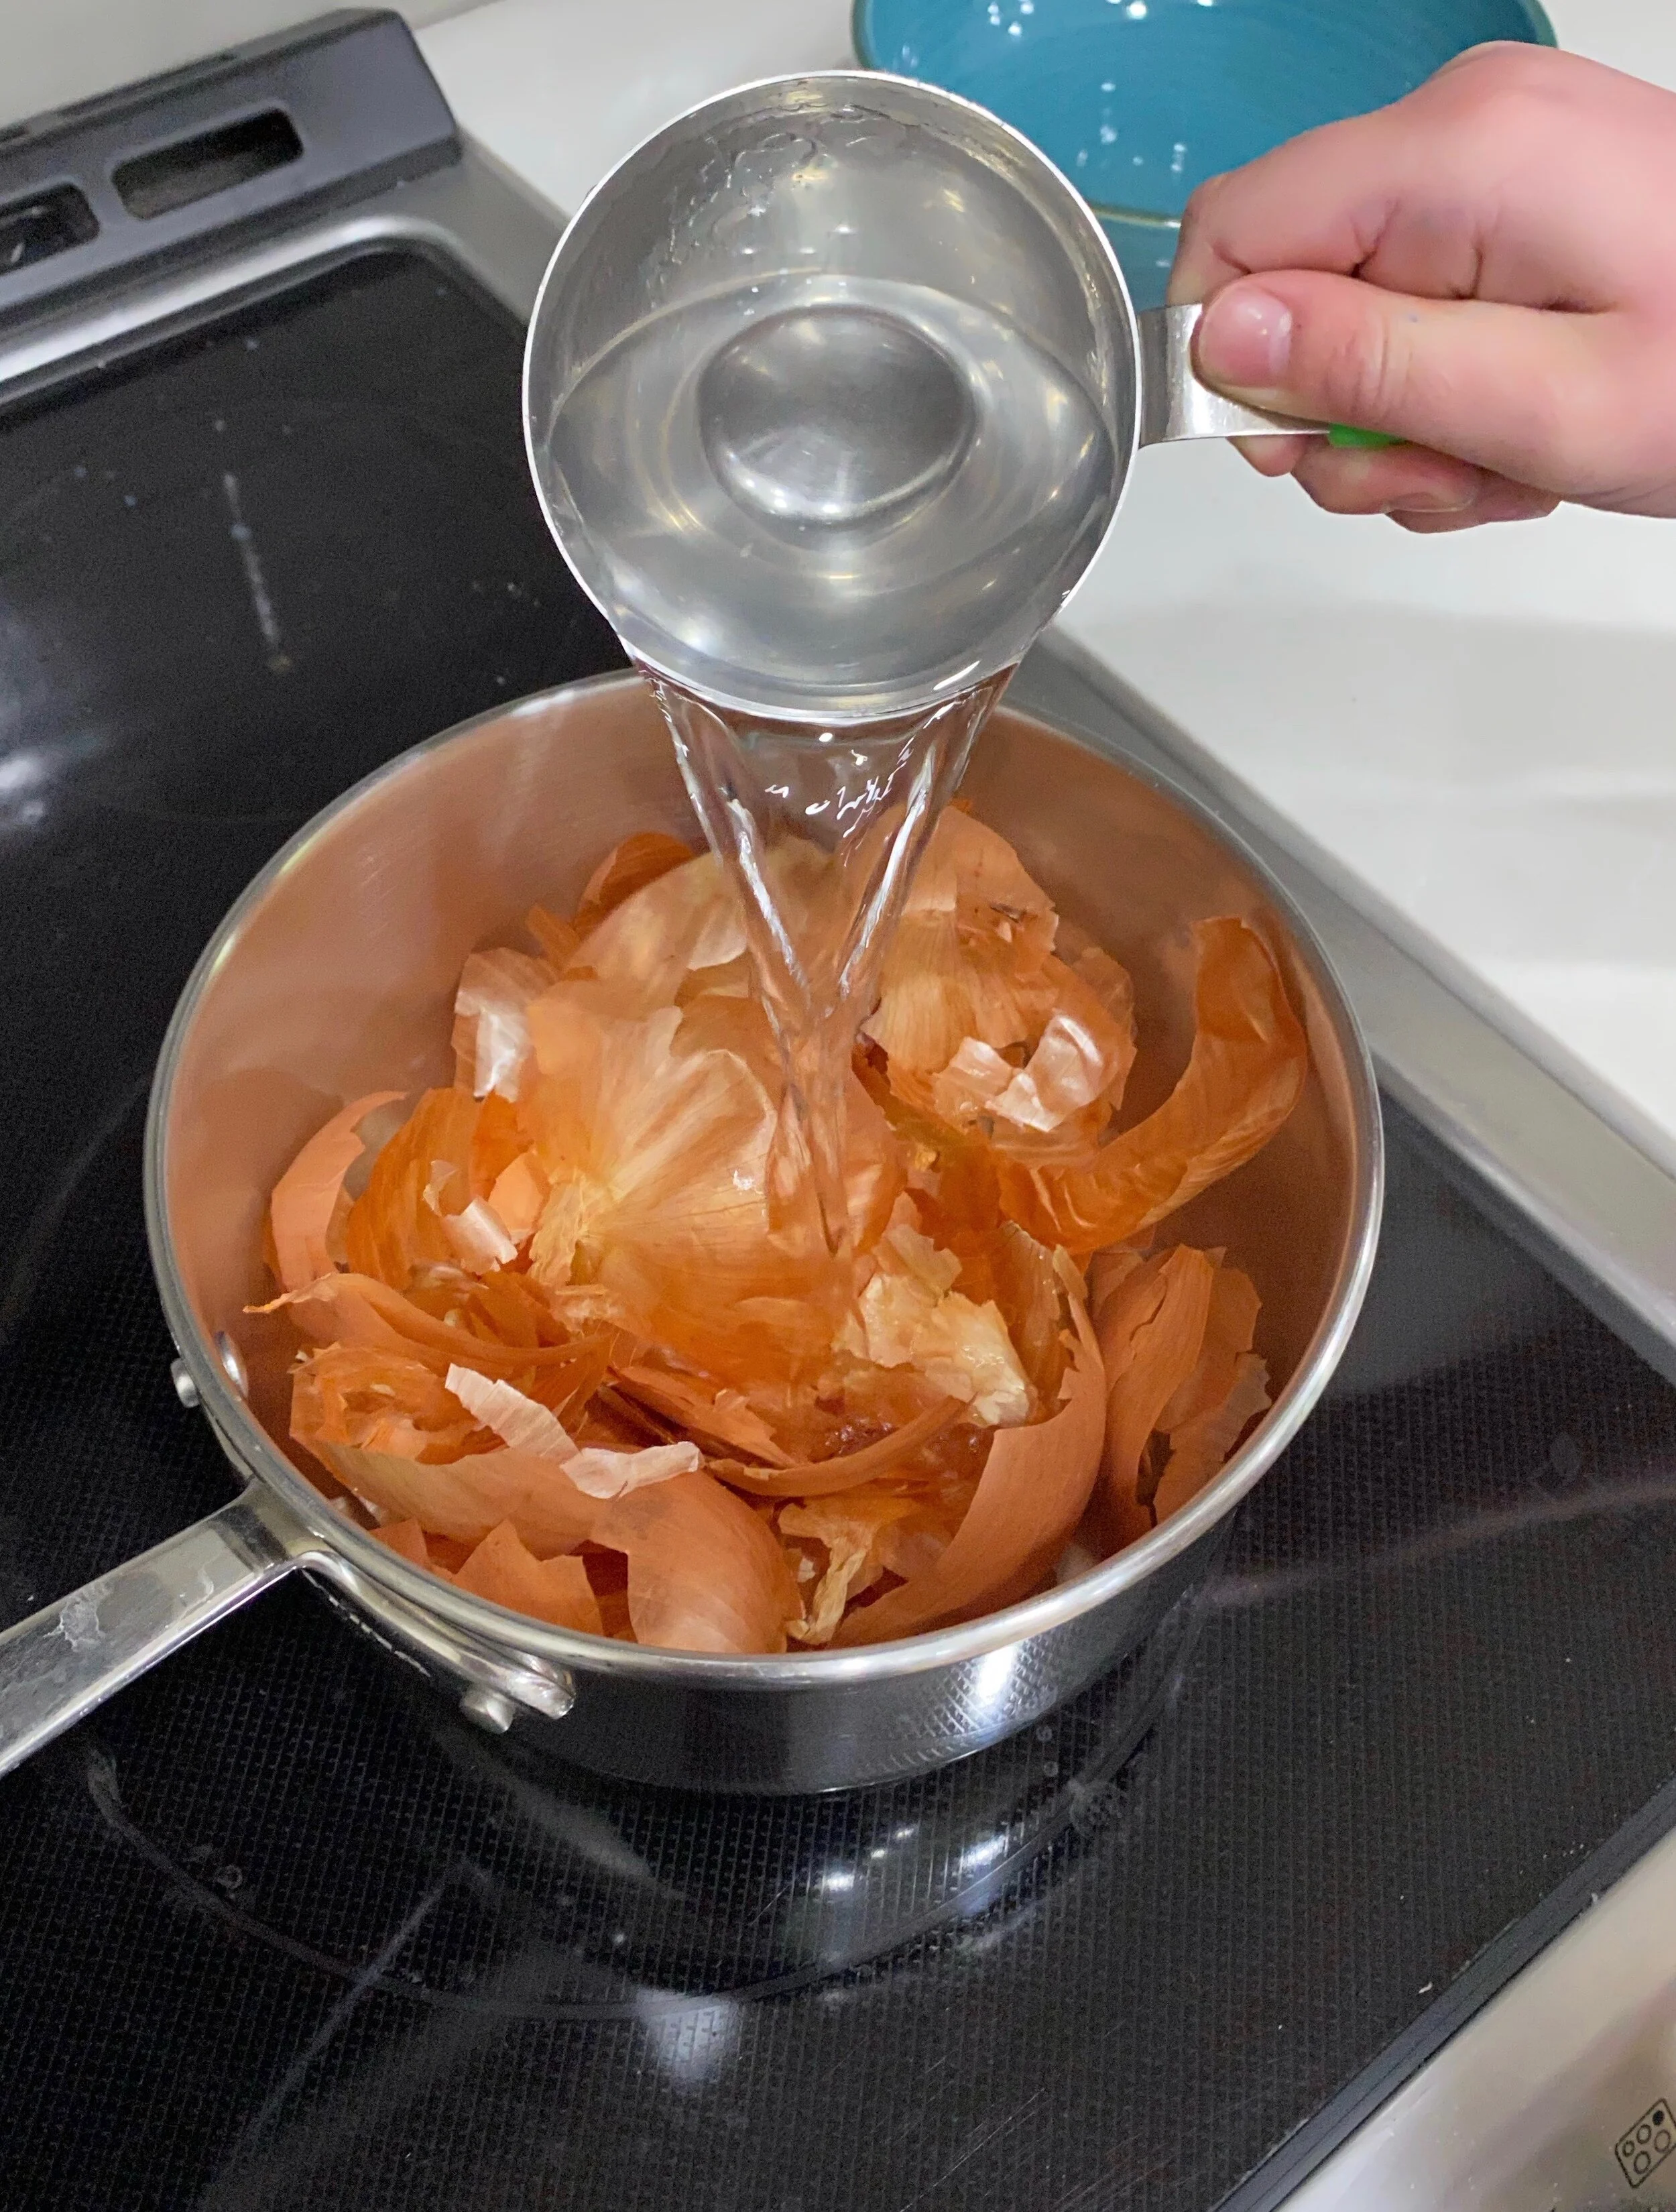
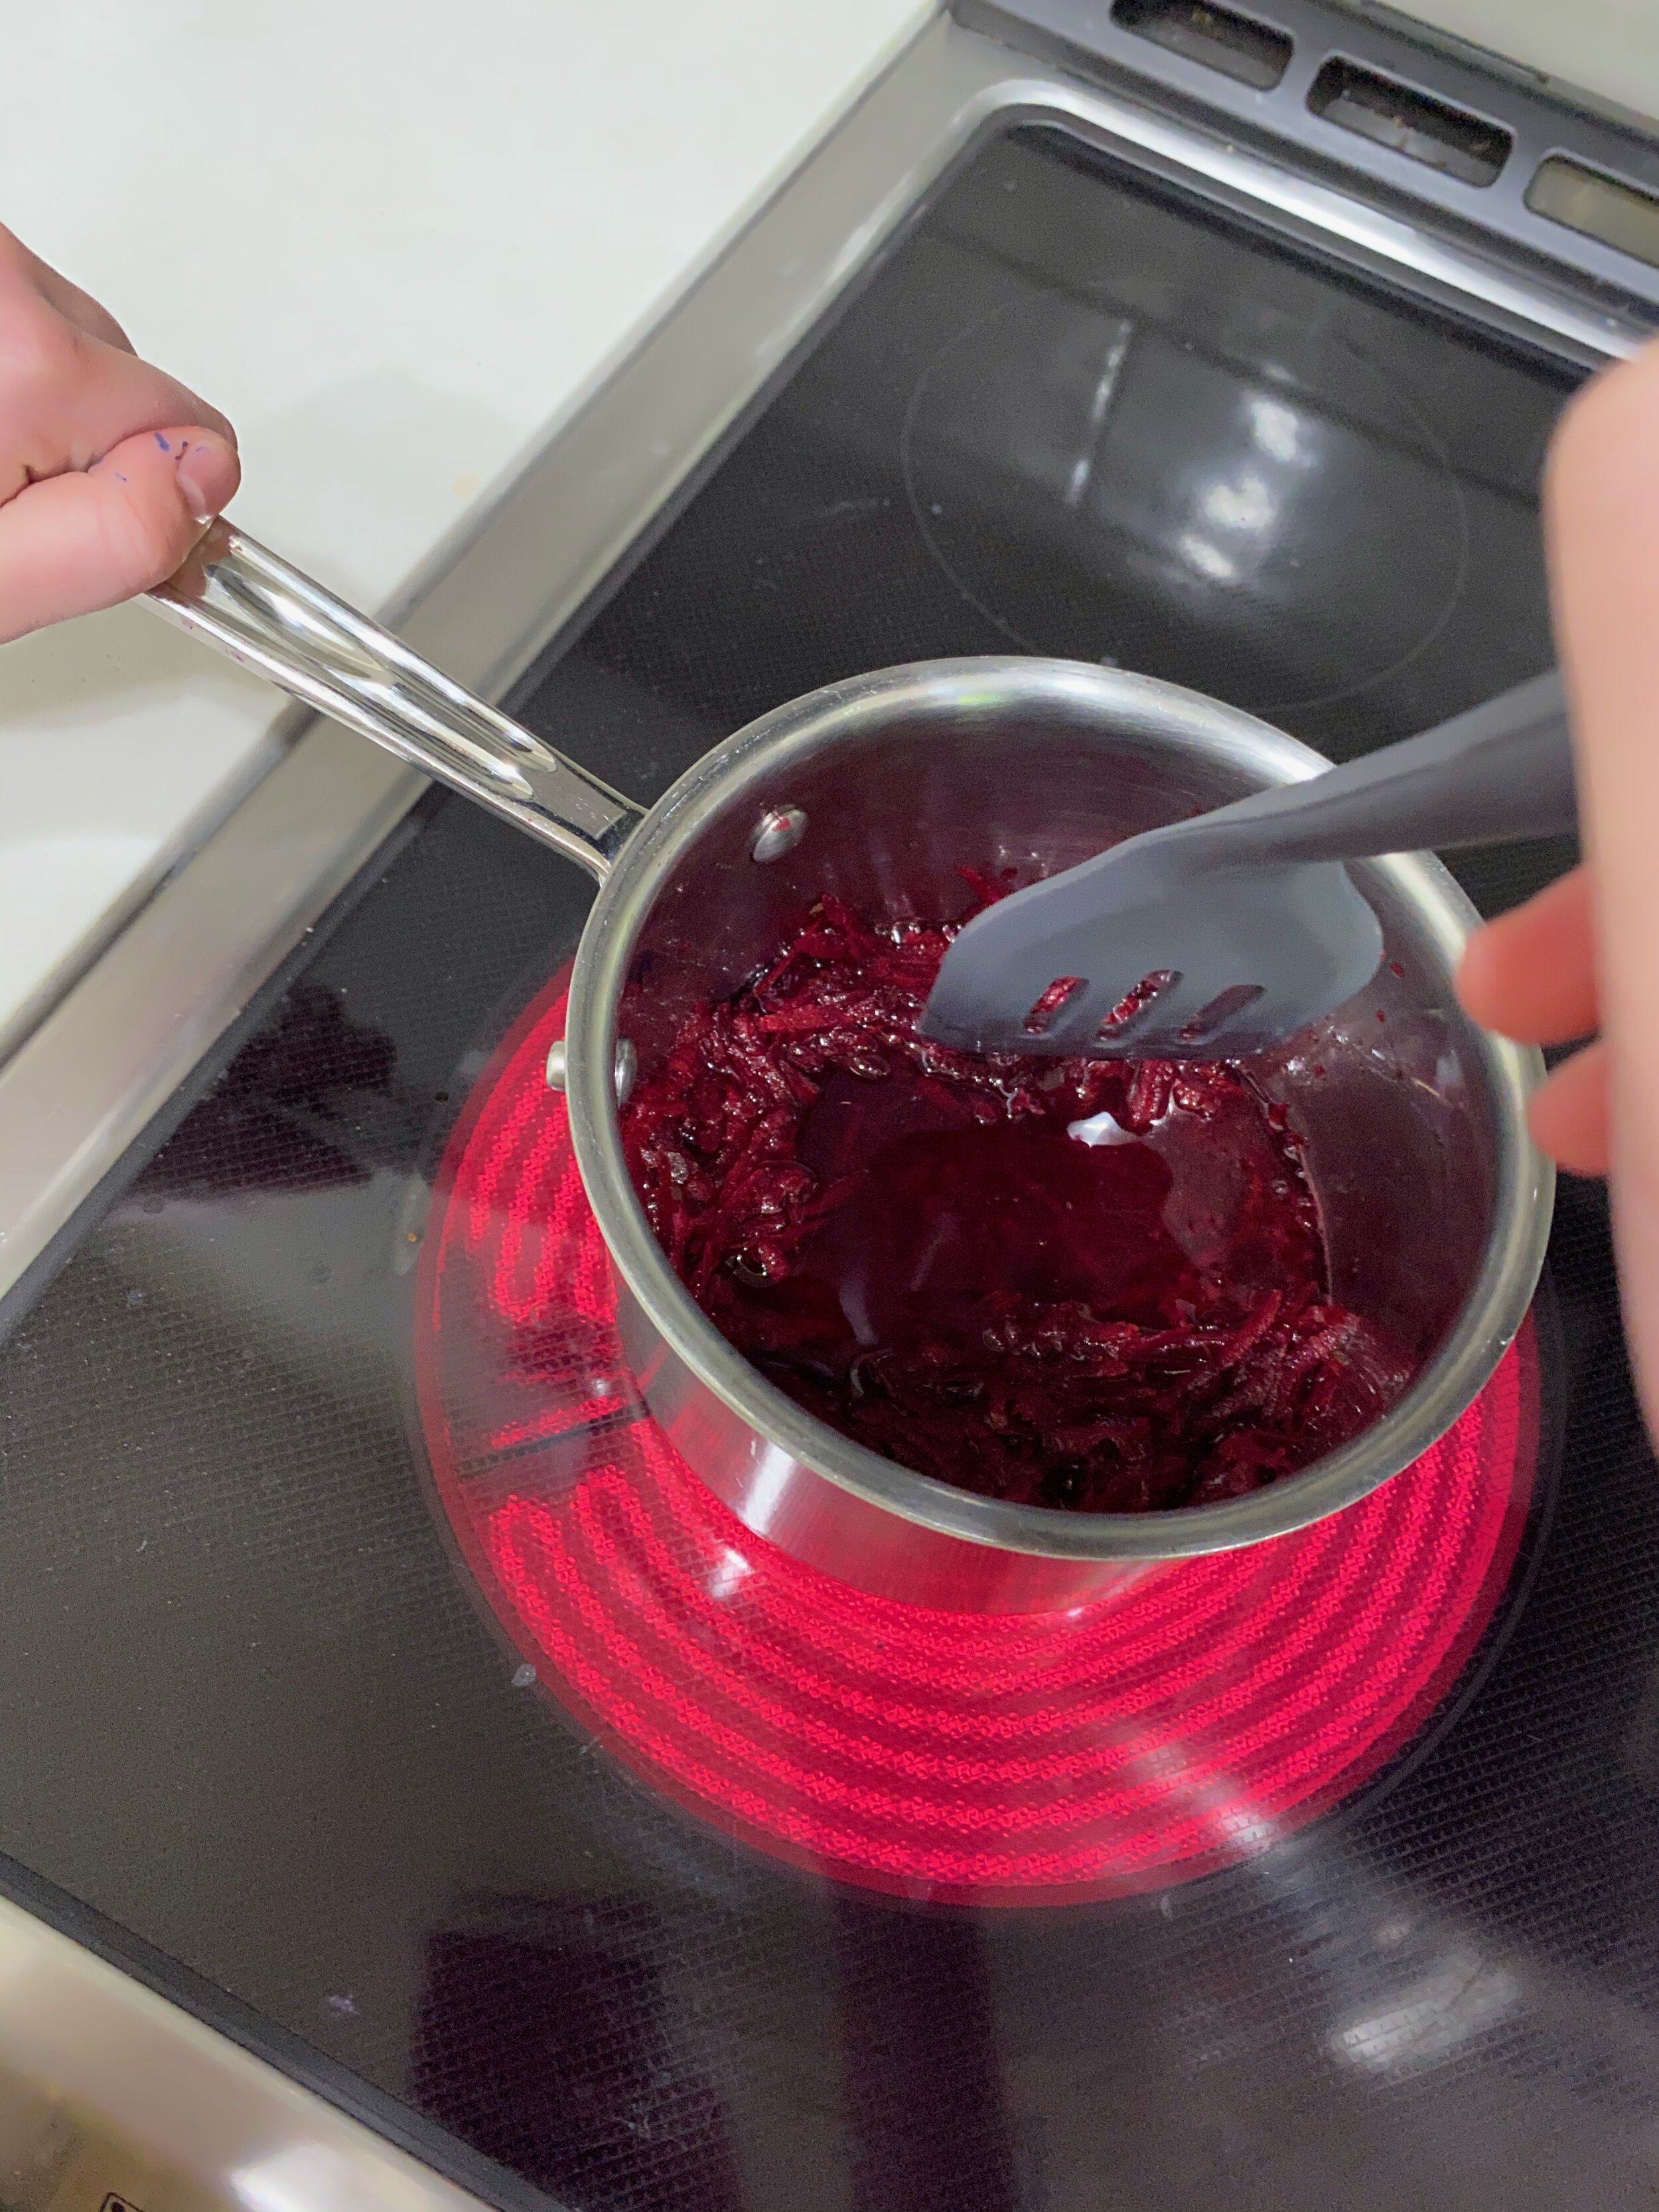
To make our dye bath we combined 1 cup of vegetable scraps with 1 cup of water. We grated the beet scraps to get maximum effect and simply broke the onion skins into large pieces. We put our vegetable scraps and water on the stove to simmer for about 30 minutes with the lid on, stirring regularly. After the dye was sufficiently simmered, we drained out the vegetable pieces and had an interesting conversation about what to do with the boiled food scraps, we decided to keep the bits of beet to add to a soup and compost the onion skins.  We transferred the remaining liquid (our dye) to a smaller container and added a mordant – we chose vinegar. Then we waited for our dye bath to cool. 

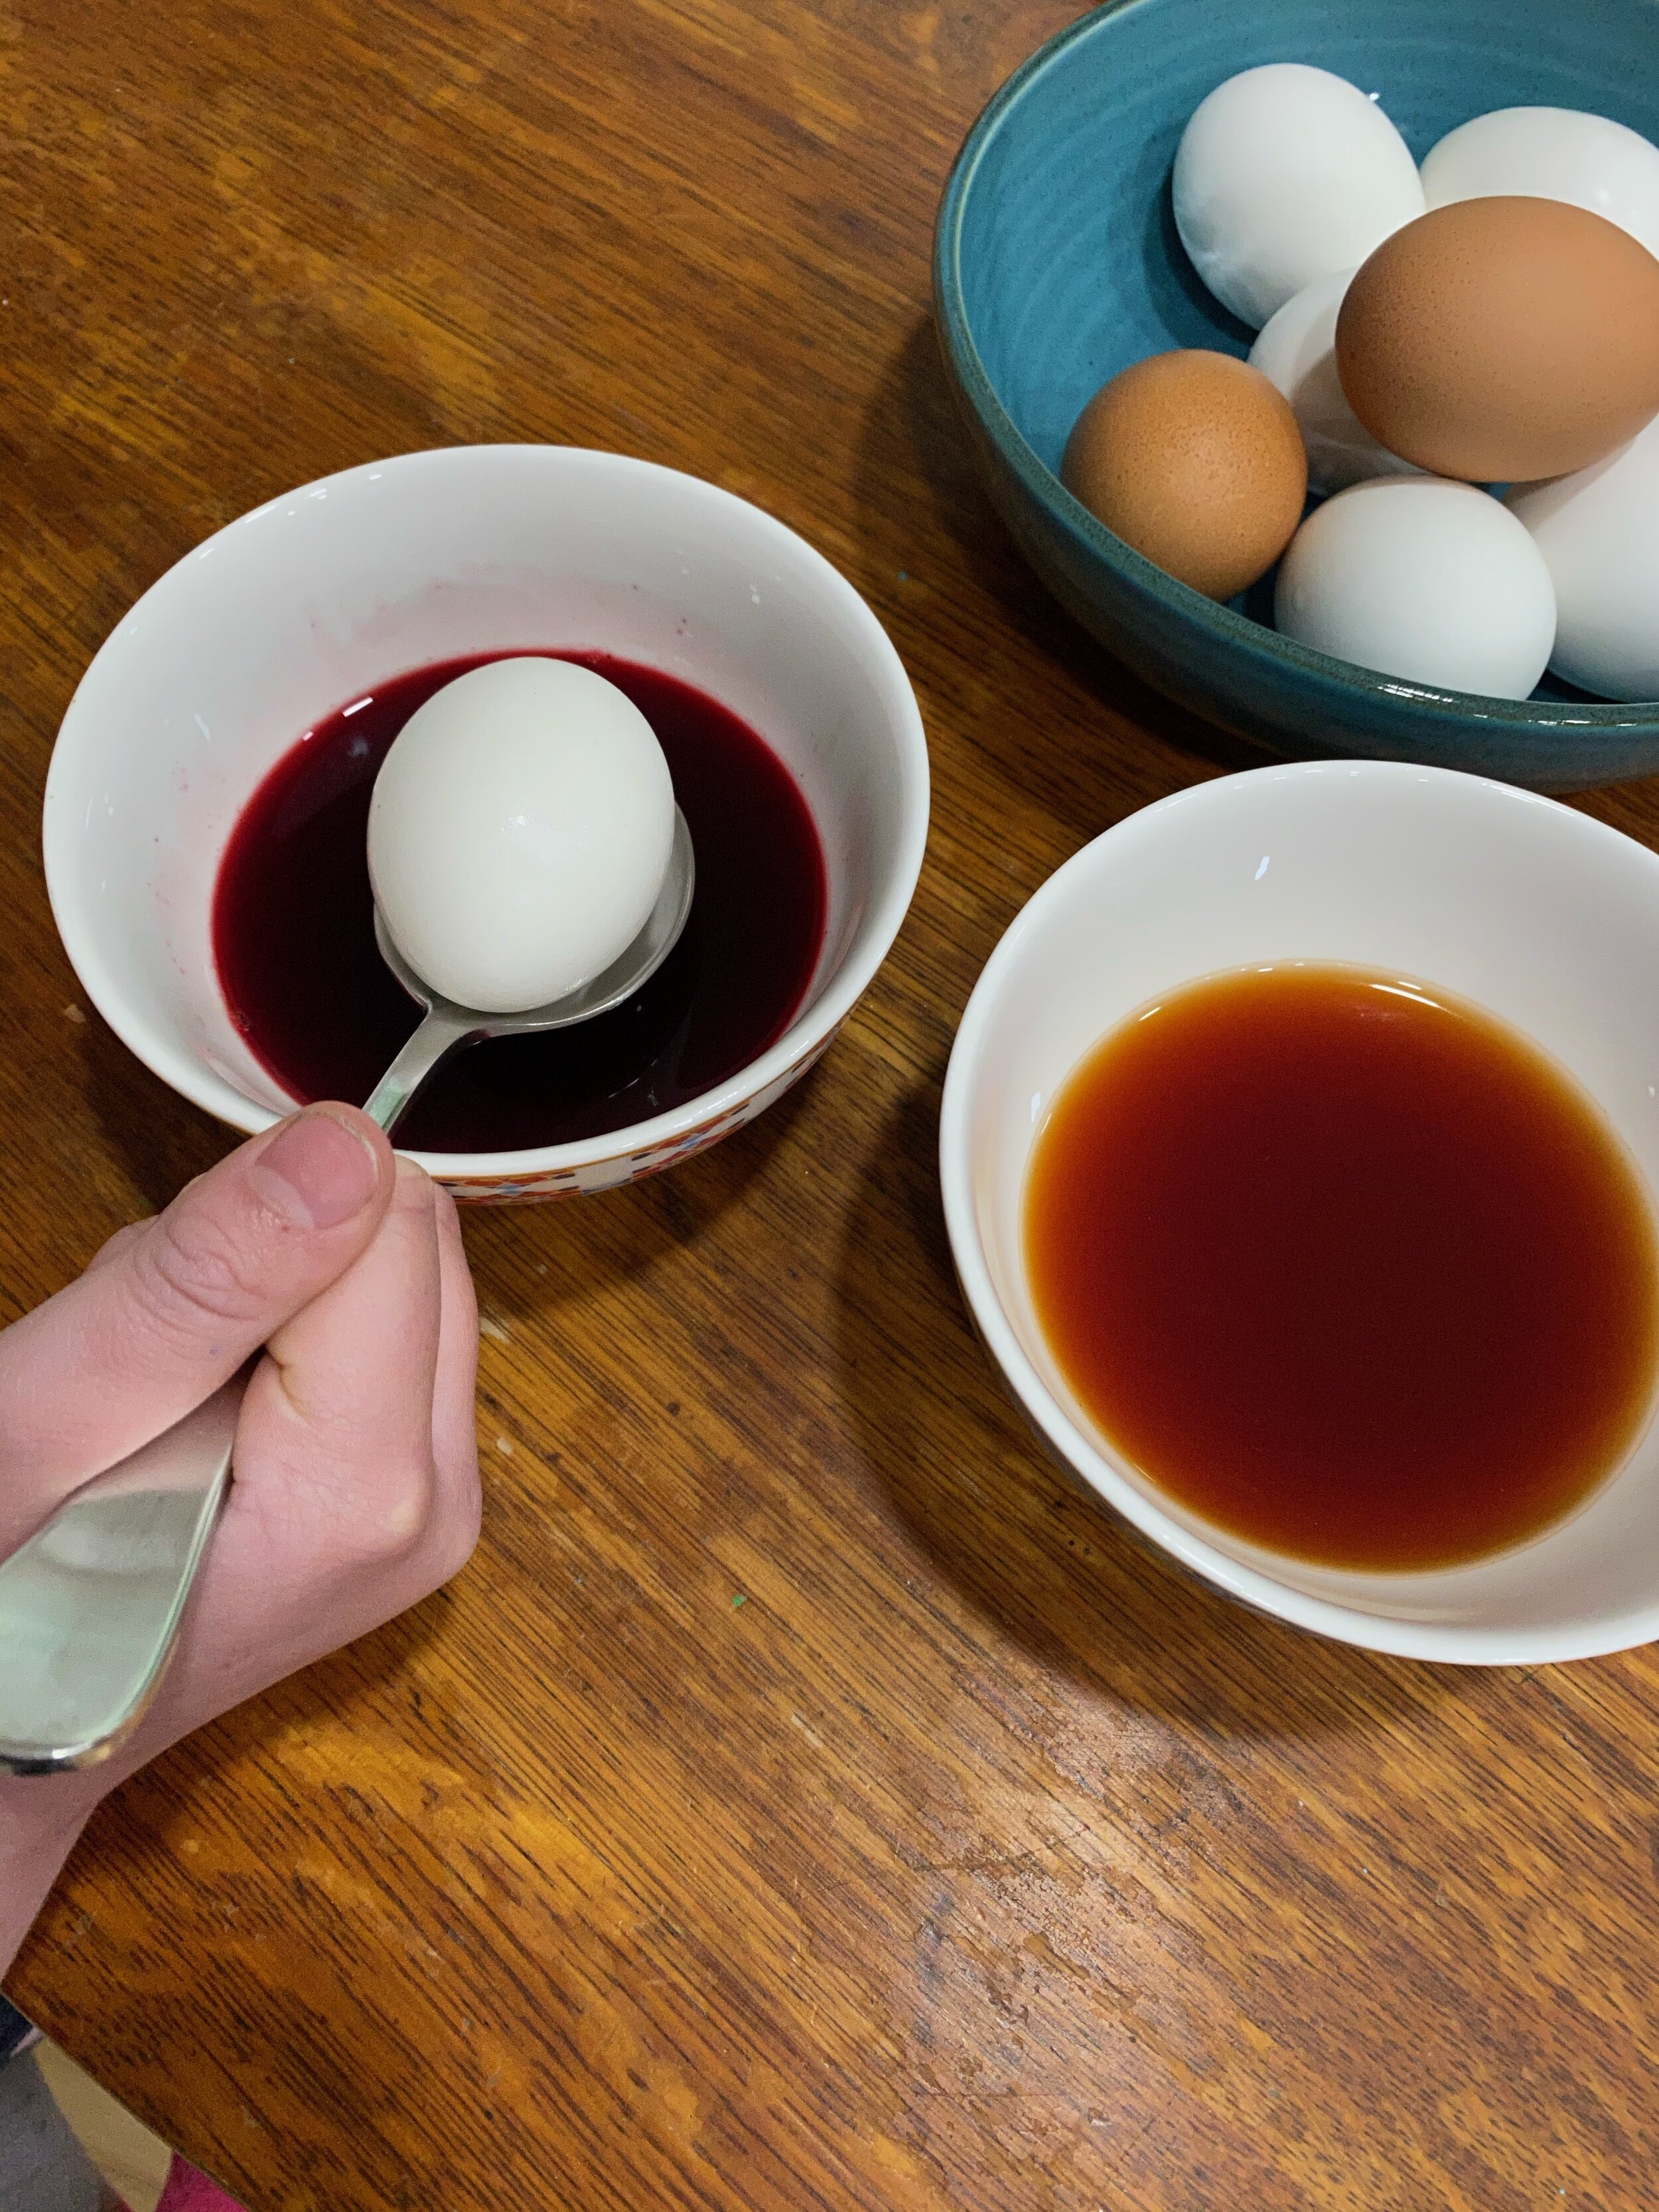
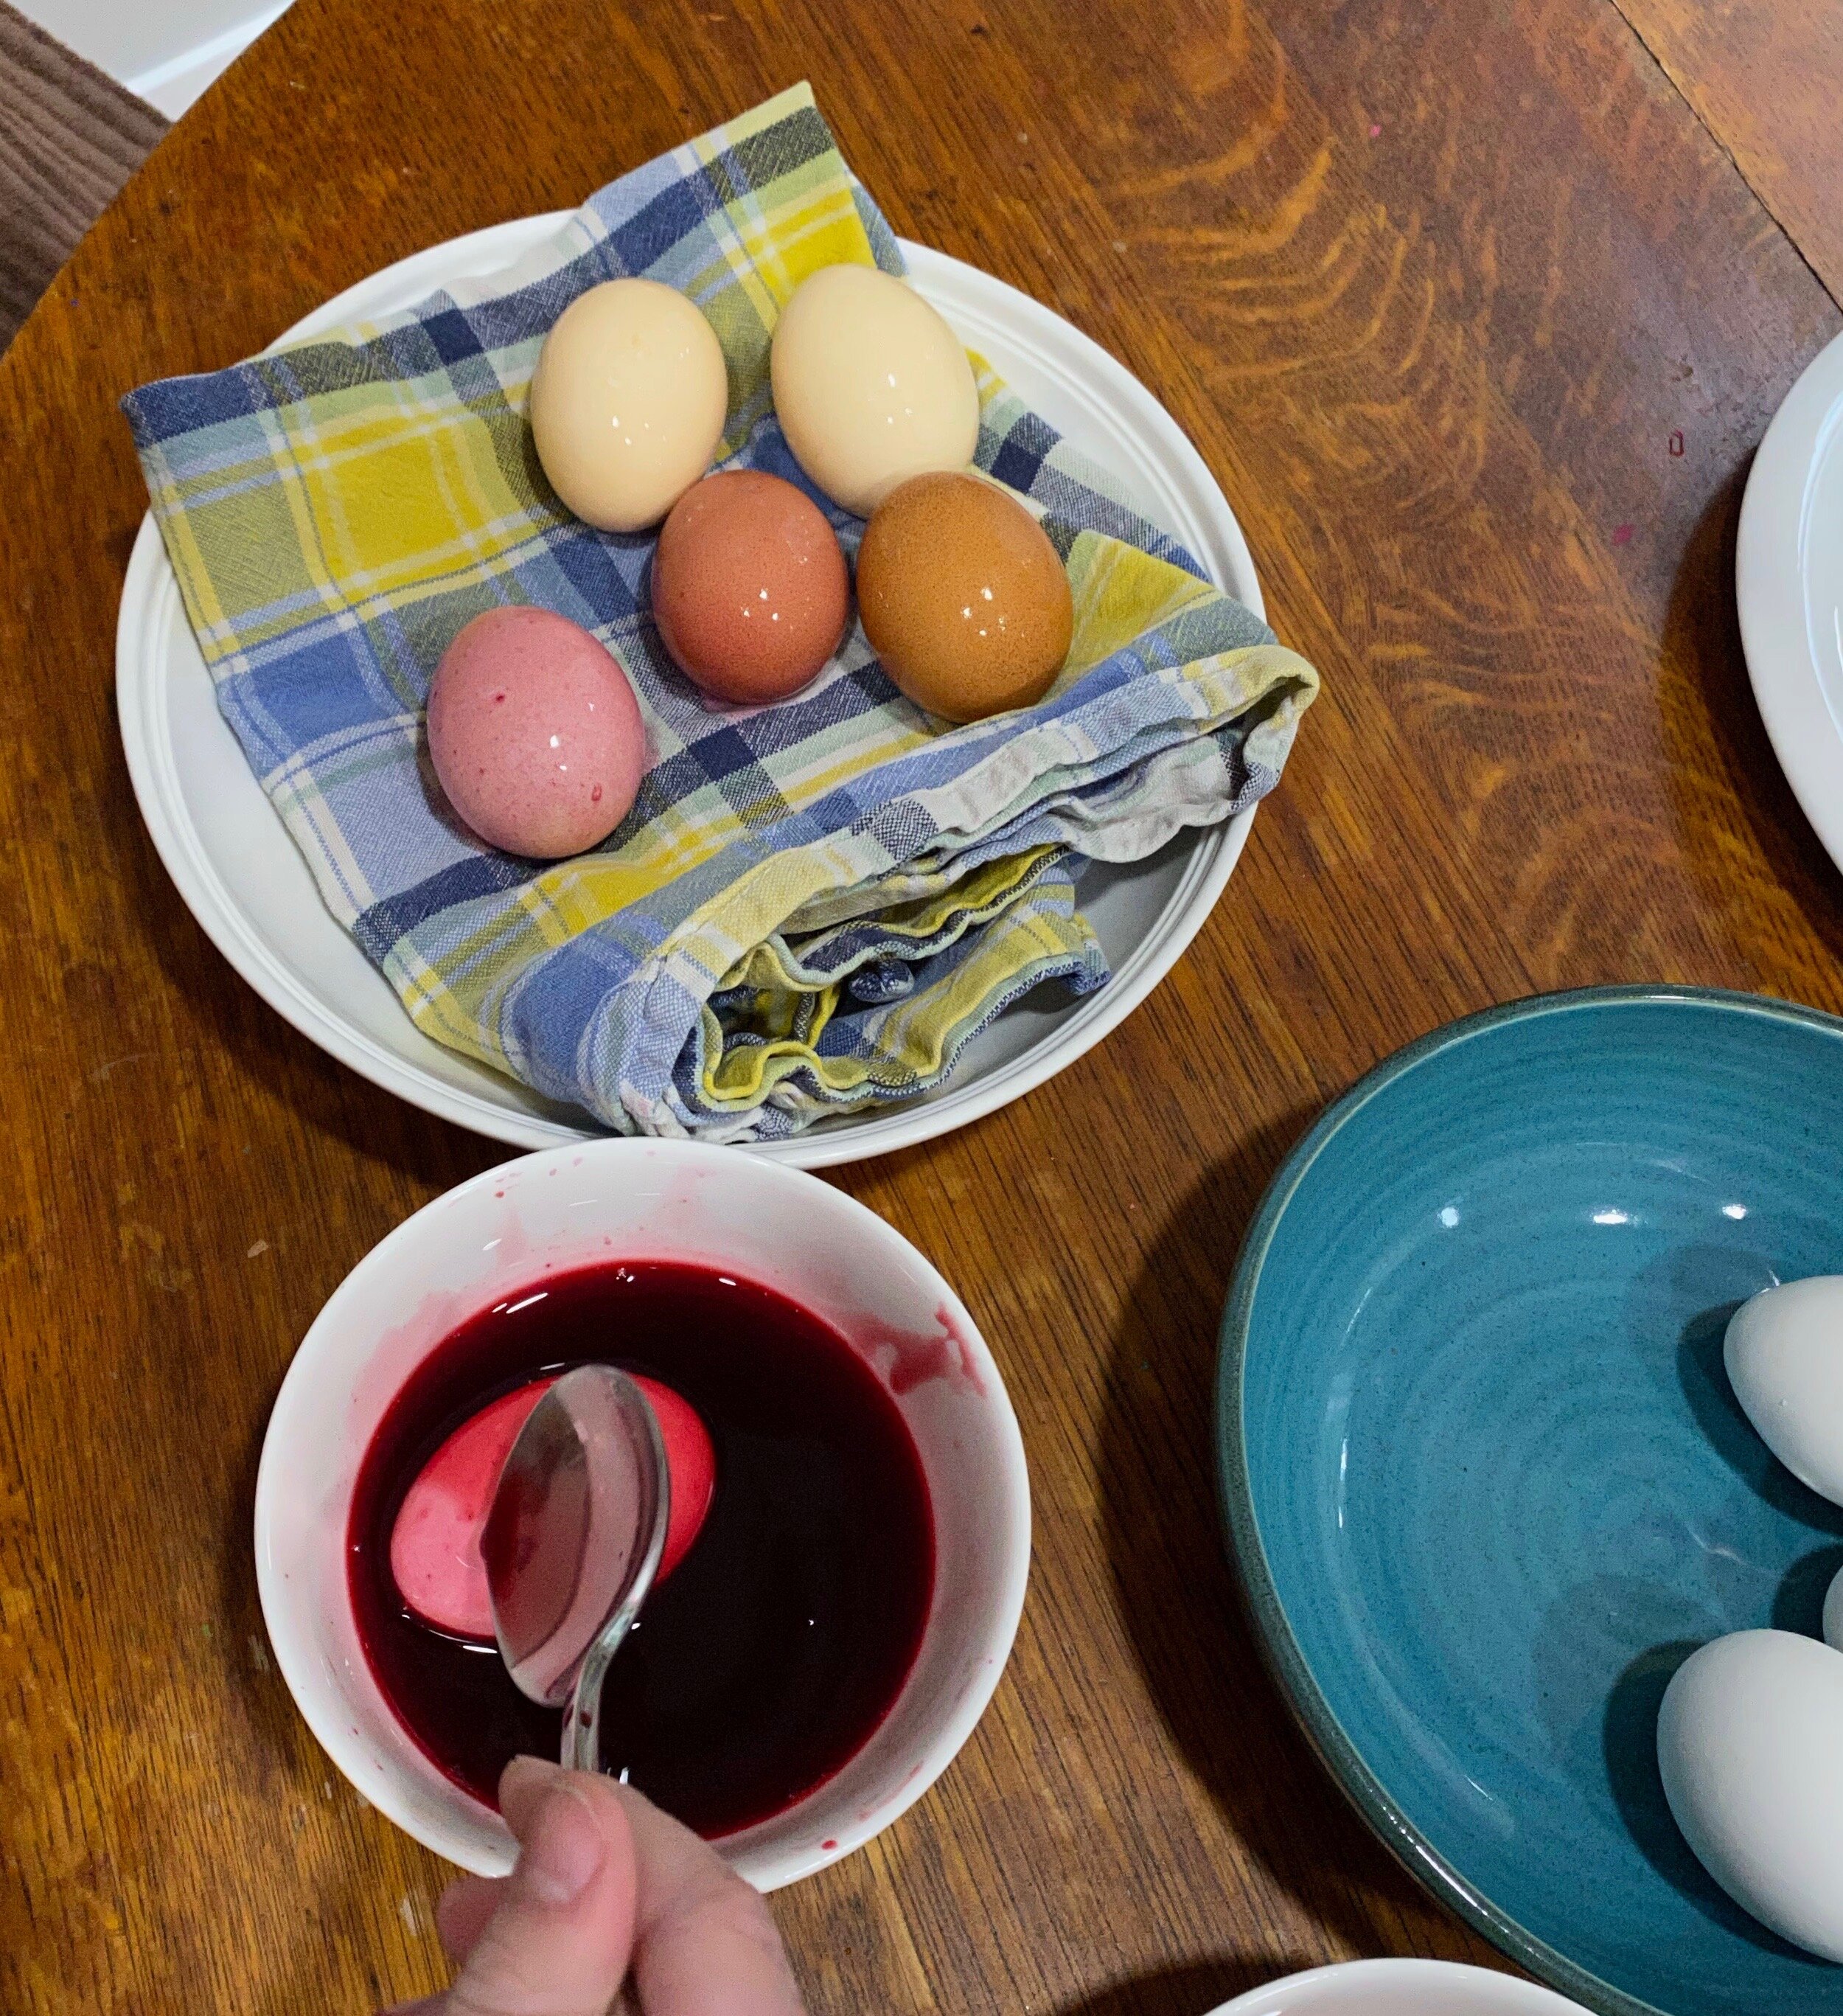
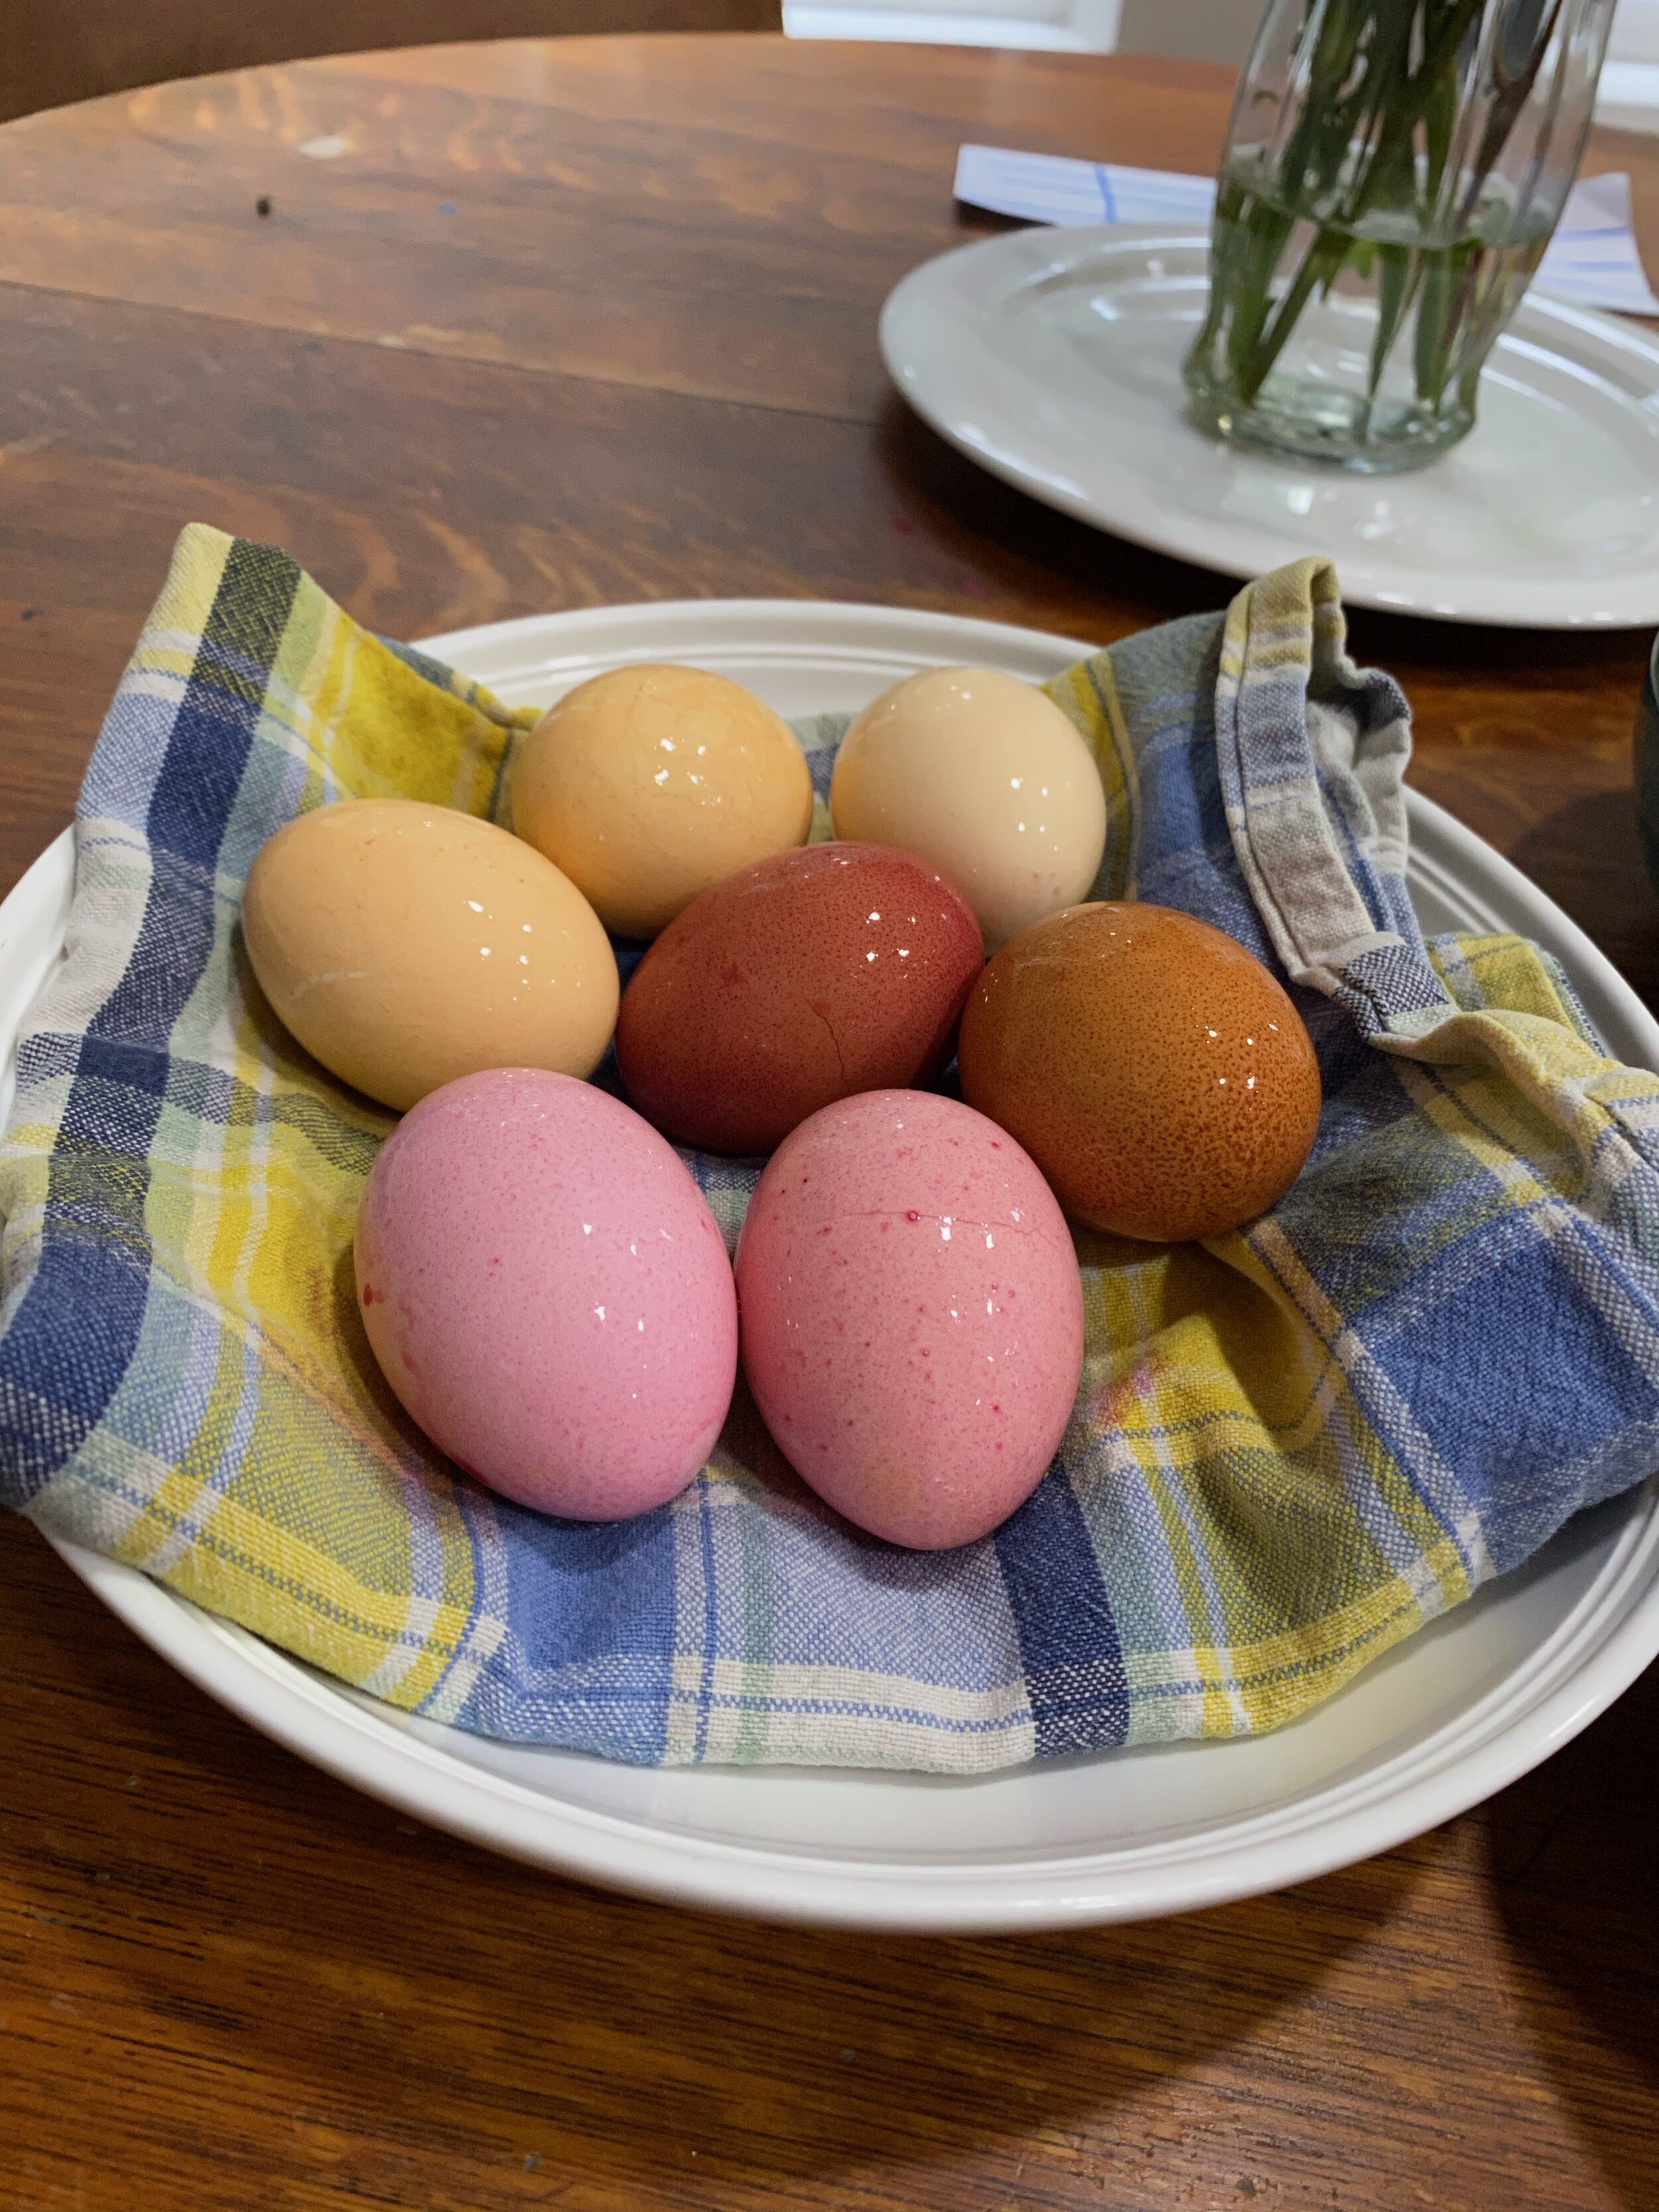
Then it was time to dye our eggs! We opted to dip our eggs several times to get the desired shades. Our eggs turned really nice shades of yellow and pink. We learned a great deal about how dye is made – and even watched a YouTube video about pigments. We are very proud of our eggs and plan to refrigerate them until their big reveal on Easter morning – when we will eat them for breakfast, along with loads of chocolate!

The Science of Mordants and Experiments with Mordants:

Mordants are what fixes or binds colour to an object through a chemical reaction. Dying is simply a fixation of colour to a mordanted material. Some dyes have natural mordants, but others don’t - these would visibly create colour, but not attach to the medium you are trying to dye. Through this process of reactions, you can also modify the colour that natural dye ingredients provide by using different mordants. For example, see the picture below for an example of the different colours that can come from the same original dye bath of yellow onion skins on fabric, depending on the mordant added.

Image Source: https://www.cedardelldesigns.com/blog/dyeing-with-onion-skins

Image Source: Cedar Dell Designs

 Natural Mordants:

  • Vinegar - 1 tablespoon of vinegar per 1 cup of water

  • Salt - 1 tablespoon of salt per 1 cup of water

  • Lemon Juice - 1 tablespoon of lemon juice per 1 cup of water

  • Cream of Tartar - 1 tablespoon of cream of tartar per 1 cup of water

  • Baking Soda - 1 tablespoon baking soda per 1 cup of water

 Formula to Experiment with Dye Baths:

  • Create your dye bath → 1 cup of food scrap, per 1 cup of water (use just one type of food scrap per dye bath)

  • Boil for 30 minutes to 1 hour

  • Strain your dye and pour into smaller containers and add a different mordant into each smaller dye batch while still hot

  • Let cool

  • Dip your eggs into the different dye baths to see if you notice any changes in colour from using different mordants

  More things to try:

  • Try dipping multiple times for increased colour take-up

  • Try layering different colours

  • Experiment with leaving the egg in for different lengths of time

Join us to get Loco for Cocoa!

Less than one week until Loco for Cocoa, our second delicious event in our From Farms to Forks Food Series. I haven’t been this excited about an event in a long time.

loco for cocoa chocolate experience | october 25, 2020 | 7:30 pm

If you haven’t heard the details, it’s an online celebration of all things chocolate! The night includes cool (but short!) lectures on the history of chocolate and how cacao is grown, along with a live demonstration of a delectable chocolate dessert. It’s going to be super fun.

For those of you who don’t know me, I’m Merri Schwartz, the founder of Growing Chefs and one of the current Co-Interim Executive Directors. But I’m also a professional pastry chef and chocolatier. Talking and teaching about chocolate are two of my favourite things of all time.

Me surrounded by chocolate treats.

Me surrounded by chocolate treats.

What I’m most excited about for Loco for Cocoa are the people. 

I get to work on the dessert with a good friend and one of my favourite pastry chefs (oh, and newest Growing Chefs board member), Wendy Boys! Wendy and I always have a great time together, and we’re stoked to do our chocolate class with a little banter. We all spend a lot of time watching talking heads online these days, and interacting with a colleague--even through Zoom--is a much more fun way to teach you how to make dessert.

The amazing Wendy Boys! Photo by Mavreen David Photography.

The amazing Wendy Boys! Photo by Mavreen David Photography.

Then, we have Shelley Bolton. Another dear friend and favourite collaborator, Shelley is the manager and chocolate maker at the amazing East Van Roasters. She’s going to explain how cacao is grown and how chocolate is made, and share about her experiences at cacao farms in the jungles of Guatemala and the hills of Hawaii. Can’t wait!

Shelley Bolton making chocolate in a 30 kg stone grinder.

Shelley Bolton making chocolate in a 30 kg stone grinder.

Our third guest, Dr. Shea Henry, is a scholar who knows aaaaaaaall about the history of chocolate. I could listen to Shea talk for hours about the archaeology of food. The current Director and Archivist at the Maple Ridge Museum, Shea is full of cool, historical facts and has been giving talks about the history of chocolate for the past ten years!

We cannot wait for Shea’s talk about the history of chocolate!

We cannot wait for Shea’s talk about the history of chocolate!

Oh, and I can’t forget the other awesome piece! The local bit. We decided for the dessert that we’re going to source every. single. item. locally. (Of course, technically… the cacao and the sugar in the chocolate are imported. But because the product is roasted and ground right in the Downtown Eastside, we decided to count it.) 

The pears are from Parsons Farm Maket, the honey is from Hives for Humanity, we’ll have Mission Hill Family Estate wine, and the wonderful Earnest Ice Cream… all from BC! Even our vegan options are local: the Earth's Own oat cream, and Blue Heron Cheese plant-based butter both hail from Vancouver, while the Cosman & Webb maple syrup comes from a lovely farm in Quebec’s Eastern Townships. The salt is courtesy of the amazing Salt Spring Sea Salt.

If you join us, your $75 ticket will land you a package of these items so you can follow along as we cook. Or just keep to enjoy later ;). For those of you who are from out of town, you’re still welcome to join the Zoom for just $20! We will provide you with a shopping list so you can follow along too.

Thank you Mavreen David Photography for visiting Chef Wendy Boys during her run-through.

We’re so grateful for the support of our Silver Thyme event sponsors, Mission Hill Family Estate and Whole Foods Market for helping us throw fun events like this one. Thank you Pacific Restaurant Supply for opening your space to allow for safe and convenient ingredient pick up!

I’d be honoured to have you on board. Let’s celebrate chocolate and Growing Chefs together! Purchase your tickets here, and check out the other great events we have coming up here.

loco for cocoa chocolate experience | october 25, 2020 | 7:30 pm

Lettuce Explore! A Lettuce Taste Test

In this activity, kids (and adults) can explore the flavours, textures, and appearance of lettuce and greens. Taking some time to appreciate the qualities of the simple foods we grow and eat can be a great sensory and learning experience. You might even be surprised to find out how much beauty and flavour can be packed into a humble lettuce leaf! 

You Will Need:

  • Three or four varieties of lettuce or salad greens (from your garden, farmers market or grocery store)

  • White paper, pencil, and felts/crayons/coloured pencils

Instructions:

1. Select 3 or 4 varieties of lettuce.

2. Wash and arrange a few leaves of each lettuce on a plate.

3. Ask all tasters to wash their hands.

4. Pick one variety of lettuce to start. 

5. Use your sense of sight to observe what the lettuce looks like. Look at the back, front, and side of the leaf. Draw or trace the lettuce leaf on a piece of paper, add details and colour if you like.

Lettuce Photo B.jpg

6. Taste the lettuce. As you chew the lettuce think about the texture of the lettuce in your mouth. Add some words that describe the texture to your drawing. Next, think about how the lettuce tastes. Add some descriptive words to your drawing. Do all the parts of the lettuce have the same taste and texture? If you need help thinking of descriptive words we have included a few in a list below.  

7. Draw and taste the other varieties of lettuce.

8. Vote on the lettuce you like the best.

Taste & Texture Descriptive Words

Lettuce Fun Facts:

  • Historians believe lettuce was first cultivated in ancient Egypt.

  • Lettuce is often eaten raw but it is also delicious to eat steamed, in a stir fry or grilled on the barbecue. Have you ever tried barbecued lettuce?

  • In 2015, the astronauts on the International Space Station grew and ate red romaine lettuce called “Outredgeous” lettuce.

  • Lettuce is part of the Asteraceae family. This family also includes the daisy and sunflower. 

  • There are four main types of Lettuce: butterhead, crisphead, loose leaf, and romaine.

Ten “School Skills” Kids Can Learn at Home While Cooking

10 “School Skills” Kids Can Learn at Home While Cooking

 “Mom, I’m doubling this recipe” my almost 8 year old kid says as she mixes pancake mix with water, oil and eggs. “Great, go for it!” I say nonchalantly. Inside my head I’m doing a little happy dance. She read the directions on the box (language), gathered the items that she needed (following directions), measured ingredients (math) and doubled the recipe (more math). All of this is happening with a big smile on her face - she doesn’t know it, but she is learning. 

As we enter the eighth week of at-home learning in BC, we are using some of our time to learn in the kitchen. We don’t have a lesson plan, but we are taking the time to talk more about concepts when they come up (what does a 1/3 of a cup really mean? How does baking soda work?) and exploring some food questions we don’t normally take the time to consider (where does the name ‘caesar salad’ come from?). We are eagerly anticipating the return of school (as early as next week for some schools), but for now we are busy doing some hands-on learning at home and producing some tasty results.

Cooking can teach children (and adults too!) so many great skills. Here are a few examples:

LANGUAGE

  • Reading, writing, and verbal communication through recipes.

  • Increasing vocabulary and introducing children to other languages (sauté is French, bagel is Yiddish, etc.).

GEOGRAPHY AND CULTURE

  • Exploring where different types of foods are from and the diets of different cultures.

  • Mapping the food miles of a meal, and the path food must travel to our plate.

AGRICULTURE AND SUSTAINABILITY

  • Learning about how and where different foods grow.

  • Discussing food miles.

  • Understanding how to reduce waste (both packaging and food waste).

MATH

  • Following a recipe includes counting, fractions, and measuring.

  • Many kitchen skills relate to shapes and spatial reasoning (cutting, plating).

  • Opportunities to introduce budgeting.

SCIENCE

  • Learning about parts of the plant and parts of an animal (cuts of meat).

  • Making observations and exploring food using our five senses.

  • Opportunities for experimenting and making predictions.

  • Chemistry: physical and chemical reactions in the kitchen (bread rising, bread to toast, emulsification, etc.). 

HISTORY

  • Learning what people ate in the past and why.

  • Opportunities to explore different food preparation methods and tools, and how this has impacted our diet.

HEALTH AND SAFETY

  • Understanding nutrition, food safety, and cleanliness.

CREATIVITY

  • Exploring new foods.

  • Creating recipes.

  • Using food as art (plating). 

SOCIAL SKILLS

  • Learning responsibility, cooperation, sharing, self-esteem, and patience.

AND, CONFIDENCE!

Growing Chefs! At Home: Lesson 5

Welcome to our fifth lesson of Growing Chefs! at Home. This lesson is all about food and our emotions. Chef Afton, her kiddo, and a superstar team of volunteers are here to talk about food and its connection to our emotions. Don’t miss the extra video in our lesson this week: Chef Ben making zoodles from his own kitchen!

Lesson 5 - image.jpg

This is the fifth lesson in our Growing Chefs! at Home series, following Lesson Four last week, where we learned about mindful eating. Keep an eye on our social media platforms and website every Tuesday morning for new lessons!

During this lesson, we will discuss the basic emotions and discover how food can be connected to these emotions. In Lesson Three, we learned about how food is connected to how our body feels physically, but food is also connected to how we feel emotionally. Foods can also remind us of times, places and people. Eating pineapple might remind you of a tropical vacation and make you feel relaxed, or the smell of tomatoes might remind you of your grandma’s garden and make you feel happy! The smell of some foods (like mint) can also make us naturally feel relaxed or energized. Everyone has a different emotional connection to food, so we have asked our volunteers and supporters to let you all know how food makes them feel! Special thanks to everyone that sent in a video clip. We will finish off this lesson with an easy activity that you can do at home next time you are snacking on some vegetables. 

Lesson 5 - happy.jpg

We would love to hear about how food makes you feel! Tag us on Facebook, Instagram or Twitter to share with us.

Below, you will find Chef Ben Mattman, from the Vancouver Marriott Hotel, sharing his feelings about zucchini with us, and creating a super fun zoodle dish!

You can find all of our new online content here on our website. We will also be announcing and releasing more fun interactive activities on our social media channels. Thank you for joining us again in our virtual classrooms this week!

Our classes are cooking!

It is our fifth year of delivering our Intermediate fall Classroom Gardening and Cooking Program in the Metro Vancouver area and our first ever year bringing our fall program to Victoria.

This fall, thanks to our amazing team of 75 chef volunteers, we were able to reach over 450 kids in 21 schools:

  • 18 Metro Vancouver schools

  • three Victoria schools

Our program is very nearly complete, but here’s a sneak peek into what these classes have been up to:

November 2015.jpg

Students are thrilled to meet the chefs when we first arrive in the classroom. The chefs tell them together we will be planting seeds, tasting new foods, and doing some cooking all right in their classroom.

Our lessons begin with students tasting fresh herbs and then designing their own science experiments to learn more about how plants grow. There is a shuffling in each classroom as students eagerly gather into groups, each led by a chef, where they thoughtfully discuss what plants need to grow and how to design their experiment, all while still munching on fresh dill, basil, and mint leaves. Some beans are planted in pots that get full sun while others are hidden away in a cupboard. Some are watered daily while others watered only once a week, and some not at all. Some plants are spoken too, some are sung to, some are watered with sugar water, some have salt or food dye added to their regular water… all experiments designed by students eager to see what happens as their plants grow.

Of course, not everything can be grown all year round, which means the fall is the perfect time to talk about local food, seasonal eating, food miles, and food preservation methods. Our amazing volunteer teams brought in some great examples from their kitchens of foods they preserve. After, our students got to roll up their sleeves and give it a try themselves preparing their own pickled vegetables right in the classroom.

In just a week’s time, we are able to enjoy our delicious pickles as a part fo our healthy snack lesson where students learn about the new Canada Food Guide and explore the artistic side of the culinary arts creating beautiful little canapé snacks, that also happen to be healthy!

Throughout the program, students have been learning recipe planning, flavour profiles, and plating all while practicing their knife and kitchen skills. At the fifth lesson, students’ faces light up as the chefs explain to them that today they will be putting all these skills together to work in teams and design their very own stir fry recipe, which they will be responsible for prepping, cooking, and plating next lesson. The students get right to work in their groups to carefully design and layout their recipes, trying out different flavour combinations of the various vegetables, sauces, herbs, and seasonings the chefs have brought them.

What tasty creations will these young chefs come up with?! We’ll just have to wait and see at our stir fry cooking showcase in the classroom next week!